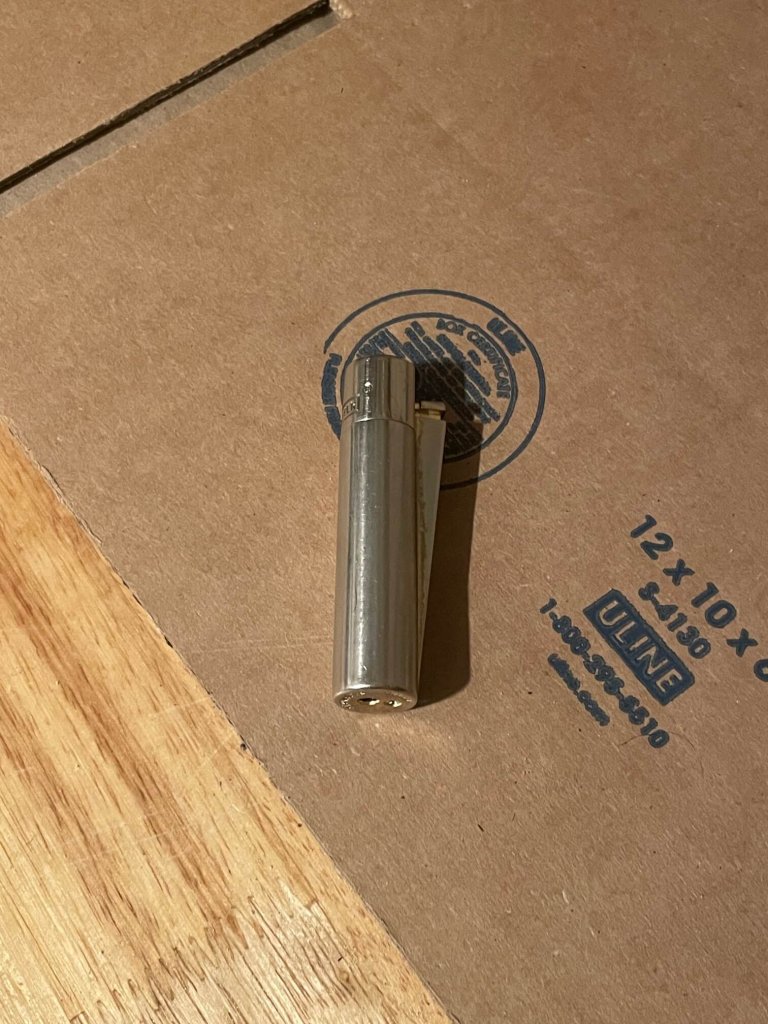
This is the Clipper lighter that I've carried every day for 3 years. One of the things that makes it so great is that you can not just refuel it, but re-flint it, which is exactly what this post will show you how to do.
“He becometh poor that dealeth with a slack hand, but the hand of the diligent maketh rich.” ~Proverbs 10:4
This is not the type of article I’d typically publish, but considering the amount of traffic that I’ve gotten through my Clipper vs. Zippo vs. Bic and my Clipper Lighter Review posts, it seems like this is a topic of value.
One of the great virtues of Clipper lights that I extol at length in my review and comparison post is that Clippers are not just cheap, nor just refillable, but re-flintable.
This gives them a massive advantage over refillable butane lighters with piezo ignitions because one the piezo goes, the lighter is cooked. Whereas with a flint lighter, you can replace that basically for the rest of time, not to mention you can use it as a striker wheel to start a fire even if the lighter is out of fuel.
Now, pictured at the top of this article is the Clipper lighter I’ve carried every day for about three years. As you can see, the brass finish has mostly worn off, but it’s been refilled and re-flinted several times now, and it keeps running just fine.
That being said, don’t toss your old Clipper when the flint wears down. Who cares if the lighter only cost a dollar; flints are cheaper, and pride of ownership can’t be bought, at least not with money. Learn how to re-flint yours.
So, with no further ado, let’s get into how to replace the flint on a Clipper lighter.
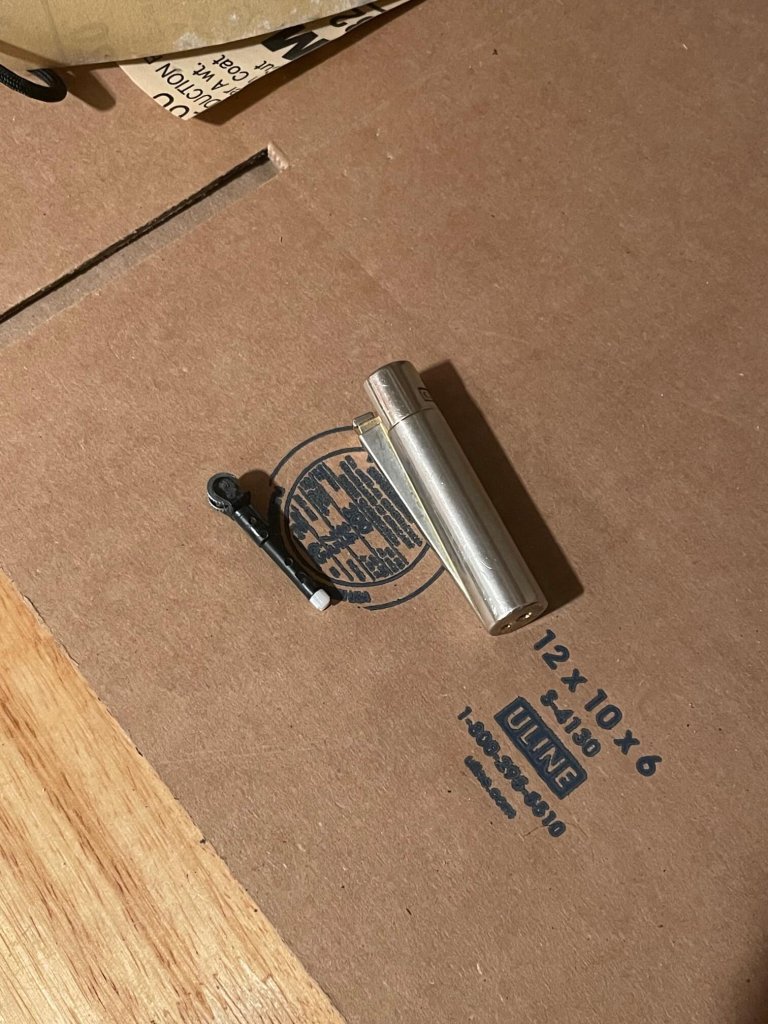
Remove the Striker Mechanism
The first step is to remove the striker mechanism from the lighter, which requires no tools. Just pull it out the top.
To replace the flint on a Clipper lighter, first you will need to remove the striker mechanism. This requires no tools and you can simply pull it right out the top.
It is made of plastic and houses both the striker wheel and the flint.
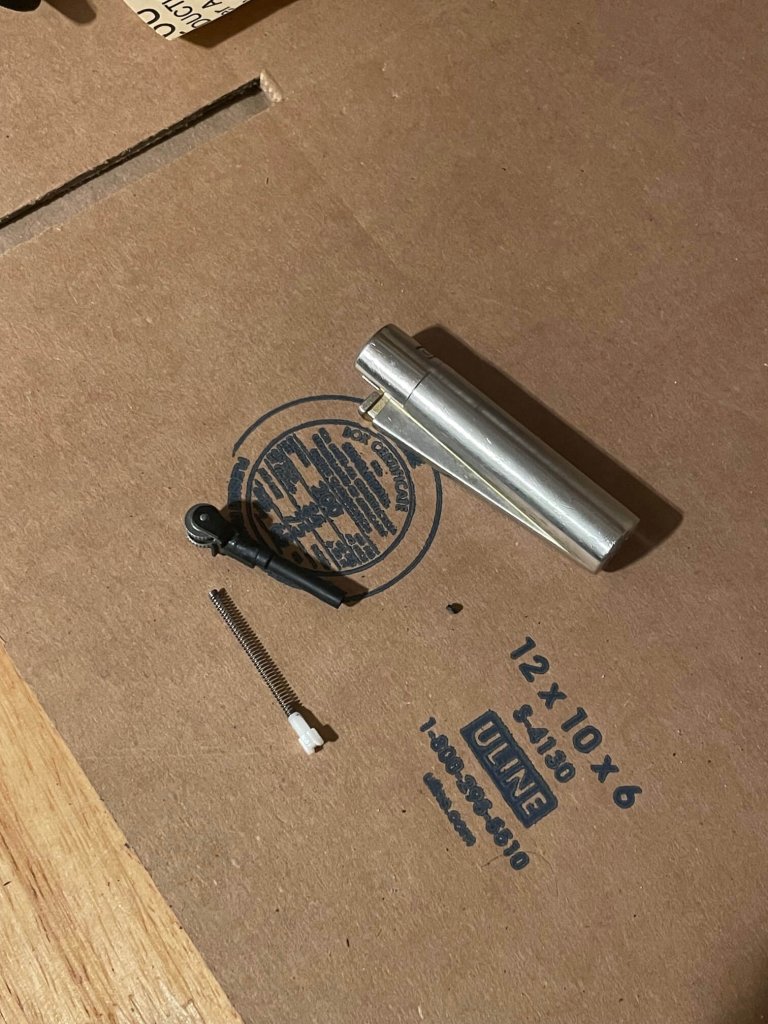
Remove the Old Flint
Next, you will need to unscrew the base of the striker mechanism and tap out the old flint. This can also generally be done without tools. you can see the two parts separated here, along with the old flint, which incidentally will need to be replaced soon.
Next, you will need to remove the old flint. Look at the bottom of your striker mechanism; you will see a small, knurled plastic wheel, with a notch in the middle to make it easier to remove. Mine is made of white plastic with the effect being that it contrasts with the rest of the striker mechanism.
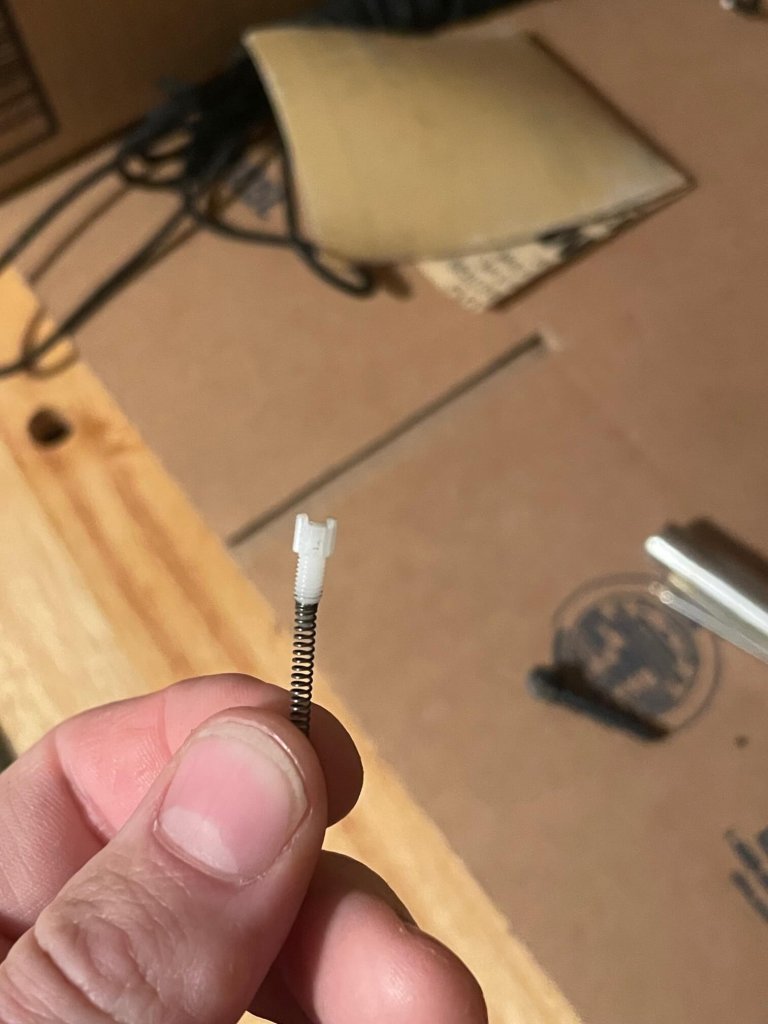
This part needs to be unscrewed; you may be able to do this by hand but on some mechanisms it is very tight. Therefore you can use either the spine of a small pocket knife, a coin, or a small screwdriver to unscrew it.
Be careful and keep this part in your grasp. Once it comes loose, it will fly across the room unless you have secured it.
Once you have unscrewed it, the old flint should just fall out the bottom. But if it doesn’t you will want to make sure you make an effort to dislodge it. This is because if you leave a piece of the old flint in there before you put in the new one, it can bind in the assembly and prevent you from rotating the striker wheel. If that happens, you need to repeat this whole process again. It’s a small headache but a headache nonetheless.
If you can’t get the old flint out, simply tap the now open base of the striker mechanism on a firm surface. That should dislodge it.
Once you’ve cleared it, you can replace the actual flint.
By the way, the bottom of the flint retainer assembly is slotted so that you can us a screwdriver (or other tool) to unscrew it if you can't do it manually.
Replace the Old Flint with a New One
This is the easy part. Get yourself a new flint; Zippo flints will work just fine, then insert it into the tube you took the old flint out of, press the insert back up into the tube to compress the spring, and screw it back in.
To finish the final few revolutions, if the insert is too tight, you can use a coin, the spine of a small pocket knife, or a screwdriver to finish the job
Now, reinsert the striker wheel assembly back into the Clipper, and you’re set.
That’s It: You’ve Just Replaced the Flint on a Clipper Lighter
I can’t make too much more out of this, y’all. That’s all there is to replacing a flint in a Clipper lighter.
Hopefully you found this helpful. If there are other similar topics you want me to cover, let me know in the comments!
Keep it lit.
~The Eclectic Outfitter
4 thoughts on “How to Replace the Flint on a Clipper Lighter ”
Ileanna says:
Thank you so much! This was perfect! It was easy to understand and just what I needed!
Thank you so much! This was perfect! It was easy to understand and just what I needed!
Glad you found it helpful. Now you have no excuse to ever throw away a Clipper!
Ty so much. Also what I needed. Very easy to understand.
Glad you found it helpful, now make sure you never throw away a Clipper.