“An ounce of prevention is worth a pound of cure.” ~Ben Franklin
I just recently came back from a few days down the shore during which I spent some quality time surfcasting. I didn’t land anything, but my tackle was still exposed to all that salt, and this reel just started turning a little gritty – so you know what that means.
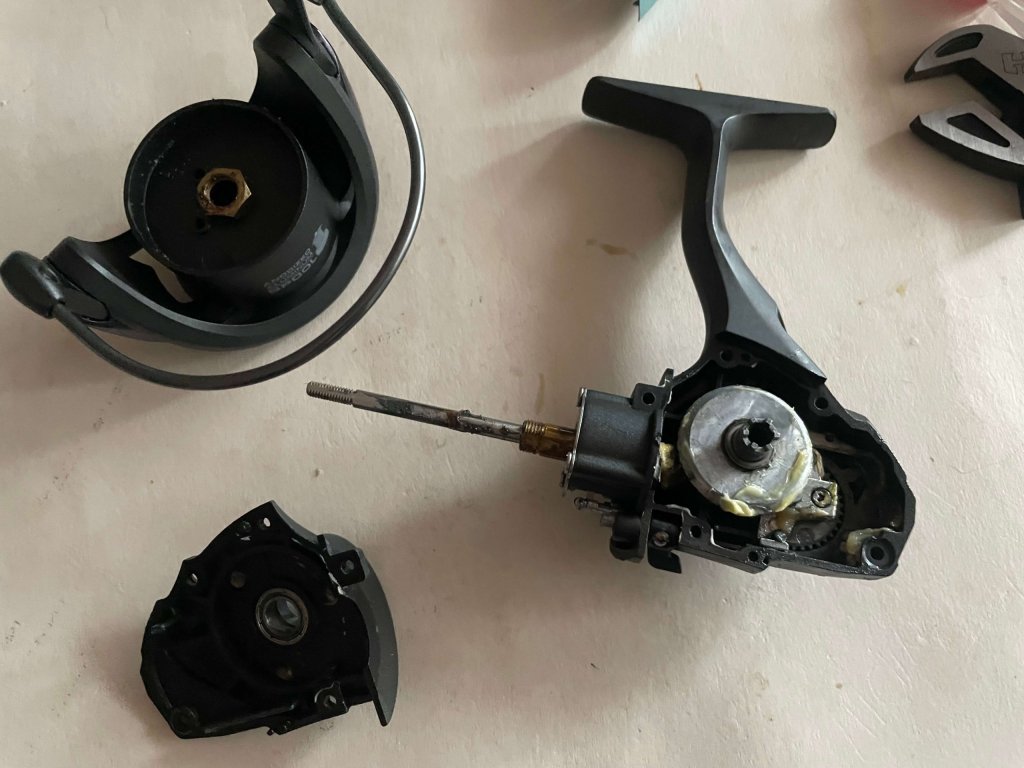
It’s not good enough just to rinse the thing off. It’s time for a breakdown and a greasing of the main bearings and gears.
Preliminary Cleaning When You Get in from the Suds
Before I get into how to disassemble a spinning reel and grease the main gears, I need to cover something much more preliminary.
While it isn’t necessary to break your reel apart after every trip to the shore, you will want to rinse your reel each and every time you touch the salt, even if it was just one cast.
Saltwater will wreak utter havoc on your fishing tackle, even the good stuff that’s designed to be exposed to salt water.
Basically, when you get back from a trip in saltwater, give your reels a light rinse off with freshwater. A misting from a hose should do. You don’t want to direct a jet of water at the reel because that can actually force salt deposits deeper into the reel, which can accelerate corrosion. A light rinse is all that’s needed.
Then let the reel air dry – I leave mine out in the shade when the weather is good – and you’re good to go for another trip.
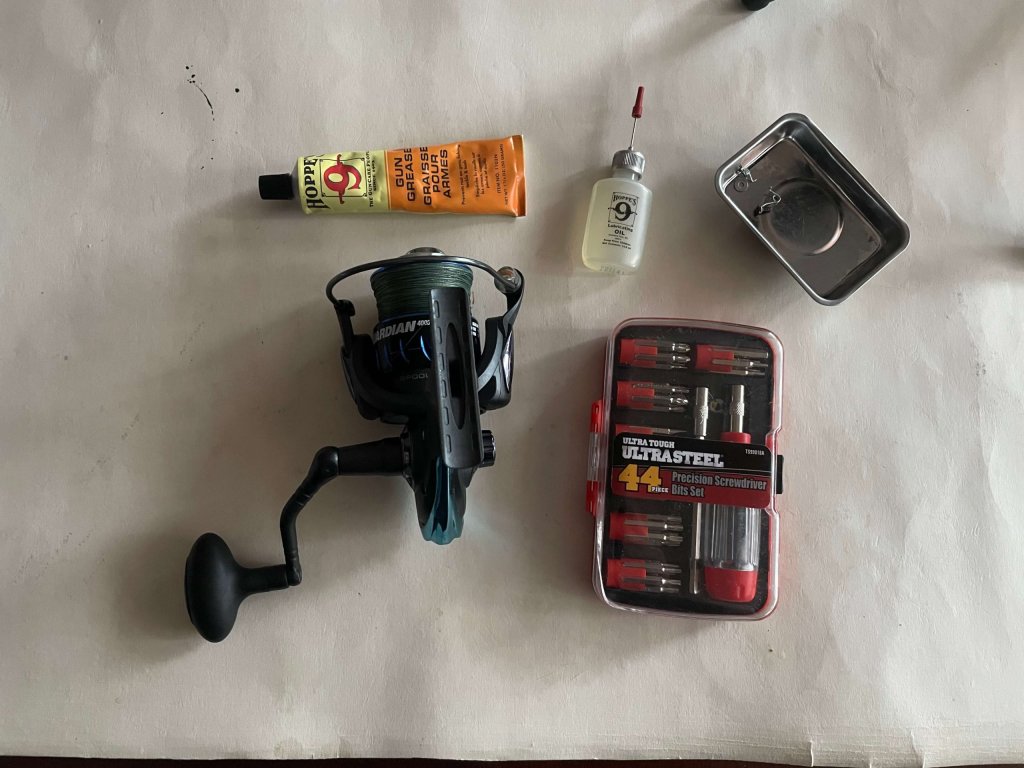
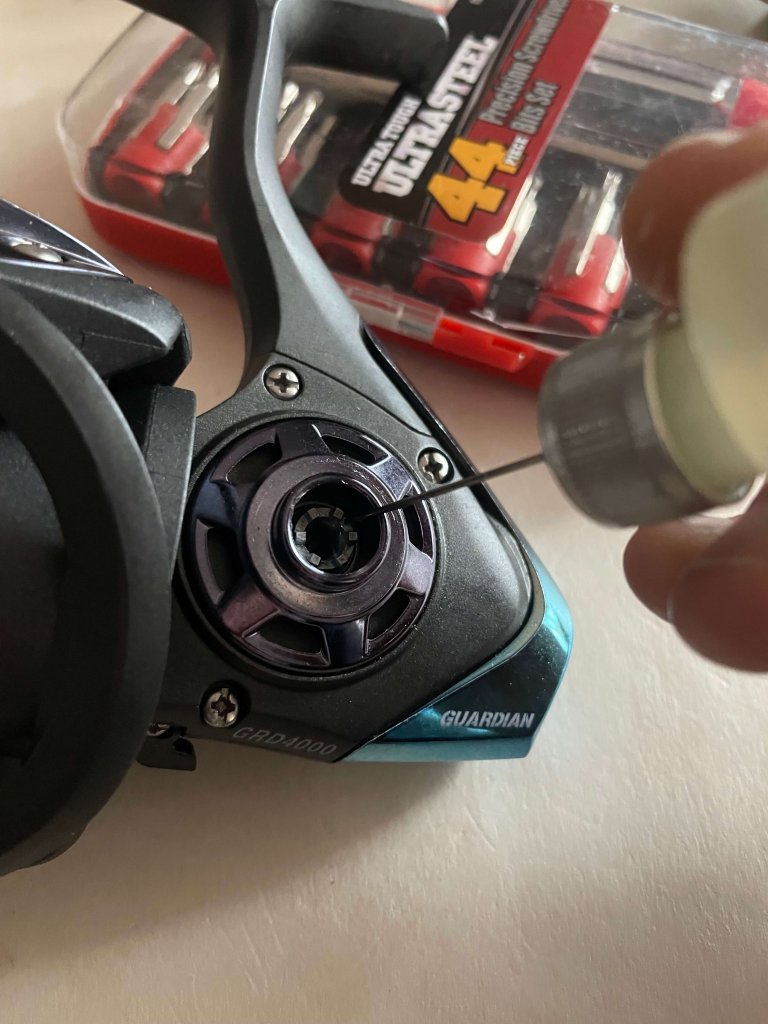
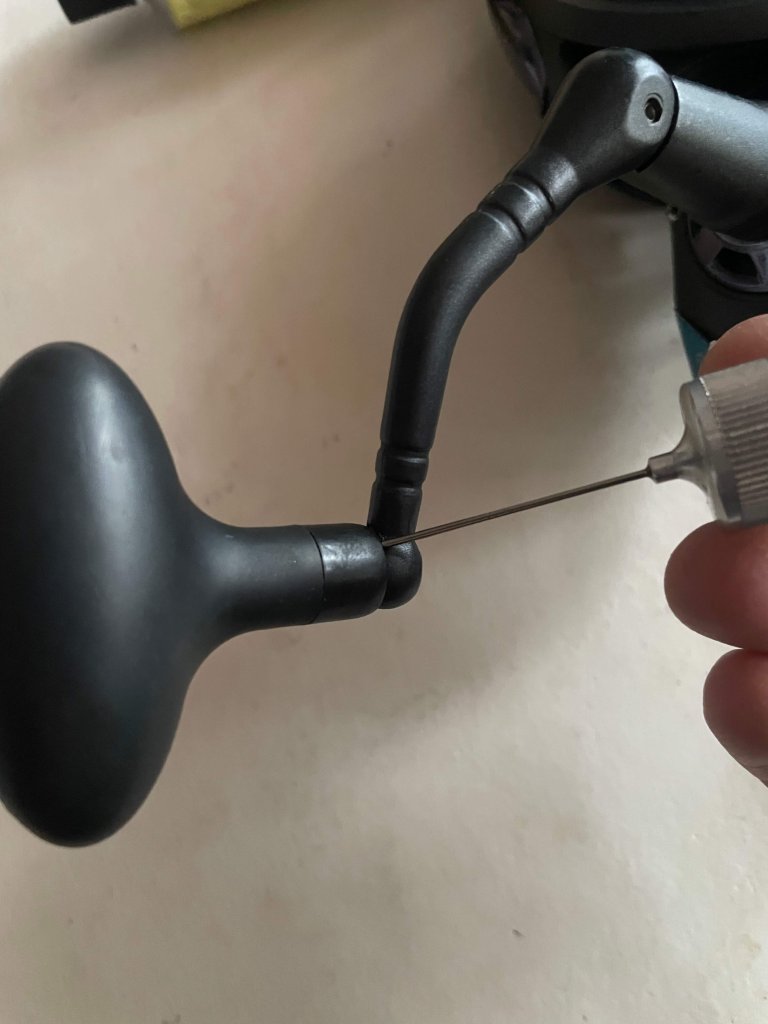
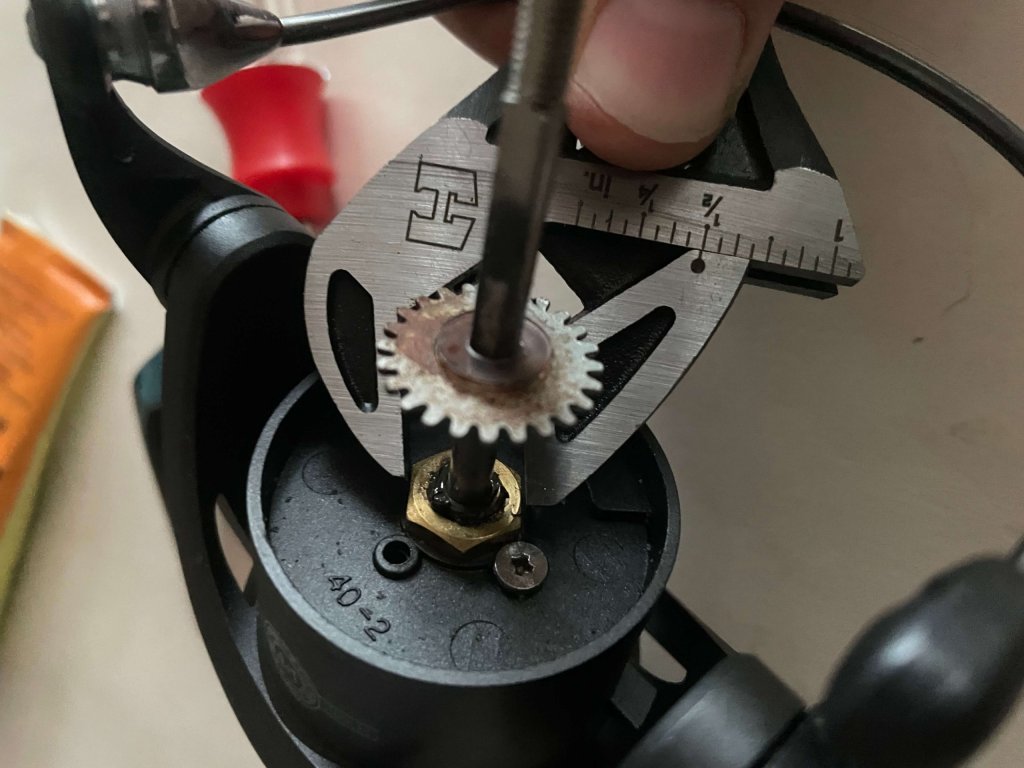
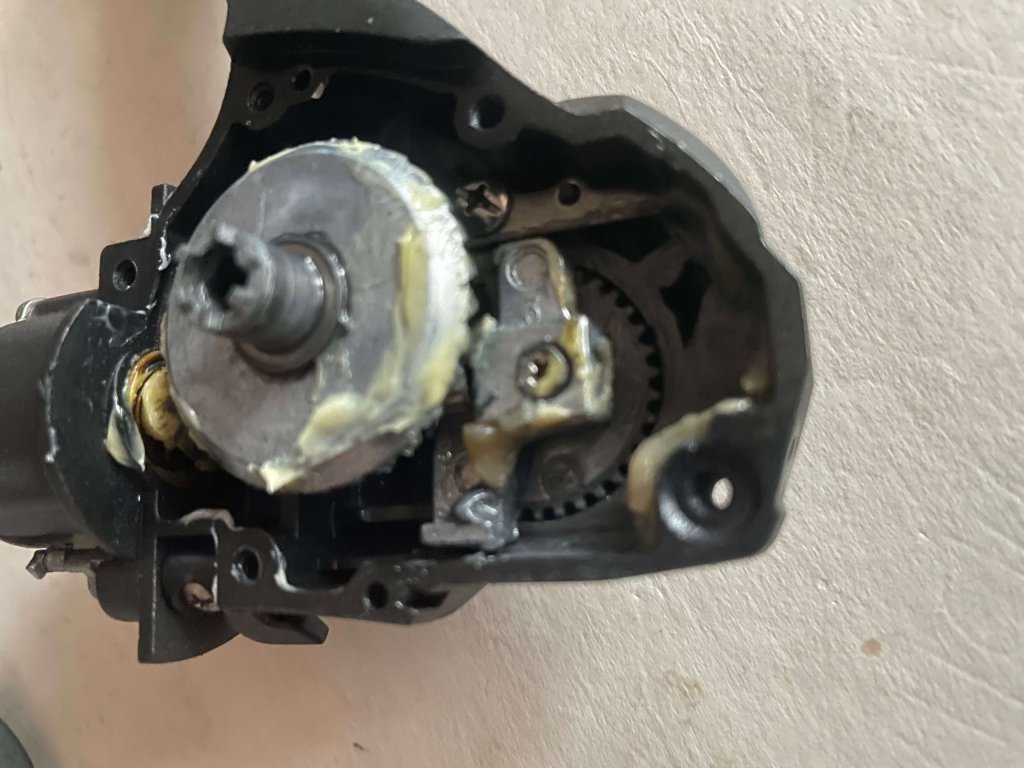
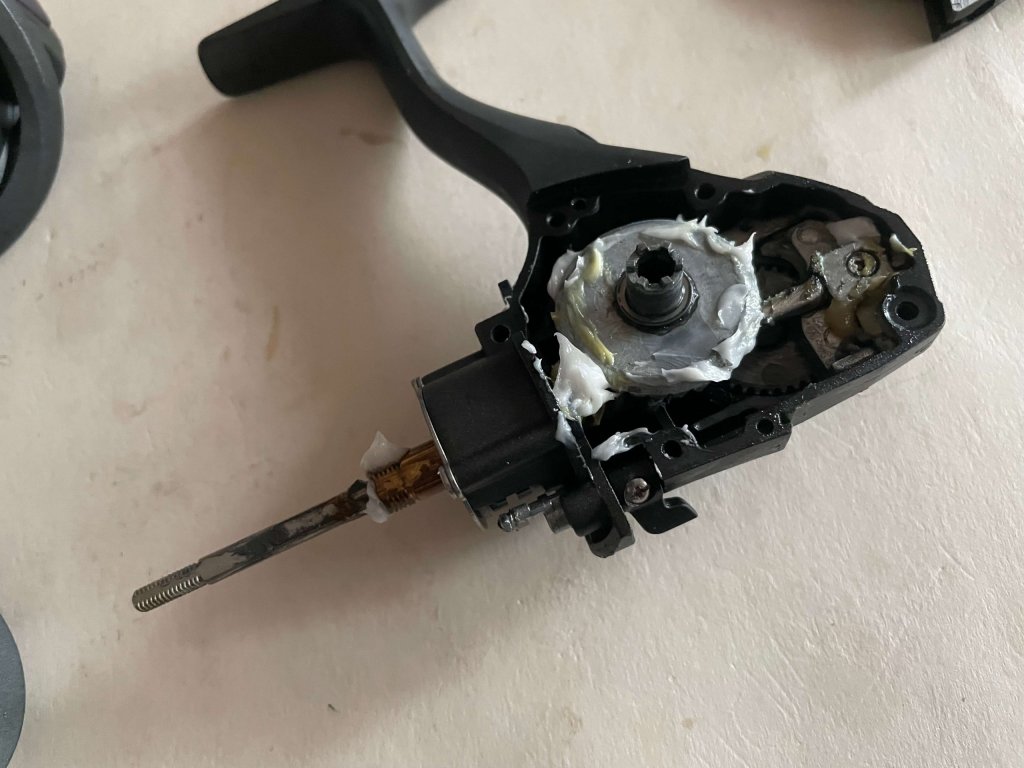
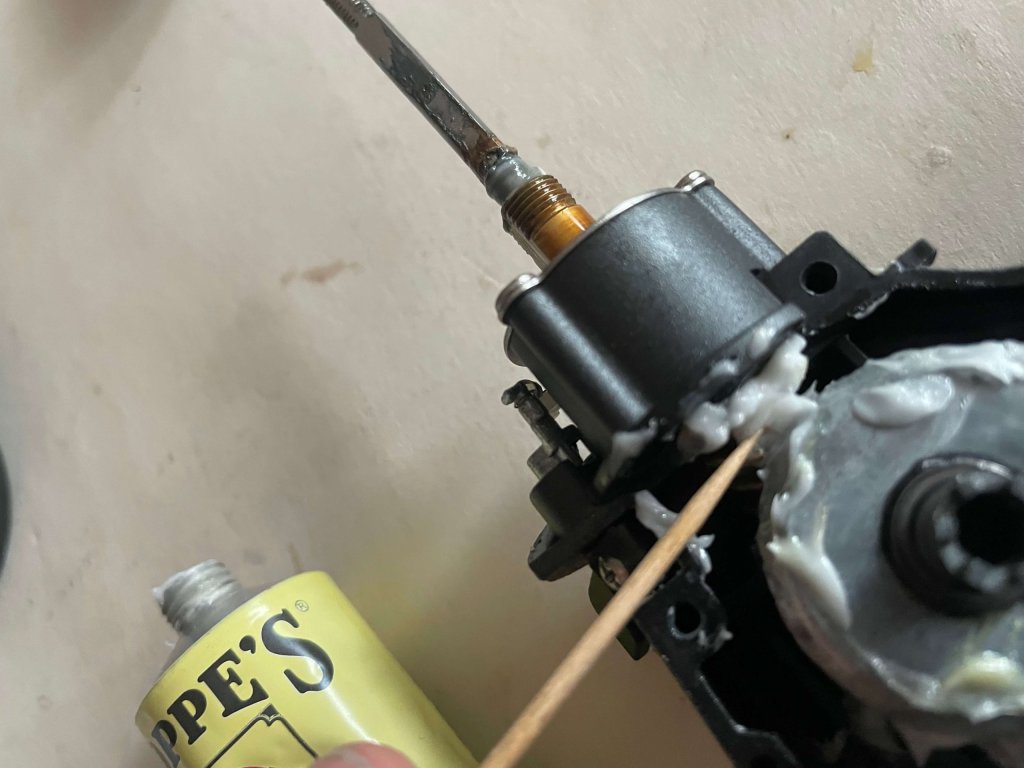
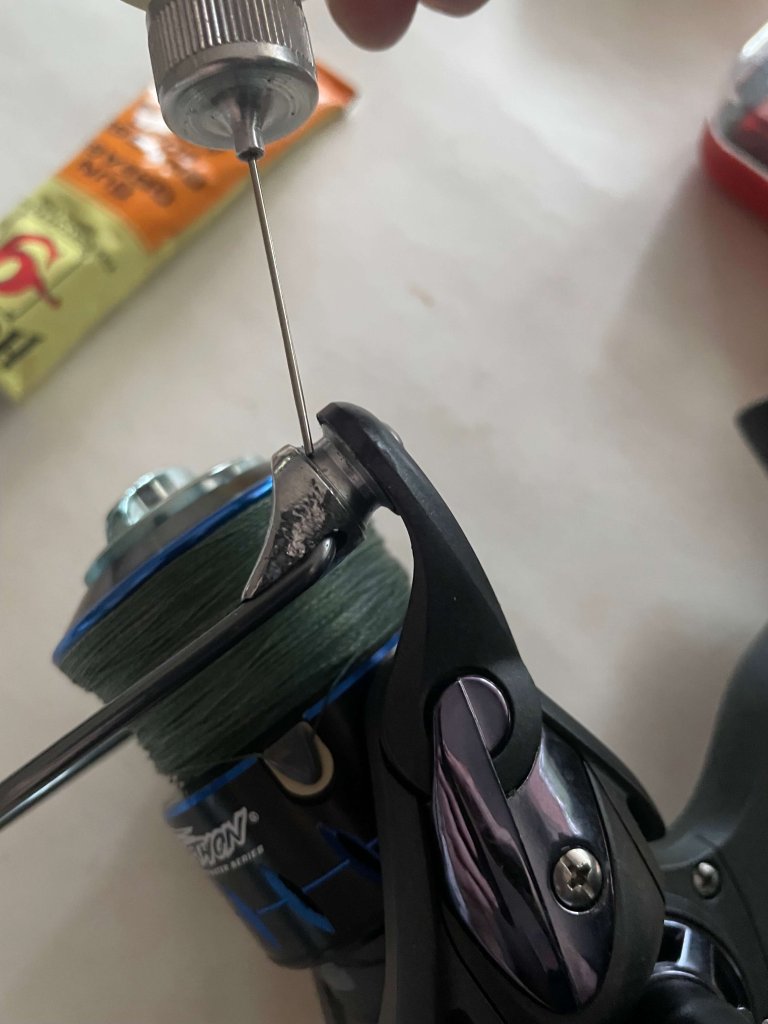
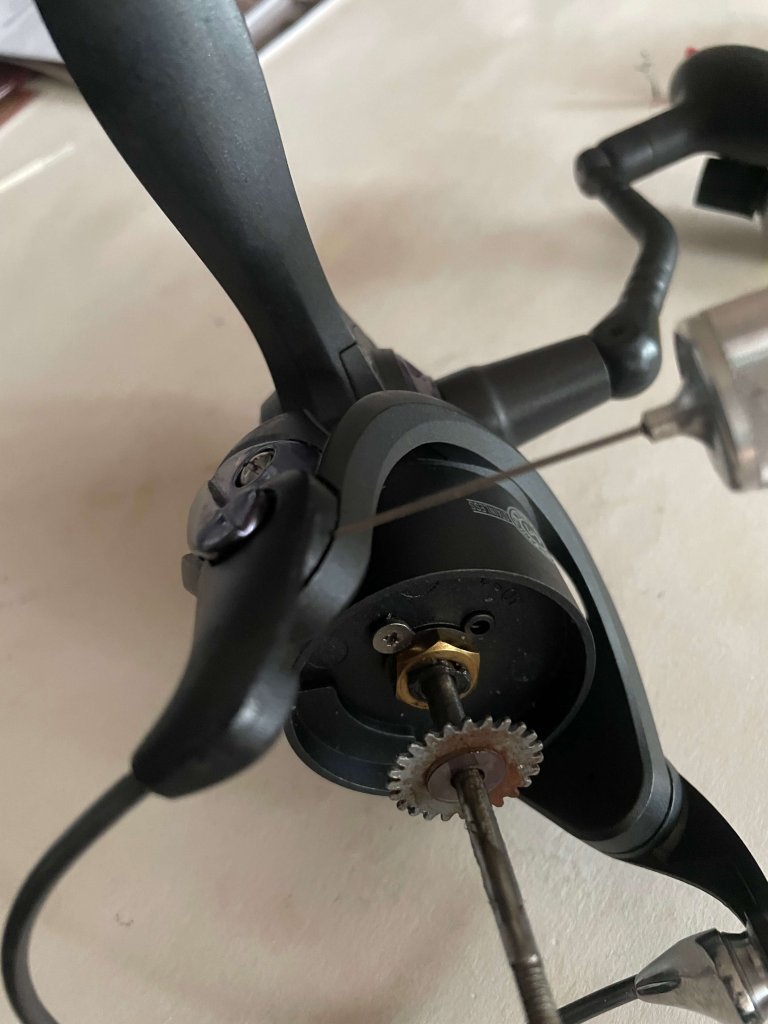
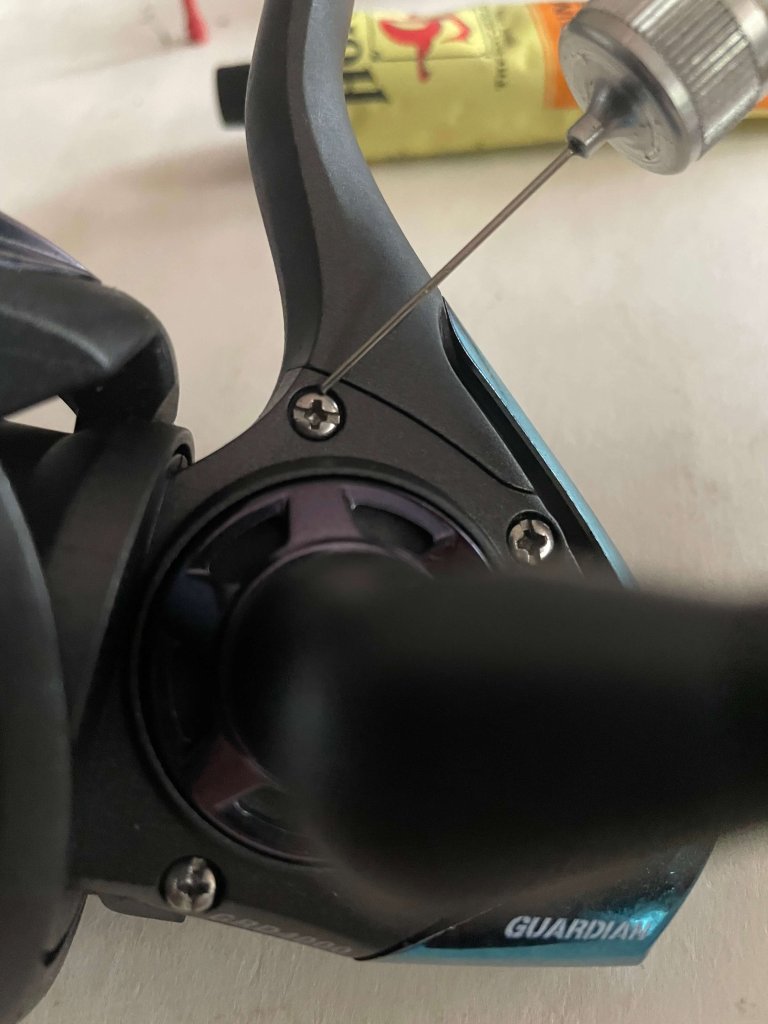
But, after a few trips, or at least once per season, or in my case, whenever the reel is starting to feel a little gritty or sticky, you’ll want to partially disassemble it and either oil or grease the main bearings and gears, as necessary.
Here’s what you need to know.
Remove the Reel Arm
Whether you take off the reel arm or the spool first doesn’t matter to me or the reel, but one of these things has to come off so I’ll start with the reel arm.
Depending on your reel, you will either want to unthread the cap on the side opposite the reel arm, or you will want to turn the reel arm in reverse (as in the case of some Penn reels) to get it to come off.
Once you have the reel arm off, put a drop or two of oil inside the bearings on both sides of the reel.
Once you’ve done this, put a drop of oil on the reel handle itself, where it rotates around the reel arm.
Then you can place the reel arm aside and continue with disassembly.
Remove the Spool and Place Aside (Do NOT Oil or Grease the Drag System)
Next, take off the spool. To do this you will want to loosen the drag knob all the way until you can’t anymore, and it and the spool will both lift free of the reel.
Once you get the spool off, you can oil the main shaft with a drop or two of oil.
At this point, I would like to say that though I won’t be addressing drag system maintenance in this post, don’t ever oil or grease the drag washers. It will significant reduce the ability of your reel to apply pressure to a fish and in some instances, you may permanently ruin the drag system.
Remove the Side Plate
Next, you will want to remove the main sideplate, which more often than not is on the left side of the reel and which is usually fastened with a few small screws.
You may also need to remove a brass nut and screw from underneath the spool.
I find that it’s helpful to have a small magnetic tray on hand for this where I can drop the small hardware so I don’t loosen them.
Be careful at this point; not only do you need to make sure you don’t lose any hardware, but you will also want to make sure that you remember which fasteners go where and the order in which you need to replace them.
This is roughly what you will see once you have removed the side plate, regardless of what type or brand of reel you have:
Grease the Main Gears
With the reel thus disassembled, the next thing you will have to do is grease the main gears. For this I will be using Hoppe’s Gun Grease, which is fairly cheap and which I find keeps my reels in fairly good shape. There may be better greases for this but Hoppe’s has worked just fine for me in the past.
Drop a little bit of grease on all of the exposed gears, as you can see in the picture below. Once you’ve done this, avoid trying to manipulate the gears with the reel in this partially disassembled state.
Once you’ve applied grease, reassemble the reel in the reverse order detailed here.
Reassemble and Give It a Spin
After you’ve reassembled the reel, you can crank the reel handle a few times to evenly distribute the grease. If the reel has an anti-reverse lever, you can disengage it and run the reel in reverse a few cranks to speed up the process.
In all my years fishing, I’ve never had a problem so bad that a partial disassembly, oiling and greasing, as detailed here, has not fixed, even among my saltwater reels. Hopefully, if you had a reel that was a little gritty, this process solved that problem for you.
For When You Don’t Want to Take the Whole Surf Reel Apart
There will be times when you come in from the salt, wherein rinsing your reel will not be adequate, but at which point you will not want to entirely take the reel apart.
On those occasions, you can:
Oil the line roller
Oil both pivot points of the bail arm
Oil all the points where hardware is exposed (screws)
Remove the spool and oil the main shaft
Oil the reel arm handle
Remove the crank arm and oil the bearings on both sides
Doing so will address the main exposed moving components of your reel, and will lubricate them while also helping to seal them off against corrosive influences.
That’s (Mostly) All There Is to Keeping Them Spinning Smooth
The steps detailed in this article have served me well among both my fresh and saltwater spinning reels, but all in all they are more critical for saltwater tackle since saltwater is leagues harder on your equipment than freshwater could ever be.
Ultimately, keeping to a routine maintenance schedule, and greasing your surf reels at least once per season, will help protect your investment and keep your reels in catching shape for longer.
Tight lines.
~The Eclectic Outfitter
Lorem ipsum dolor sit amet, consectetur adipiscing elit. Ut elit tellus, luctus nec ullamcorper mattis, pulvinar dapibus leo.