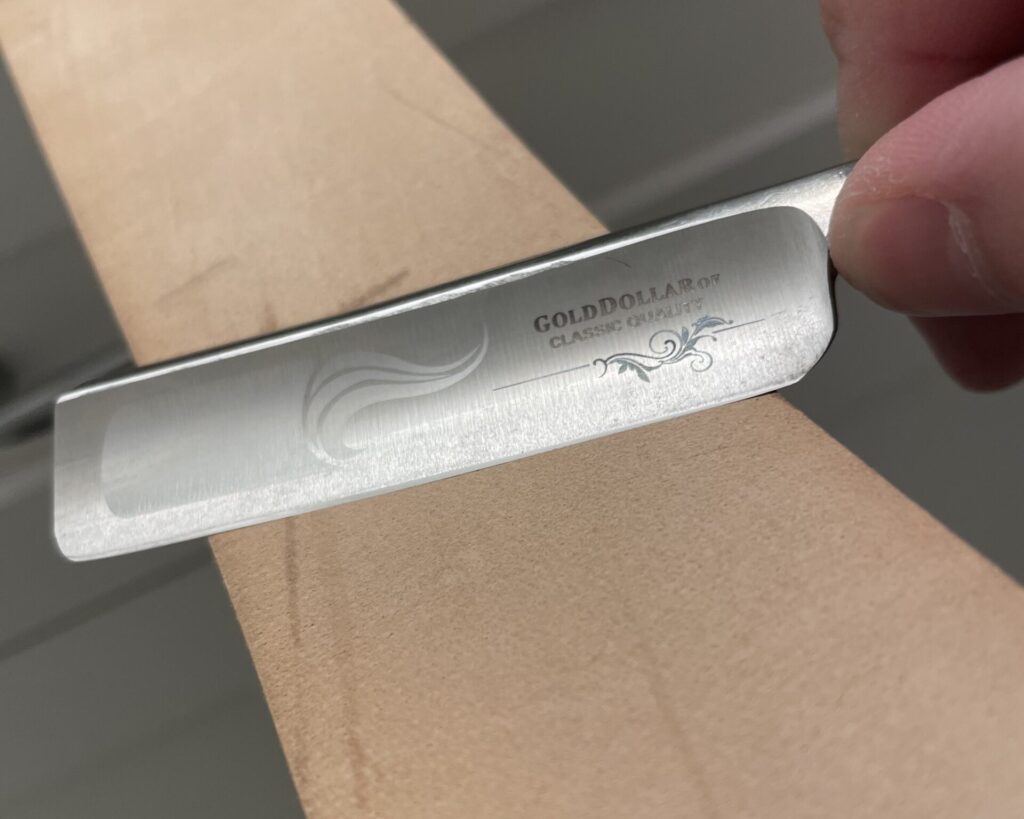
You need a really sharp knife or tool, and you have all of the sharpening stones and honing solutions that money can buy, all the way up through a 3,000 grit stone or even higher. You can get your knife, razor, or tool sharp, but you can’t finish the job because you’re missing something essential: a leather strop – or any strop.
If you really need to finish an edge, honing with a stone is only the first step. To finish the job, you need to strop your blade on something.
A Leather Strop? Why Do I Need That?
Unless you’re in the routine habit of coaxing your blades to hair-shaving levels of sharpness, you may not even know what a strop is. That’s fine. Maybe it’s even the norm. For most of us, most of the time, a knife doesn’t need to be stropped. It’s not like you even see professional chefs stropping their knives, and that’s how they make their actual living.
But – and this is important – when you need to get a knife or a tool sharp – when you need to get a knife or a tool really sharp – then the help of a strop is not only important but instrumental. Actually, the help of a strop is irreplaceable. If you want to sharpen a razor to the point that you can actually shave with it, if you want to sharpen a woodworking tool to the point that only slight pressure will curl an effortless wisp of swarf, if you want to get your filet knives to the point that they will glide through scales and bones, then you need a strop. Period.
Enough poetry. You know you need a strop at this point, otherwise you wouldn’t still be reading. You deserve an explanation. What is a strop?
What Is a Strop, Anyway?
A strop is not like a sharpening stone. A sharpening stone is what you use to remove metal stock from a tool or a blade to restore a damaged profile, or to re-establish a cutting edge. A strop is only necessary once the edge has been established.
When you are sharpening a tool, you choose a grit, based on the condition of the edge. Then you select an angle, based on the intended use of the tool. Then you drive the tool across the abrasive surface of the sharpener, edge forward. This removes some of that metal from the blade, re-establishing a profile and creating a cutting edge. A strop does not remove any stock from a blade.
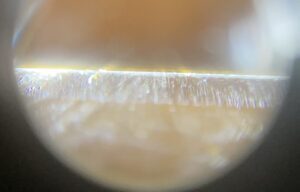
It all picks up where sharpening, also known as honing, leaves off. If you look at the edge of a blade under a microscope, after it has been sharpened on a stone, even a very fine stone, you will see a whole bunch of jagged teeth. A sharpened edge actually looks a bit like a saw, with teeth sticking out at odd angles. A saw has serrations; on a straight edge, where they are too small to be seen with the naked eye, they are called microserrations.
This is not the best example, but the picture below is a magnified image of the edge of my EDC, an OKC RAT II, after sharpening. You can’t quite distinguish the microserrations, but you can see the striations at the edge that would appear like teeth under a high magnification.
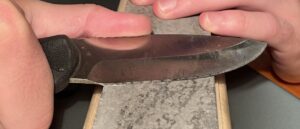
When you sharpen with a stone, you push the edge forward, as in the image shown below. When you finish an edge with a strop, you draw the edge back toward toward yourself. Doing so helps to align these microserrations, enabling the stropped blade to glide more effortlessly – through whatever it is you’re trying to cut.
It’s easy to buy a strop. They’re not expensive. A prepared leather strop, with a coarse side and a fine side, a ring and a handle, is a convenient product. With one, you can comfortably and easily align all of the microserrations on your straight razor or knife, allowing you to finish it with a truly razor sharp edge, no pun intended.
They’re also pretty cheap. You can pick one up at a sharpening supply store, on Amazon.com or at Walmart.com, for just a few dollars. But what if you don’t have one? Not to fret. While it’s difficult to create a serviceable solution for a sharpening stone (but not impossible – that’s a topic for another blog), creating a makeshift strop is not difficult at all. Actually, it’s easy. Here are four practical solutions for you to use when you need a truly razor sharp edge but don’t have a strop on hand.
However, despite the ready availability and low price of strops, you may not have one on hand. If you don’t have a ready-made strop on hand, finish your razor’s edge with one of these equally useful impromptu solutions.
I Don’t Have a Strop. What Do I Do?
Fret not, there are abundant solutions on the horizon, and soon your blades will be screaming sharp. All you need is a little human ingenuity. Any of the following improvisations will serve as a strop in a pinch, and yes, they will make a properly sharpened blade sharp enough to shave with.
1. Make your own strop.
Alright, consider this first solution a bit of a cheat, since the title of this article is effectively “alternatives to leather strops.” This first one is, nonetheless, the best of them all. You can easily make your own strop with whatever scraps of leather or other hide you happen to have lying around.
The picture below is one of a strop that I made myself from old leather that I had on hand after making a few hammerstalls for a flintlock. It’s a pretty light leather, probably somewhere between 3-5 ounces, and it’s fairly soft. However, it also has a smooth side and a suede side (although I doubt these are left over from the grain of the hide, they’re probably engineered).
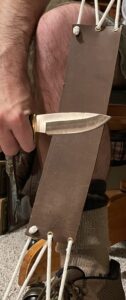
I cut the leather to size, installed brass eyelets and then created a simple set of handles from a cotton clothesline. It’s easy, deadly effective, and you can make one yourself at home.
But that’s not a real replacement for a leather strop, so what else can you do?
2. Use an old belt.
Here’s another legitimate cheat that doesn’t quite create a leather strop – although it will probably be made of leather. Just get out an old belt and you can probably use it as a strop.
There are a few things to point out here. Avoid cracked leather, as any imperfections in the surface of your strop can result in an uneven finished edge, defeating the purpose of a strop. Also, generally speaking, you should avoid textured or embossed leather. Use only smooth leather for this.
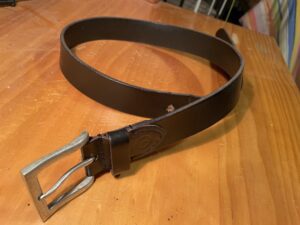
Find a serviceable old leather belt, wrap it around your hand, step on one end, stretch the belt taut and you’re ready to get stropping.
3. No belt in sight? Just use your shirt or your pants.
If either of the former two options turns out not to be serviceable for you, or you’re really in a pinch, or you’re out in the field and need a razor’s edge but can’t improvise in the above manner, then you can simply use what’s right on hand – your clothing.
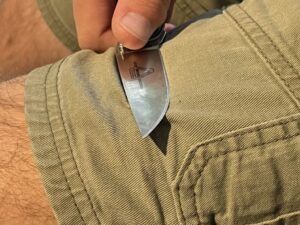
With a word of caution – coarse fabrics will work, but they really aren’t optimal. Avoid anything with a coarser wave than denim. For example, duck canvas can be used as a strop, but it isn’t great.
What you want to use is smooth clothing, like a cotton t-shirt or cotton denim pants with a tight weave. Synthetics are also suitable, if you have nothing else.
Hold the piece of clothing taut before you work. You need a straight, flat surface free of wrinkles. Then, simply use the fabric to strop your blade as you would with any other strop.
There’s a note here for you to take – if your clothing is made of natural fibers, like cotton, as you strop the blade in question, a thin film of down fluff will accumulate along the side of the blade that faces up. Clean this off of your blade as you strop, before you flip it to work on the other side. This lint-like fabric is an excellent source of tinder, and will readily take a spark from ferrocerium, or even from a piece of flint.
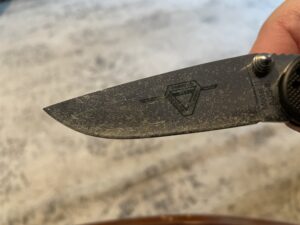
The above picture shows you what this looks like. This came off of my shirt as I stropped a blade. Keep this stuff – it’s perfect for making a fire when all you can draw is a spark.
4. Use a straight, clean piece of cardboard or paper.
If you really have nothing else – although I can’t think of a time when you can’t literally use the proverbially shirt off your back – you can strop a blade with nothing but a piece of dry, clean, smooth cardboard or paper. You can even rummage through a recyclable pile to find some, but the smoother the paper is, and the better shape it’s in, the better it will work.
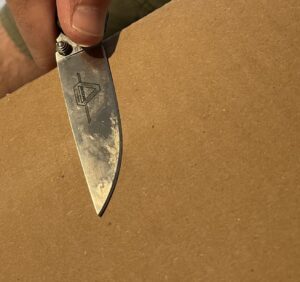
The rules here are the same. Place the blade flat against the paper or cardboard surface and sweep towards the spine, away from the edge. The paper surface will help to align the microserrations on the blade, and at the end you’ll have a truly sharp blade. This is one of the best strop hacks out there, and it is all too poorly known – until now.
It should be abundantly apparent by this point in this post, but there is effectively no domestic setting that is devoid of a serviceable substitute for a strop. You might be without a sharpening stone of adequate grit, but if you can get that edge, you can strop it with something you have on hand, even if you need to dive into the pile of recyclables out back.
How To Use a Strop
By this point, you deserve at least a quick tutorial of how to strop your blade, since you went through all of that effort of reading about what you could use to do so. Luckily, it’s easy to strop a blade. In fact, provided you follow a few simple rules, it’s even easier than honing a blade, since you don’t need to set and follow an angle to ensure proper edge geometry. If the blade is ready for stropping, the edge geometry should already be set for you.
Whatever you’re using, paper, old belt, shirt or otherwise, lay the blade flat against it, as shown below. Then, sweep the blade toward the spine, as indicated in the same picture.
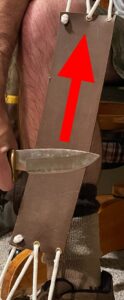
After this pass, you can do one of two things. Either lift the blade straight up off of the strop before laying the other side down and stropping in the other direction, or roll over the spine and pull the blade back toward you, spine first. Just make sure you do not roll over the edge when reversing strokes as you will either damage the strop (unlikely) or the edge you have just begun to strop (not only likely, nearly certain).
That’s basically all there is to it. Make a few passes in this manner, between 10 and 30, and then feel your edge. You can test it on a piece of paper or on the hair on your hand to check if it’s “sharp enough,” but that’s a subjective metric only you can measure. If it glides through paper or makes the hair pop off the back of your hand, you’re working with a razor.
~The Eclectic Outfitter
Fantastic overview of the need for stropping your edges, how easy it is to accomplish, and the benefits of a stropped edge. Well done.
‘It all picks up where sharpening, also known as honing, leaves off.’ Surely sharpening and honing differ from each other considerably.
No, not really. Anyone that insists on a significant difference between sharpening and honing is arguing semantics for the sake of conflict. It can be said that sharpening is the process of removing metal to create a new edge whereas honing refers more specifically to maintaining an existing edge, but again, this is splitting hairs. What differs considerably from sharpening (or honing) is stropping, as I have thoroughly outlined here.