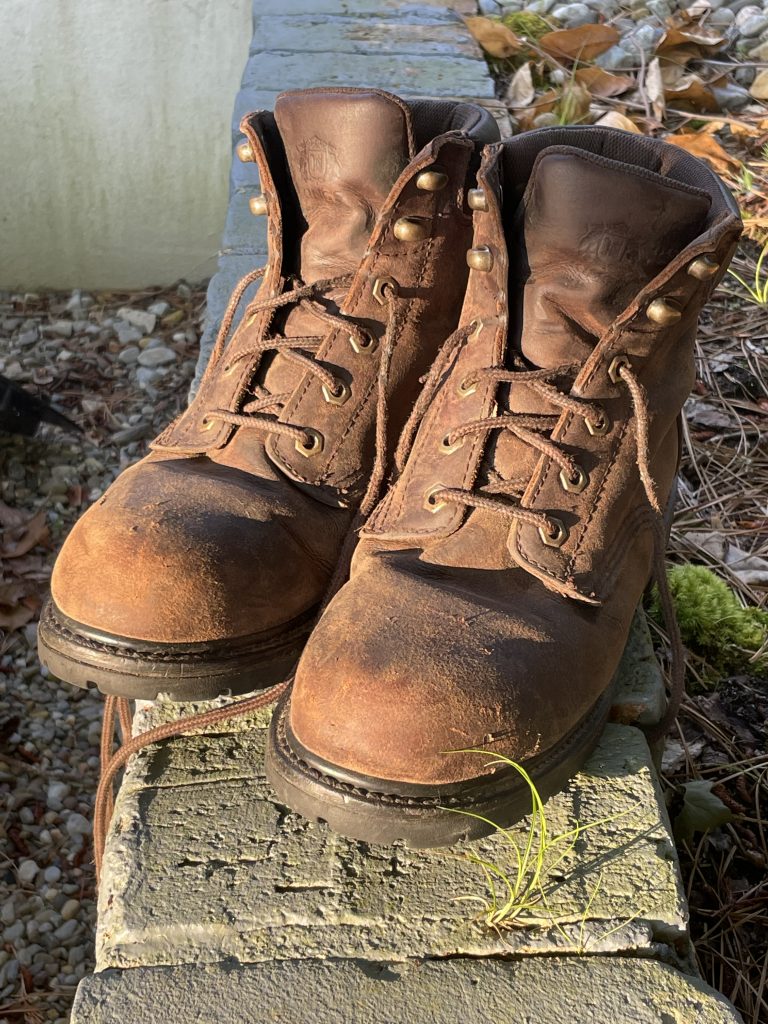
Pictured are a pair of Honeywell King’s I’ve had for about 5 years. Now, I don’t work in construction or landscaping, so I can’t say I have professional experience with this, but I have done my share of working in the yard, splitting wood, hiking, fishing, camping, hunting, and all of those sorts of things.
Those boots have some miles in them and the only reason they’ve lasted as long as they have is because I took care of them.
Now, when I was younger, I didn’t even realize that “leather boot care” or “shoe care” in general, was a thing. But the older I got, the more it stuck in me to have to throw out a pair of shoes or boots – even good ones – every few years.
So I broke down, sucked it up, and learned how to clean and condition a good pair of leather goods (which is also applicable to high quality shoes, I’ve learned) and here is what I’ve picked up about leather boot care along the way.
In for a Dime…
First things first, and I cannot possibly stress this enough: buy quality.
Do not fall for gimmicky marketing, branding, or so-called “space age materials.” Either they are never worth it, or I simply have not stumbled upon instances in which they are.
And I’ve been through a lot of pairs of shoes and boots. A lot.
Here’s the thing. I’ve learned to stick mostly with simply but natural materials. Leather, steel, cotton, rubber, wool, and so on and so forth. I have a practical reason for this, which isn’t entirely snobbish.
Let’s take two hypothetical pairs of boots as an example. We’ll give the one leather uppers (full-grain, of course) and the other pair of boots a set of uppers of ballistic nylon or some other type of synthetic weave.
Now, nylon is tough. But what happens when it starts to age? Or suffers water damage?
Can you restore it?
The answer is pretty simple: no.
You can take care of nylon or synthetic boots, but there’s not much you can do to prevent them from breaking down except sheltering them from abuse. And that’s not what boots are for.
Now, by contrast, let’s take a pair of nice leather boots with full grain uppers – like Chippewas (my favorite) or Rocky’s or Irish Setters, or Danner or Red Wing – anything like that.
Leather is prone to drying out, to water damage, to abrasion, to UV damage, to wear and tear – the whole nine yards, just like nylon and synthetics.
The difference is you can waterproof and condition leather to help prevent it from wearing out before its time.
This is one of the great things about natural materials. They require more care (this is very true) but when afforded that proper care, often (in my experience) they will outperform their synthetic counterparts and last longer.
So, buy quality. That doesn’t mean you need the most expensive boots. Far from it; in fact, I’ve bought Chippewas and Kings and Kodiaks and paid significantly less than a hundred each time, but there were some things in common.
They were all made using high-quality natural materials, like leather and wool, and I learned how to take care of them, the old-fashioned way.
Since this is a blog on leather boot care, I might as well put in a word on the quality of leather. This is one of the most important things I’ve ever learned about leather quality and something I wish I knew years and years ago.
The only leather you should buy is full grain, period, full stop.
Don’t get me wrong. I do have accessories and what-not that are not made from full-grain leather. But trust me, in each instance, it’s either a case where being genuine as opposed to full grain really doesn’t matter; or that I got the genuine for cheap I was willing to make the concession.
This is why it’s such a big deal. Full-grain leather is a piece of the hide from which the hair has been removed. It’s not split, or only very minimally split. In heavier weights of leather, the full-grain portion of the hide reaches from the skin’s surface all the way through the hide to the suede side.
In other words, full-grain leather is a whole, (basically) unadulterated piece of cowhide.
It is stronger, tougher, and more resilient than all other grades of leather. It is easier to care for, will last longer, and will develop a beautiful patina over time.
Genuine leather is made from pieces that are split, or “skived” from the hide. This makes the hide progressively thinner. Either this is done to stretch the pieces of the hide farther, to save money, or because overall the hide has so many blemishes it cannot be used as full-grain.
Genuine leather exhibits invariably poor quality. I’m sorry if you’ve heard elsewhere. These thin pieces are then glued together (the process is known as lamination), stamped as “genuine leather,” and then sold off to people that don’t know they’re getting swindled.
Not only is genuine leather inherently low-quality; it also is weaker, less durable, does not last as long, and won’t develop a patina.
But that isn’t the worst part. Even if you condition, waterproof, and oil genuine leather, it will still fatigue, stress, crack and break down faster than full-grain leather. This is due in part to the fact that there is nothing realistic you can do to stop the layers of leather from delaminating.
Actually, now that I type this, I realize there is something that you can do. It’s quite simple and has a success rate of 100% efficacy in preventing leather troubles down the line for those that invest in poor quality grades of leather. Just don’t buy genuine leather.
Now that we’ve gotten that out of the way, let’s take a closer look at why boot care matters.
Why Leather Boot Care Matters

High-quality leather boots are tough and will put up with the hardest beatings you can dish out. That is, for a time.
After a while, even the toughest footwear will flag. This is true whether you’re in a trade that actually doles out abuse – such as in the logging industry or in landscape – or are like me, are an outdoors hobbyist with interest in hiking, camping, bushcraft, hunting, fishing and that sort of thing.
If you don’t take care of your boots as I detail in this article, you will hasten their decay, causing the laces to fray, the leather uppers to crack and separate from the soles, the soles to wear down more quickly, and much worse.
All of that would have eventually happened anyway, but at least by properly caring for your boots, you can help slow down the inexorable march of time that will inevitably divest you of your favorite boots.
Leather Boot Care: What to Use for Cleaning and Conditioning?
Since part of conditioning leather boots involves properly cleaning them, let’s take a closer look at what you’ll need for the job.
There are a lot of commercially available leather cleaners on the market. The one which I probably see most often advertised is a product known as saddle soap.
Now, I’ll be honest. I don’t use and have never used any sort of soap or detergent on leather. I won’t sit here at this keyboard and tell you not to. Perhaps they really work and don’t damage leather, but here’s the way I see it, and here’s the reason I don’t use them.
Leather is a natural material; it is literally skin. Like our skin, it gets dry and at risk of cracking and warping when it is not moisturized. That’s one of the reasons you need to keep your own skin hydrated.
Soap and detergent are designed to emulsify oils, grease, and other hydrocarbons. This allows them to be lifted away and removed in an aqueous solution. Will it clean leather? For sure – but it is also going to dry it out, and dehydrating is one of the main causes of damage to leather, even more than dirt and mud.
So, if I’m being totally honest, I don’t see how using a detergent on leather can help protect it. All it probably does is remove stains and make the leather look good.
I won’t mince words. I enjoy it when my boots look nice, but I like it a lot more when I know they’re in good shape. I wear boots to support me and protect me, not to look nice. I just so happen to look nice anyway.
So, as for my leather (and this goes for leather belts, bags, shoes, wallets, gloves, hats, and whatever else, not just boots) I don’t use soap or detergent.
If they are dirty, I just wipe them off with a rag. If they’re really dirty, I moisten the rag and wring out most of the water (because I don’t want the leather to absorb it) and then I wipe the leather clean. That gets most marks out, anyway, so I hardly have a need for soap as it is.
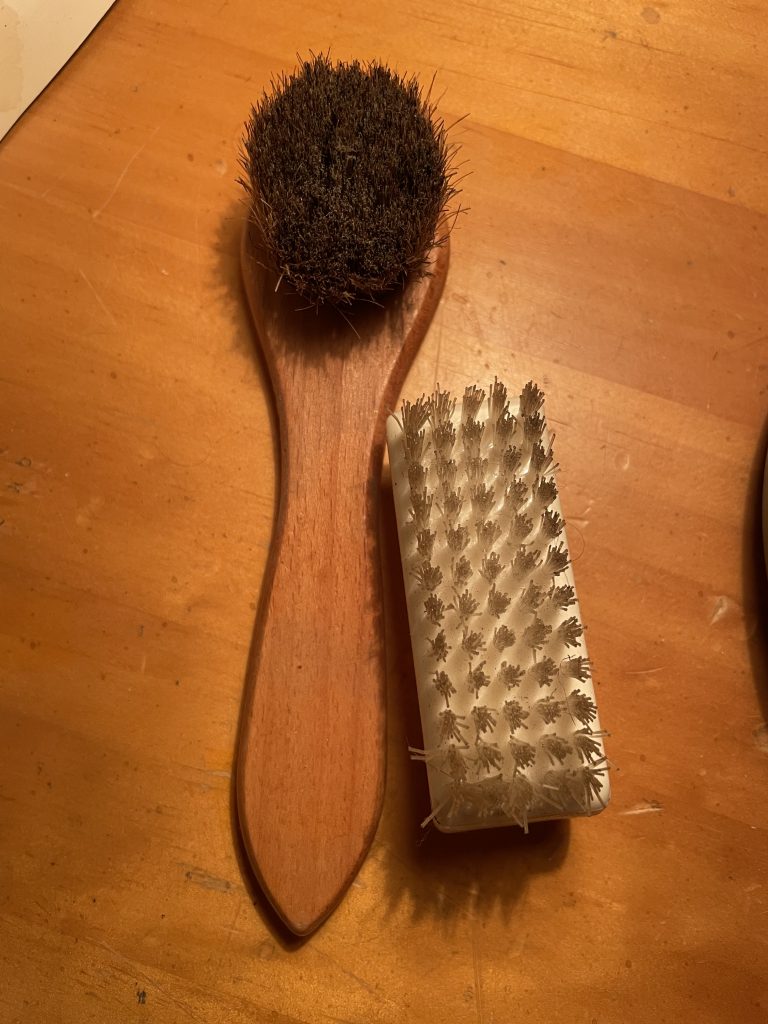
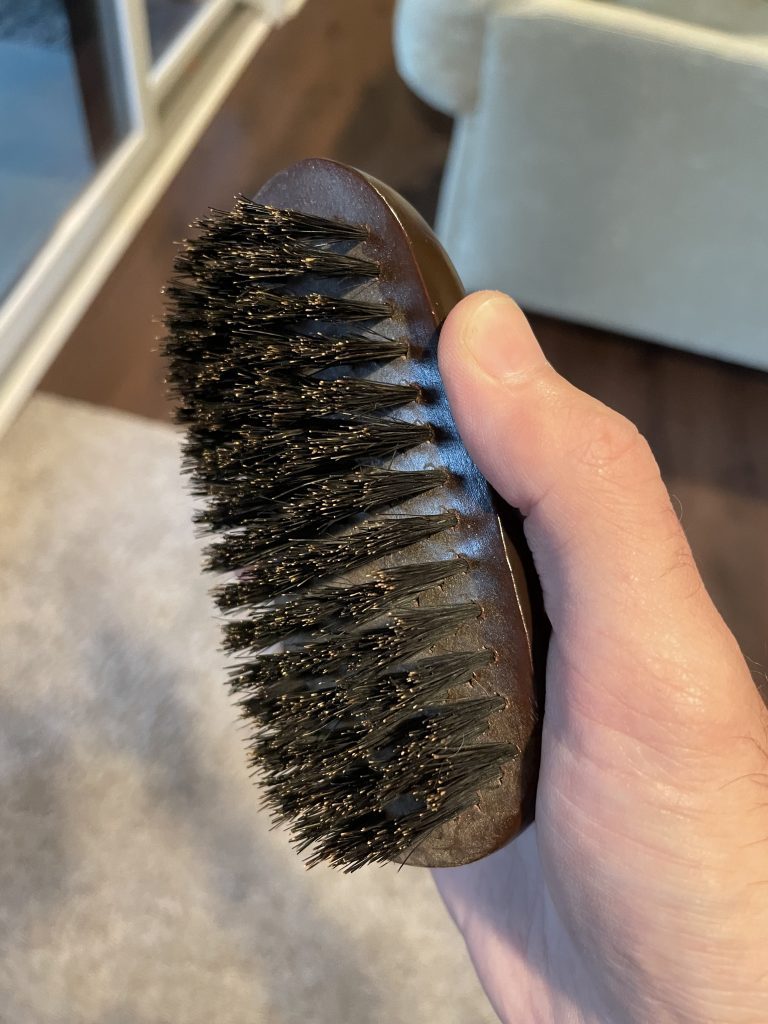
So for cleaning, all I need is a towel or a rag and a boot brush. There are all sorts of brushes you can use to clean boots. I have brushes with synthetic bristles as well as horsehair brushes. An old toothbrush is also very helpful for dislodging dirt from the welt and from the lugs of the soles.
That covers cleaning. Then you need to consider conditioning, which is actually the most important step here.
Like cleaning products, there are a wide range of conditioning products that you can use to restore leather, many of which are commercially available. There is mink oil, neatsfoot oil, beeswax, and then a whole bunch of blends that have other things in them and which I don’t really know that much about. Some people swear by Leather Honey or Sno-Seal. I use something much simpler.
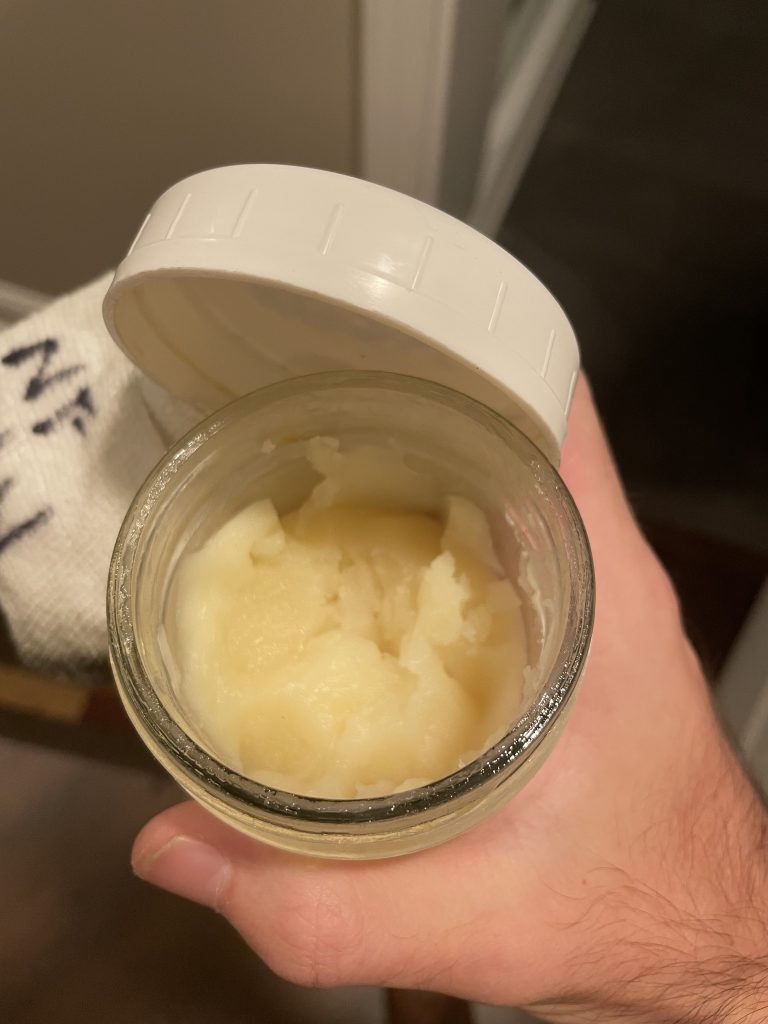
That is my homemade leather conditioner. It has just two ingredients (and itself is a ripe topic for another blog). It contains only neatsfoot oil and beeswax.
Neatsfoot oil is an oil that naturally occurs in the legs of cattle and which is rendered out of them after slaughter, being used for the purposes of softening and conditioning leather. It’s not just “close” to the real thing. It is the real thing and can be used to protect and condition leather to drive out moisture and protect against warping and cracking.
As for the beeswax, although that is not naturally present in leather, it is a highly protect barrier and when applied as a part of this mixture encourages water to bead up and roll off of the surface of the leather. It doesn’t quite waterproof them, but it helps discourage moisture absorption while still allowing the leather to breathe.
One thing: whether you intend to mix your own leather conditioner (as I do) or buy neatsfoot oil, I have one word of caution. I would stick with the real thing only and avoid compound neatsfoot oil.
Not speaking from experience here, but I have read that compound neatsfoot oil contains chemicals that can dissolve threads and other fabrics, which means that compound neatsfoot oil can hasten the decay of your bootlaces, the welt stitching, or of the stitching that holds your boots together.

I’ve never tested it because it isn’t worth the experiment. I just use pure neatsfoot oil. Use what you think is best. Side note: it can be a bit tough to find pure neatsfoot oil as most places carry compound only. I got mine at Tractor Supply Co. – but not online, I got it at the local store.
Step One: Allow Boots to Dry Slowly
Now it’s time to get into how to clean and condition a pair of boots.
First things first, if you come home and your boots are soaked through (likely if you’ve been out camping, hiking, hunting or fishing) you’re going to want to give them time to dry completely before you start with cleaning and conditioning.
Some people will tell you to remove visible mud and dirt first. I say let them dry, but you’re free to act as you think fit.
At any rate, when you take them off to let them dry, make sure you don’t get drastic about it. Do not put your boots close to a fire or heater to get them to dry out quickly. That’s a sure fire way to stress the leather and encourage them to crack.
Air drying is best. If you must use a boot dryer, use it on the lowest setting (if there is one). What I suggest is to stuff them with dry newspaper, then remove the newspaper every hour or so as it becomes saturated. That will dry your boots out relatively quickly without stressing the leather.
Once your boots are dry, you can worry about cleaning and conditioning.
Step Two: Remove and Retreat Laces (If Necessary)
Before you get into cleaning off the boots, remove your laces and set them aside so you can really get your boots clean and work in the leather conditioner.
Take off your laces and place them aside. Now is the time to retreat them with a waterproofer if necessary.
I don’t use sprays, although you can buy those. I use good old paraffin wax. There are a number of good reasons to wax your laces, too. It protects them from water damage and allows you to tie knots that hold better.
At any rate, if your waxes are laces and you want to re-wax them, melt some paraffin in a container, drop in the laces, stir them around to make sure they absorb the wax, then remove them and let the excess drip off back into the container.
When the wax has started to congeal, strip off as much excess as you can. If you really want, you can wring the laces through your hands to clear off even more.
Otherwise, place them aside and start clearing the mud off of the soles of your boots.
Step Three: Clear Mud and Dirt Off Soles
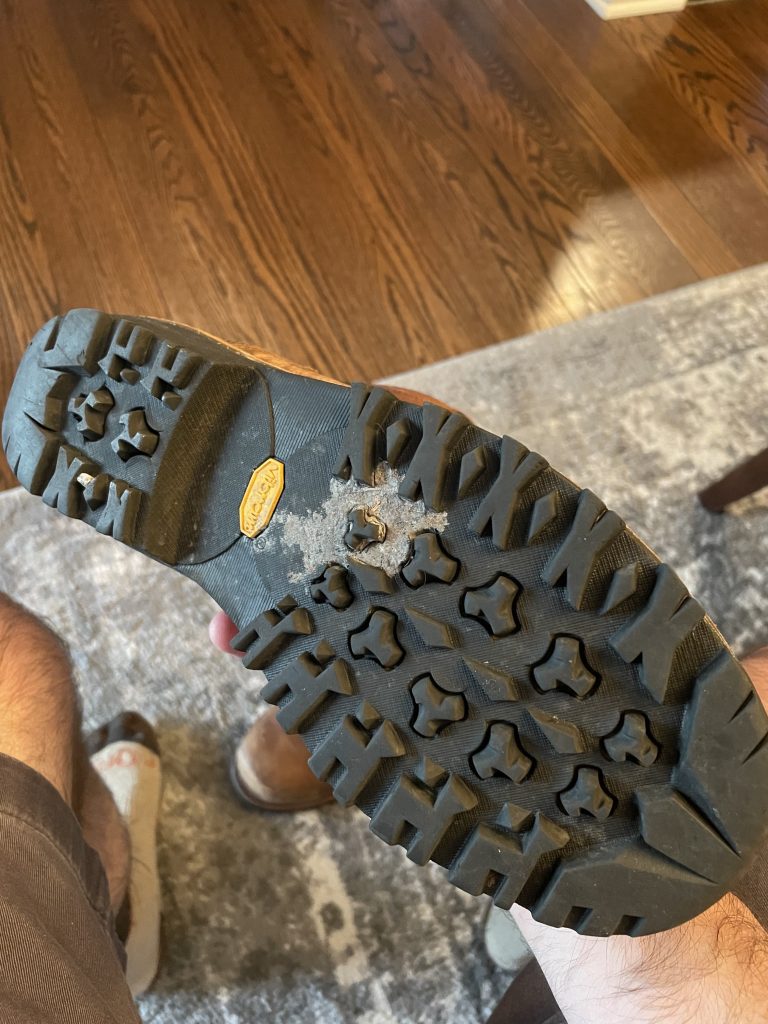
The best practice you can get into is stomping off most of the mud on the bottoms of your boots before you get home, but that isn’t always possible and I’m sure you know this if you’re reading an article about leather boot care.
Take your boots one at a time and clap them down on a hard, preferably paved surface once they have dried. Desiccated mud will usually crack and drop off. Depending on how aggressive the treads of your lug soles are, caked-on mud might take a little extra coaxing to dislodge.
Never worry, though. This is why we have brushes with stiff bristles. I prefer horsehair or hogshair because these bristles are stiff but won’t damage or scratch leather.
Use the brush to clear out the treads of your soles before brushing off the sides to remove any mud, silt or sand that’s clinging to them. Make sure you get all of the mud out of the treads before proceeding. Then you can focus on the uppers.
Step Four: Clean the Uppers
If you have mud or sand clinging to the uppers of your leather boots, you can clean them off with the same brush you used to clean off the soles.
Start at the welt, where there is likely to be a lot of mud in between the crease with the upper meets the sole. It is important to clear any debris out of this little crevice as salt and moisture in there, if left alone, can cause the welt stitching to rot away. If that happens, your uppers will separate from your soles and you’ll need to get your boots re-soled. It’s best to prevent this in the first place. If you can’t dislodge any caked-on mud, use a toothbrush with stiff bristles as you can usually exert greater dexterity with a small toothbrush than with a larger boot brush.
Then, focus on the sides of the upper and the toe. It’s generally pretty easy to get mud and sand off of these areas of the boot.
Next, spread open the sides of the upper and expose the tongue of the boot. Mud, sand, and grass tends to bunch up and accumulate between the base of the tongue where the uppers fold against it. Clean these areas out thoroughly.
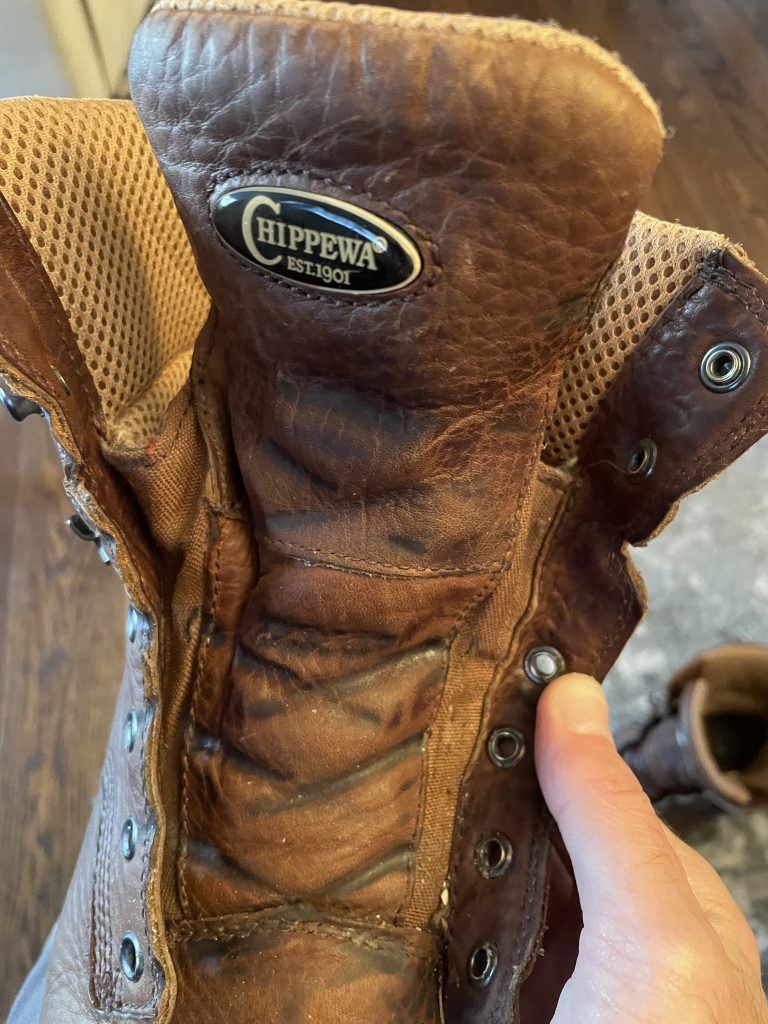
Finally, you’ll want to focus on the area around the eyelets, where mud and salt also want to deposit themselves. Use a brush to clean out these areas making sure you leave nothing behind. Again, you can use a toothbrush here because it might make it easier to reach the tight spaces between the eyelets.
If your boots are stained, discolored, or are covered with a coating of very fine dust or silt, you might want to use a damp rag or sponge to get some of this off. Gently wiping the surface of your boots should help with this.
Again, I don’t use soap, conditioner or detergent for leather boot care. A damp rag is all I use, at most.
Step Five: Conditioning and Waterproofing
Conditioning is arguably the most important step of leather boot care. At least, that’s an argument I’d be willing to make time and time over.
Once your boots have dried, had the laces removed, and been cleaned of dirt, sand, mud and grass, you can begin conditioning them.
My leather conditioner – the conditioner I mentioned above – doubles as a sort of waterproofer, so this is one step for me.
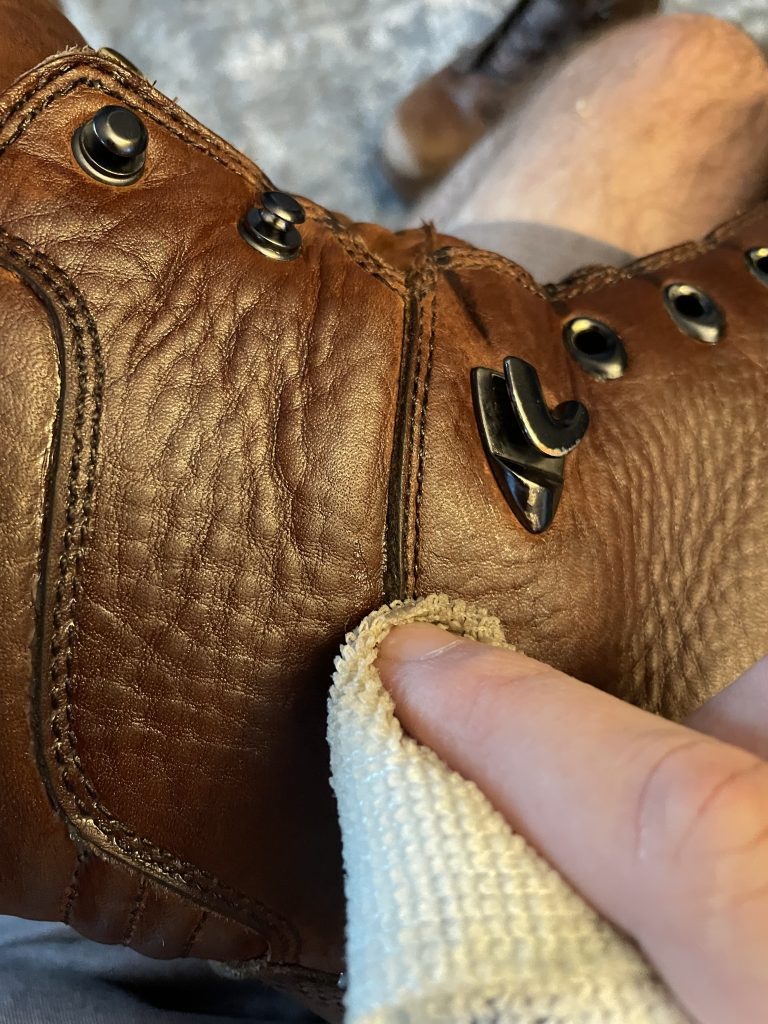
To apply the conditioner, I use either a clean, dry sponge or a rag, whatever I have available. If I’m using a rag, I fold it in half until it’s as small of a square as can be reasonably handled. This makes it much easier for me to work the conditioner into the leather and reach difficult spaces and crevices.
I use the tip of a knife (here, I’m using my CJRB Maileah) to apply the conditioner to the rag or sponge. Dipping the sponge or rag directly into the conditioner runs the risk of absorbing too much, which is something you definitely don’t want to do. (
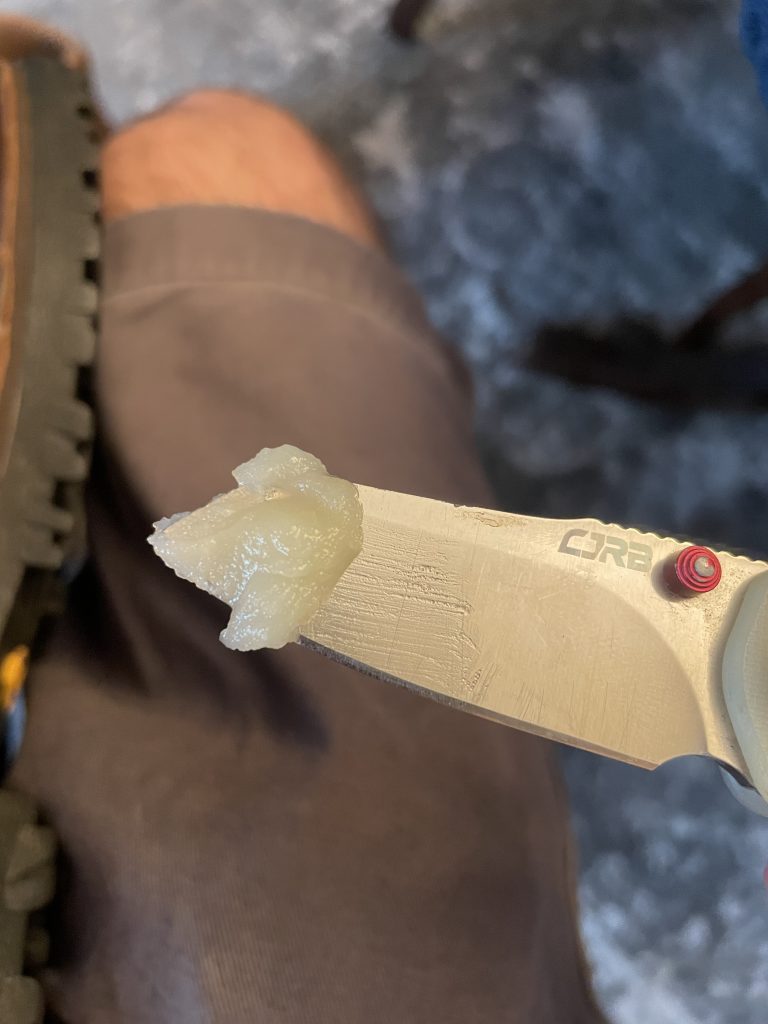
Be sparing with your application. You can always apply more conditioner but you can’t take it out. Also, leather is absorbent and will generally drink everything you give it, so you don’t want to overdo it. Applying too much conditioner can make your boot leather too soft and will make them sweat out oil over time. Also, neatsfoot oil will oxidize over time, so you don’t want to pour too much on your boots or they’ll blacken.
Anyway, apply some conditioner to your sponge or rag and rub it gently into the surface of your leather boots as evenly as possible. It’s fairly easy to apply to the open, clean surfaces of the shaft and toe of the boot.
As you work along the sides, be sure you are even with your application as the stitching will make it difficult to apply the oil. Rub along any seams to ensure that the leather is being conditioned properly.
Two of the biggest stress points on a boot are on the inside of the tongue where it meets the upper and where the crease naturally forms where the ball of your foot begins. These areas need more conditioner than the rest of your boots’ uppers.
At the crease where the ball of your foot starts, work in some extra conditioner to keep the leather limber. Most of the time, this is the first point of failure on a boot or shoe. Keeping the leather conditioned will help prevent cracking and will help prevent the upper from separating from the soles under stress.
Be liberal with your application at the inside of the tongue, too, ensuring that the entire surface of the tongue, and any gussets, are carefully conditioned.
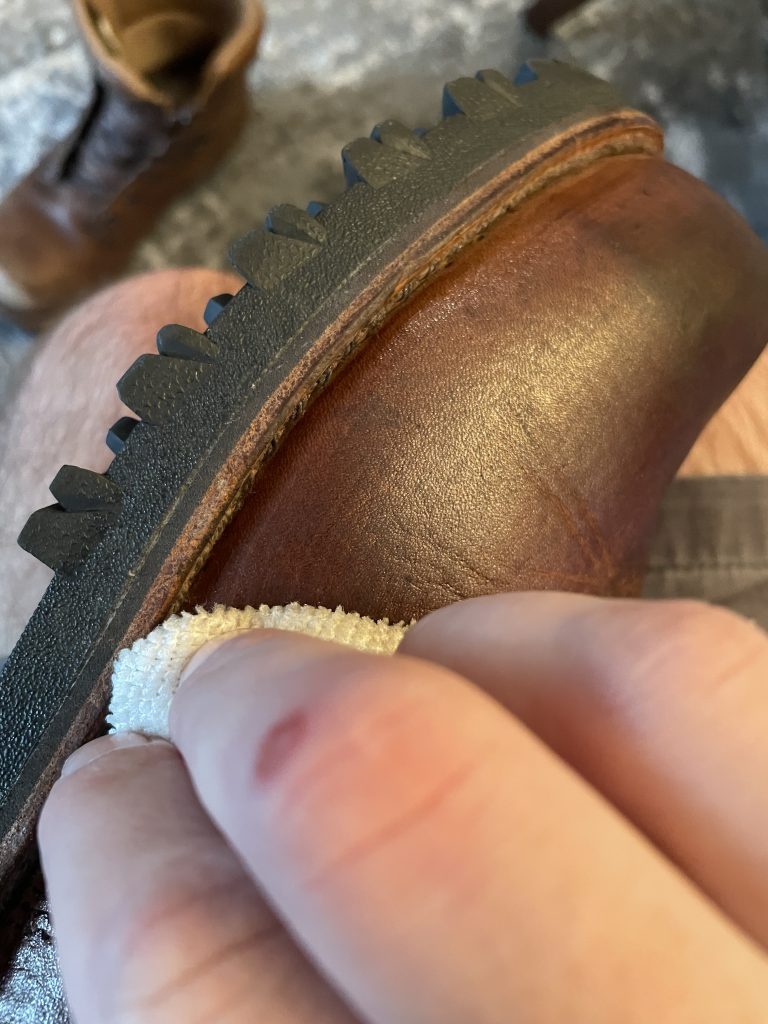
Also, it is difficult to reach the leather of the uppers where they join the sole at the welt, but these areas are under a strong concentration of stress, too. Make sure your conditioning routine gets in that crevice between the upper and sole at the welt. If you must, use a corner of a rag to get in there; it’s important that you do.
Another note: as you apply leather conditioner to the rest of your boots’ uppers, focus on any areas where creases are naturally forming. These are other areas where your boots are experiencing the greatest concentrations of stress. Creases are the precursor to cracks. Where creases form, give the leather a slighter deeper drink.
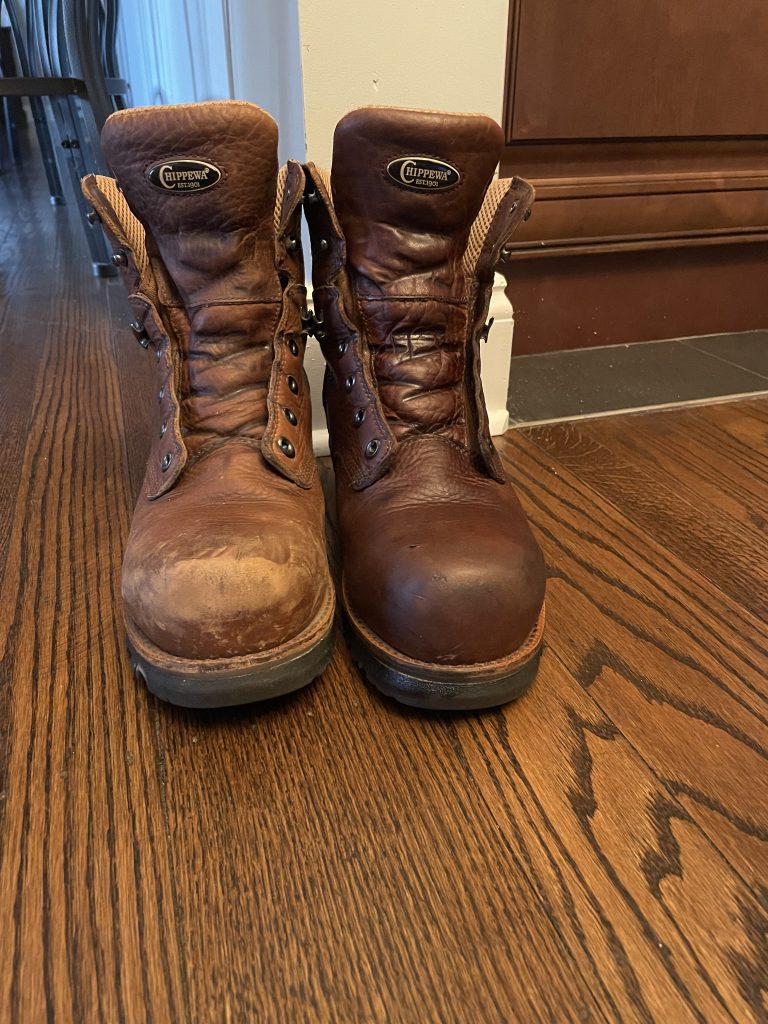
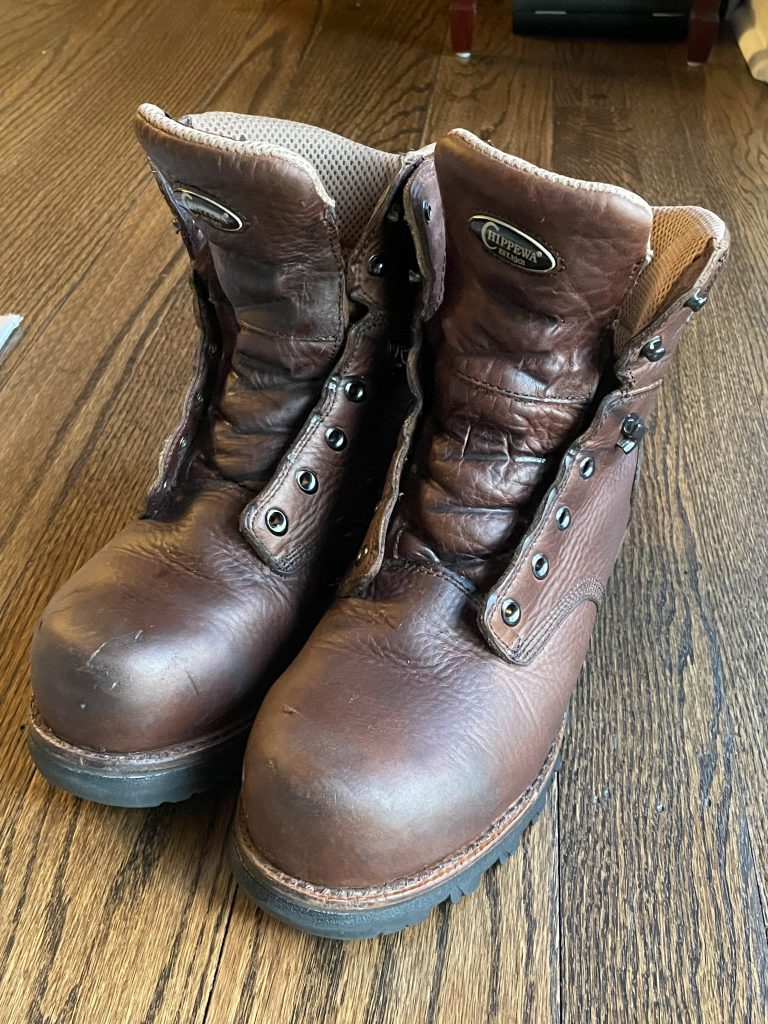
The above picture shows one freshly conditioned boot next to the other. You can see from the picture alone how much life leather conditioner breathes back into leather. All of the scuffs and marks have all but been erased from the upper and, though you can’t feel the picture, I assure you the conditioned boot is more supple than the drier, unconditioned one.
Once you’re complete with the first boot, repeat the same process for the second one.
Since my conditioner contains beeswax, it fills the role of waterproofing, too. As I stated, it doesn’t completely waterproof the leather but it does protect them against rain and discourages the leather from absorbing water.
Still, if you’re using a separate waterproofing agent, the time to apply it is after you apply your leather conditioner. Once that’s done, you can set your boots aside to dry.
When you’re not wearing them, store your boots in a cool, dark, dry place. That will protect the leather, too.
Going the Extra Mile with Leather Boot Care
I can’t tell you how much of a difference it’s made being proactive about leather boot care instead of consistently buying boots, beating them into the ground, then throwing them away and getting a new pair. I’ve been there and done that and I can confidently say that this way is much better, not to mention more affordable and far more gratifying.
Take care of your boots and they will take care of you. Or, perhaps we can say, go the extra mile for your boots and they will go twain with you.
~The Eclectic Outfitter