How to Make Taper Candles (by Casting)

How to make taper candles.
Just one box of a whole bunch of taper candles I cast in molds from old wax I had lying around. You can make them too; it's easy, saves money and keeps you from throwing away perfectly good wax.

“Neither do men light a candle, and put it under a bushel, but on a candlestick; and it giveth light unto all that are in the house.” ~Matthew 5:15.

Are you someone that appreciates candle light? Do you simply want to be prepared with a backup for lighting that doesn’t rely on gas, oil, electricity, or batteries? Do you have a lot of stray wax laying around? 


Then maybe you should learn how to make taper candles. They are economical, excellent for lighting (and sometimes even heating) a room, are great as an emergency measure during blackouts, and can be made from scraps of wax that you (probably) have lying around. 


Let’s get into it. 


Why to Make Your Own Taper Candles


Obviously, if you’re someone that burns candles a lot, you need no justification here. 


But even if you aren’t, having a stash of emergency taper candles is a must in any emergency situation. You can use candles for light in a blackout, they can extend the life of matches (never strike a match without lighting a candle!), and much more. 


With a stash of candles, you’ll be prepared for much more. You can use them to heat a room with a makeshift inverted-pot heater (that for another topic) and even use them to warm up or cook food, such as in a can. 


Perhaps most importantly, you can use candles to recycle old wax you just have lying around the house, which is my next point. 


Stop; Don’t Buy Wax! 


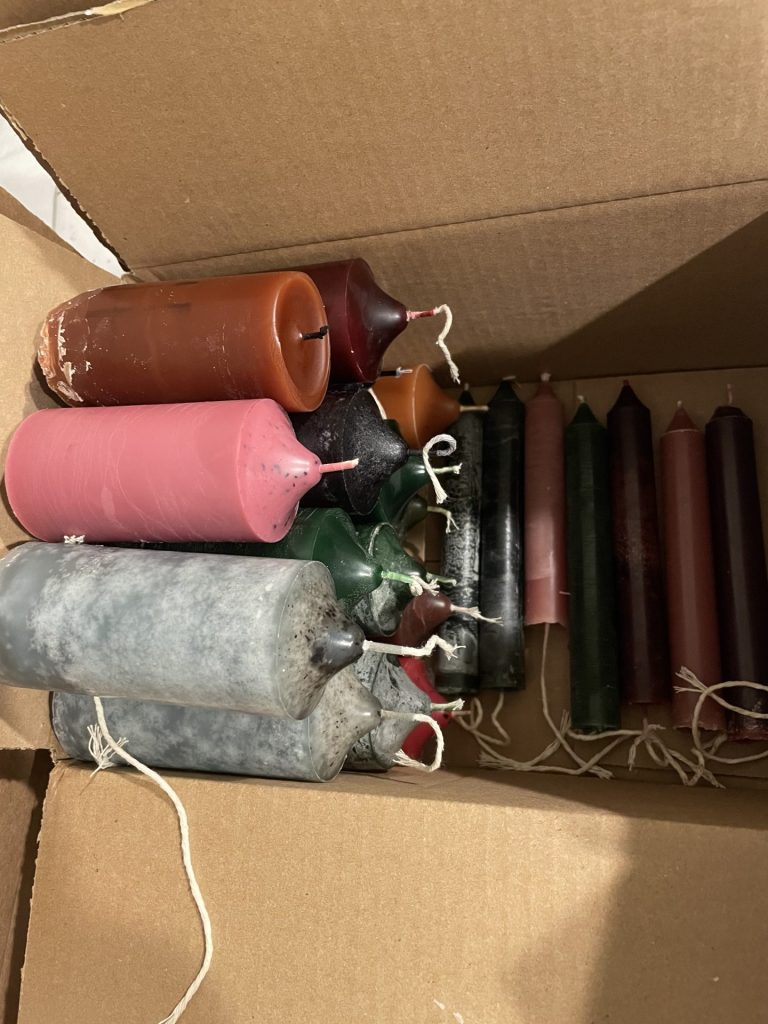
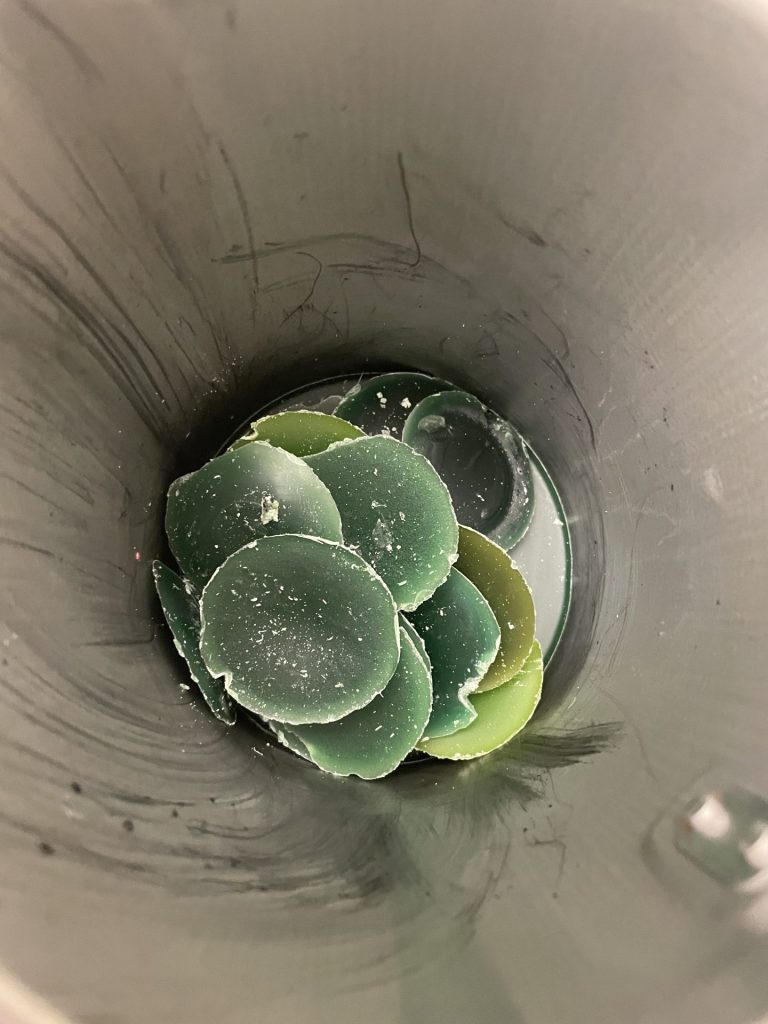
If you’re going to make your own candles for light or heat or whatever, don’t buy wax. There’s a good chance you have wax lying around that you can and absolutely should recycle. 


Buy all means you can buy it if you need to. You can get Gulf Wax at pretty much any grocery store or hardware store (fair online price at the previous link).


But if you already burn candles, just use what you have. You can recycle the stumps of candles, chip the remaining wax out of old jar candles, or, if you use those scented wax melts, just take them and turn them into candles. There’s not much else to do with them once the scent burns off, anyway. 


Rummage through what you have and recycle any old wax you find before you buy new because if you already burn candles you almost definitely have something around you can recycle. 


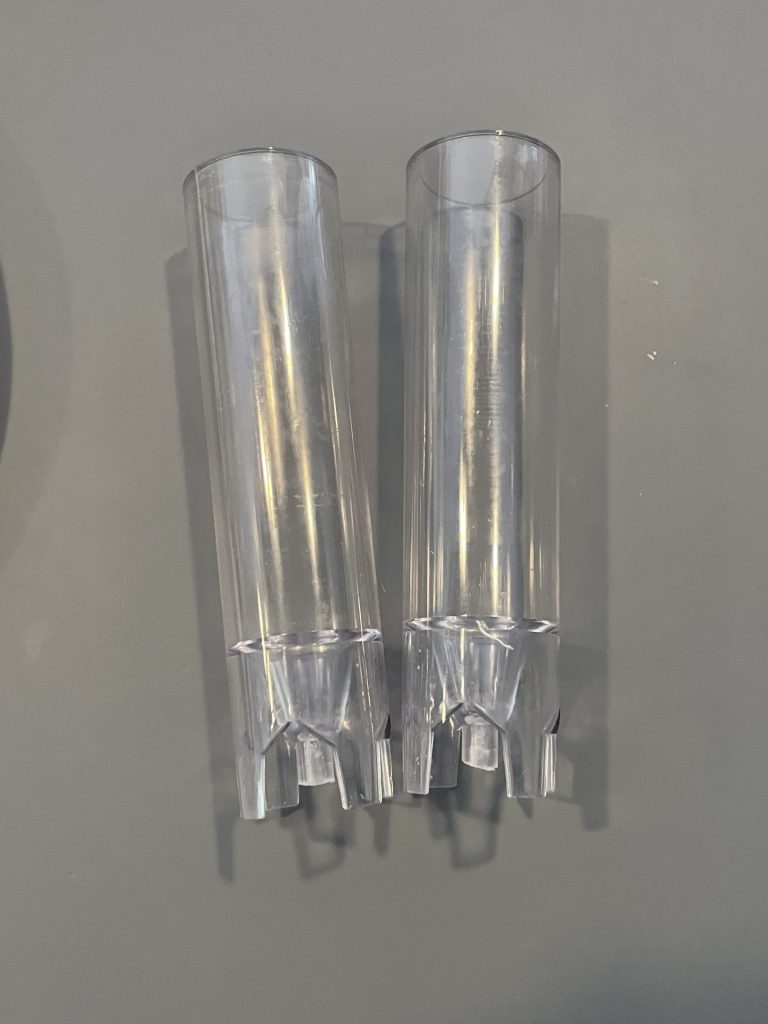
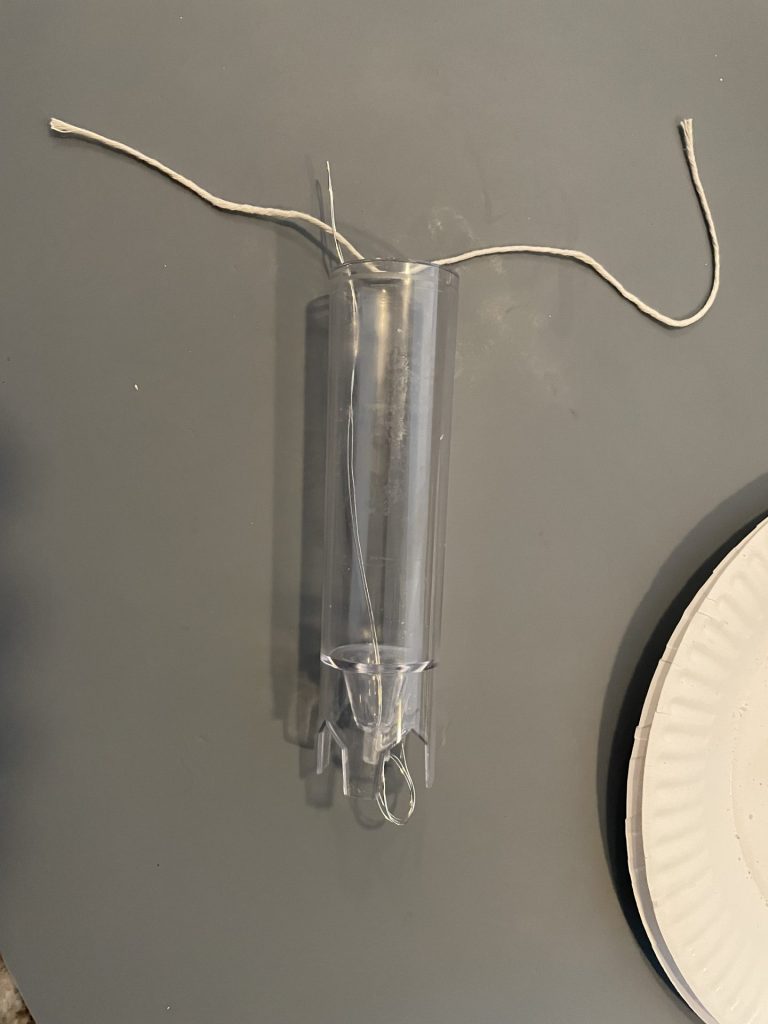
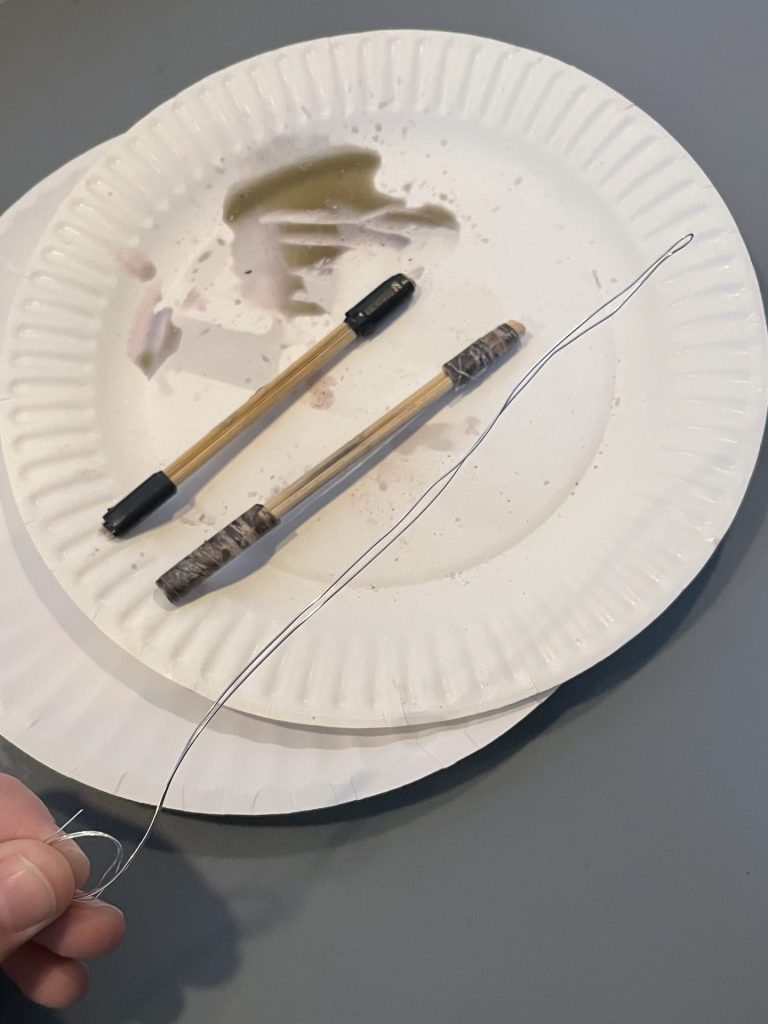
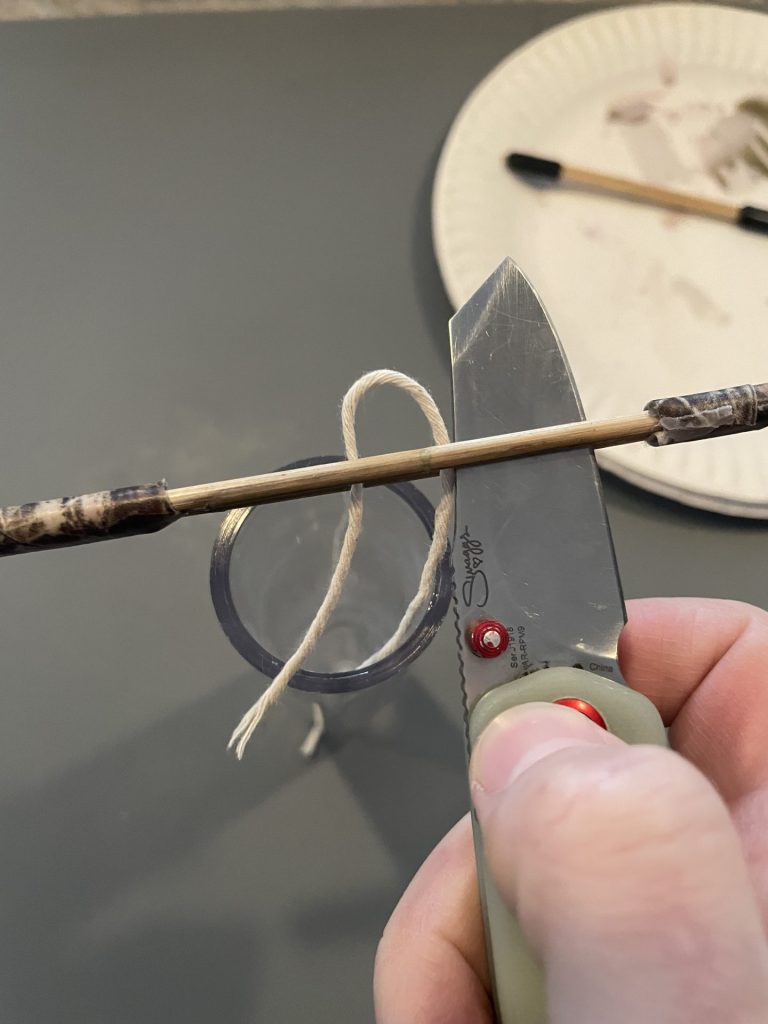
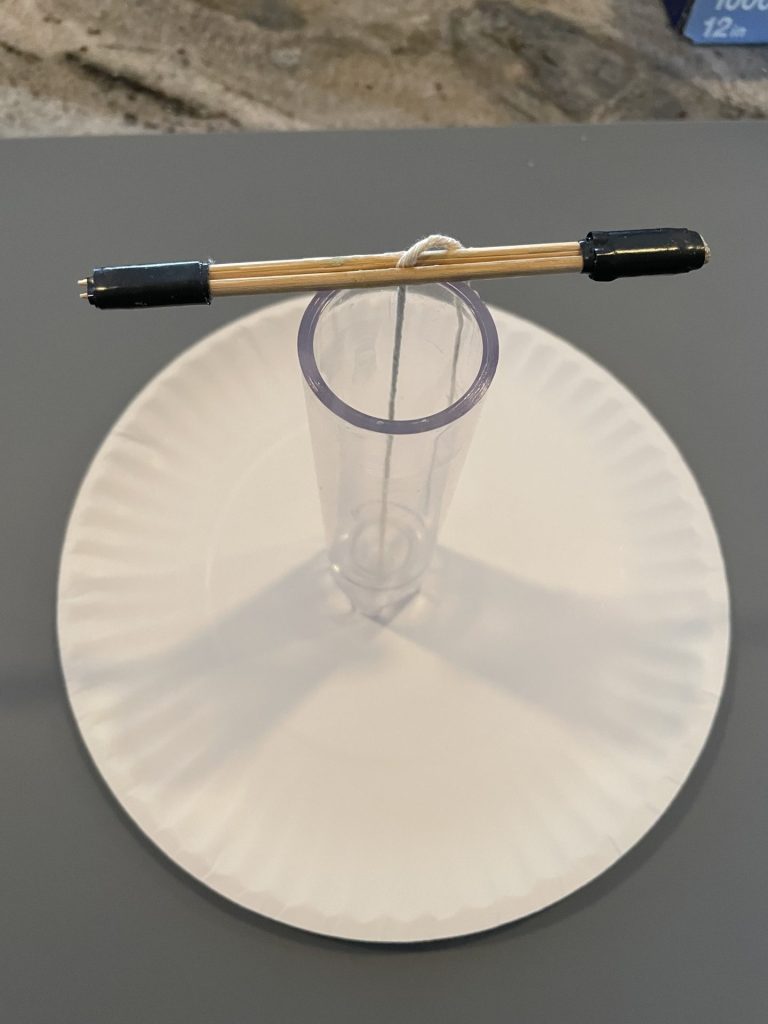
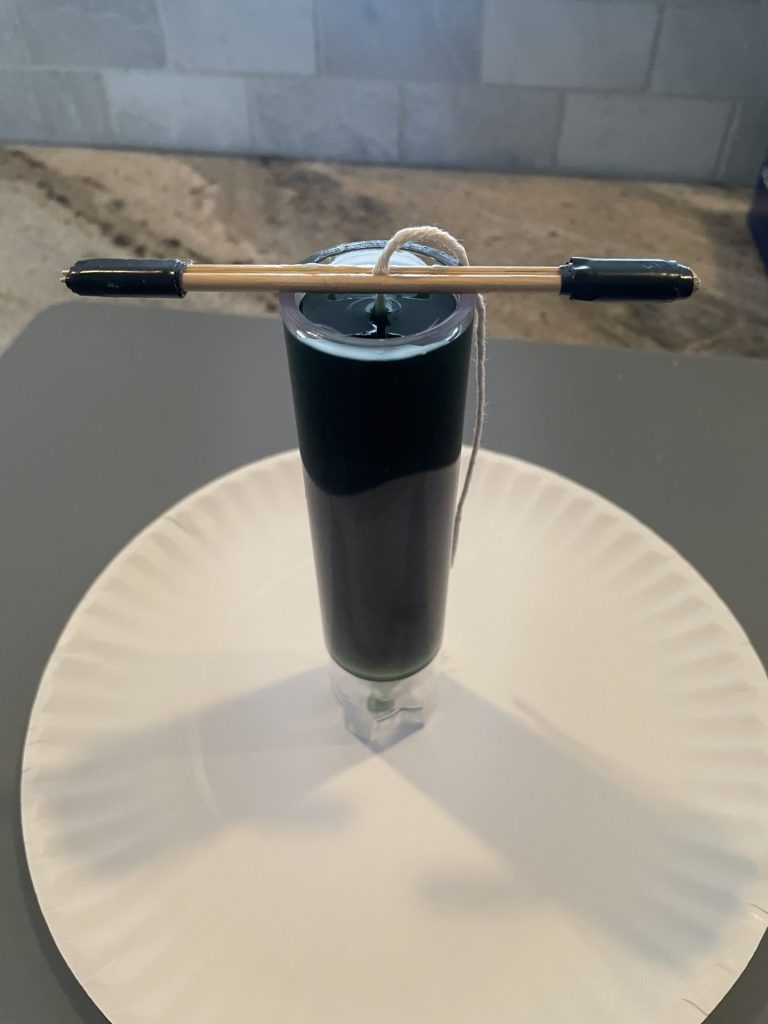
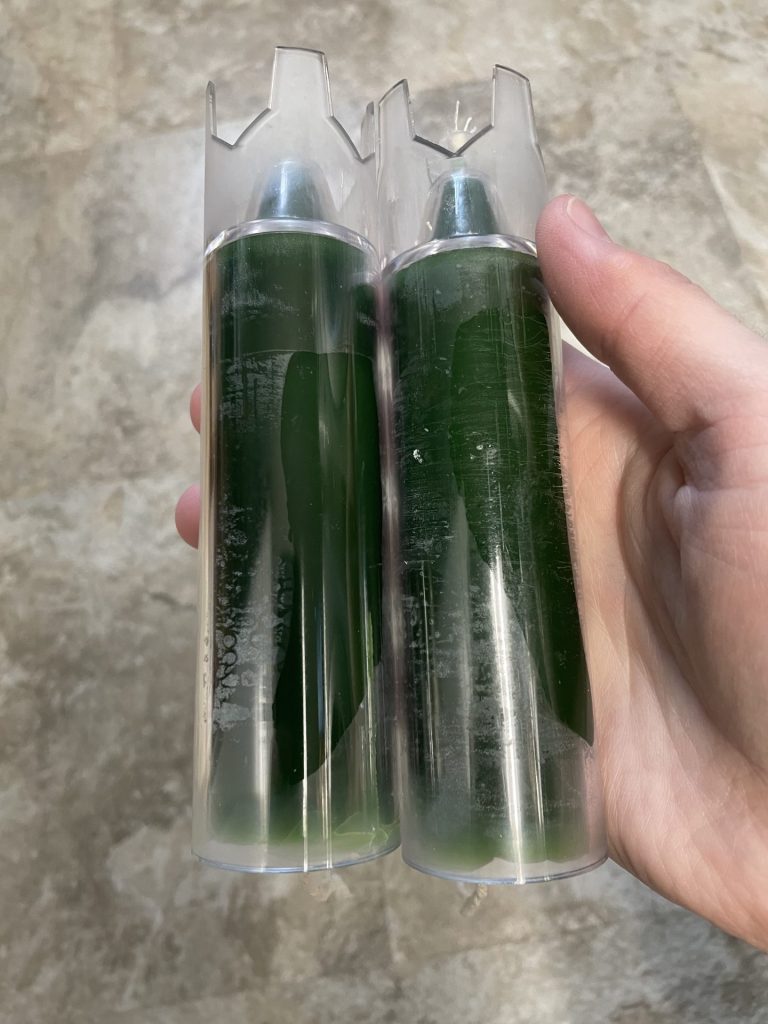
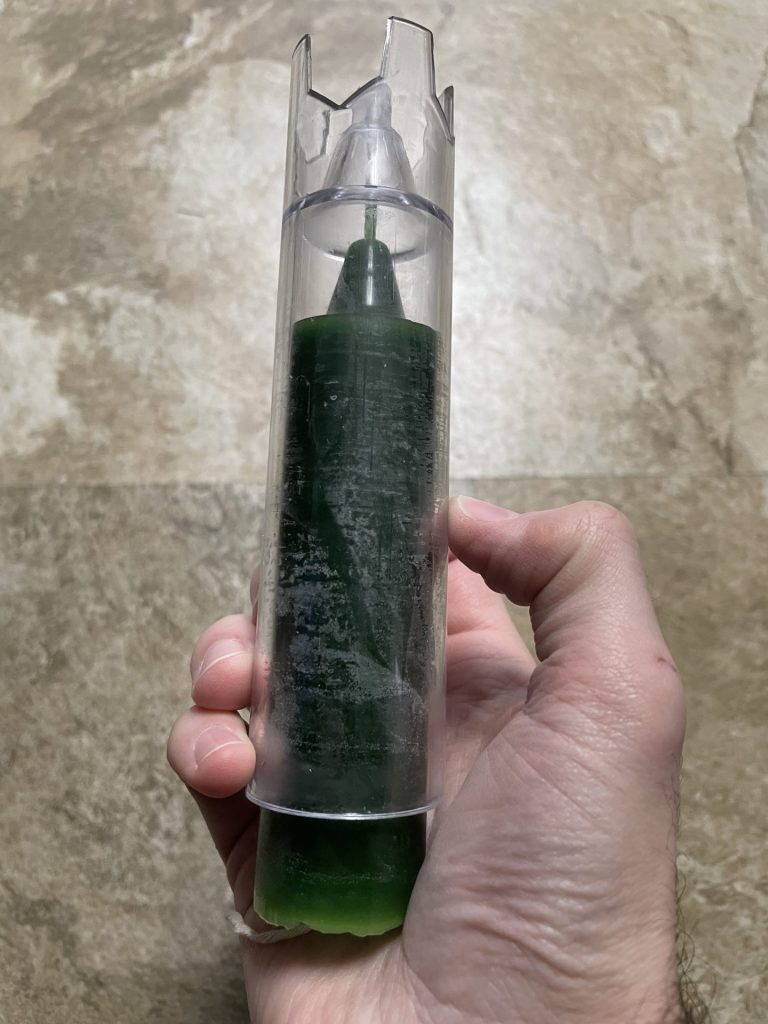
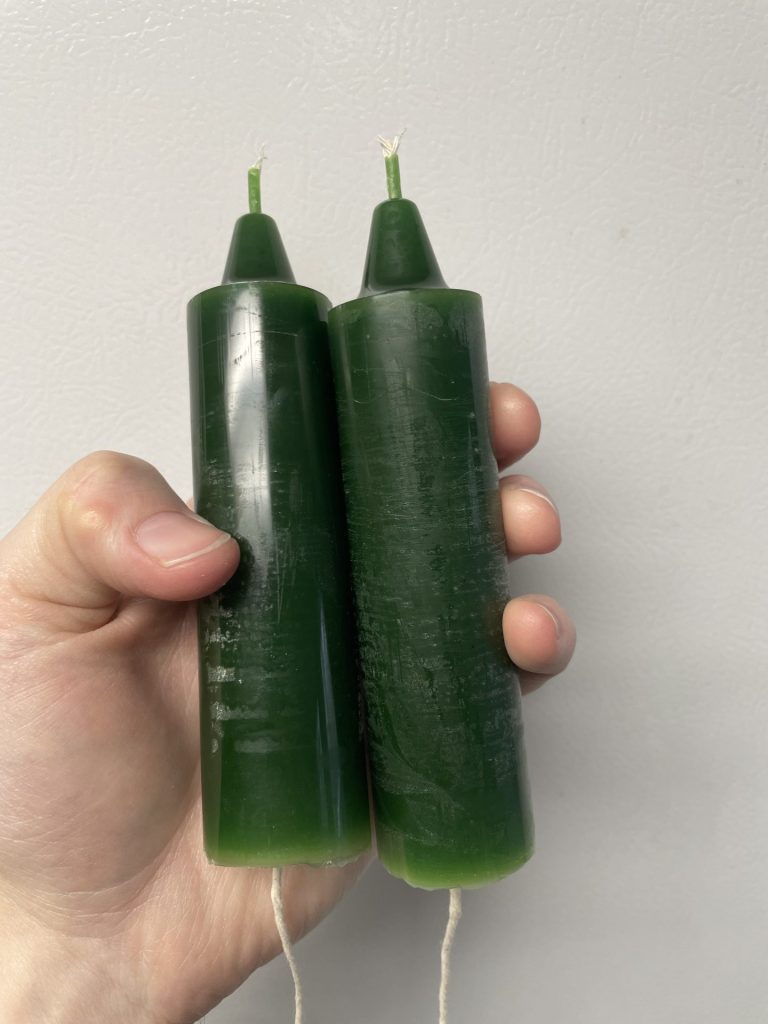
Step 1: Choose a Mold Size 


Next thing you will need to do is choose a mold size. You can also make dip tapers, but that takes a lot more wax and skill and is much more time consuming. Also, it’s less precise. 


So for the purpose of these article I’m only going to cover casting tapers, for which purposes you’ll need a mold. 

  I hate to point you in the direction of Amazon but they seem to have the best prices on cheap, serviceable taper molds that are pretty tough and which (I think) are made of acrylic. 
How to make taper candles.
These are some of the acrylic molds I commonly us when making taper candles. They're affordable and very easy to use, plus they're pretty durable.

I have a few different molds, but I like the size and use of these candle molds from a brand that you can hardly pronounce if English is your mother tongue. 


There are also two-piece molds that break apart, making it easier to get the candles out.


Either way, use what works for you. A one-piece mold isn’t terrible because if you chill your candles in the freezer like I do, the wax will shrink enough that it will be easy to back the candle right on out of the mold without even using a release agent. (More on that below).


Step 2. Make a Wick-Threader and Thread the Wick


One thing you will definitely need to buy or (my recommendation) improvise is a wick threader. Without a wick threader it’ll be damn near impossible to get the wick through the hole at the bottom of the mold.


For this, I use beading wire. Simply double it back on itself so that there’s a loop with a point at one end, similarly to how I show in the picture below.

How to make taper candles.
In this image you can see the wick threader I've made from silver beading wire, how I've formed it, and how you can use it to pull the wick through the hole at the bottom of the mold.

Then, you can insert it up through the mold like this, thread the wick through it, and pull it back down through the bottom of the mold. 


Now that I think of it, now would be a good time for me to tell you what to use for a wick, wouldn’t it be? 


I recommend cotton twine, although you can buy any commercial wick you want to use. You can also use pretty much any plant-based fiber. 

How to make taper candles.
Cotton twine makes a fine wick for taper candles.

Stay away from synthetic fibers, as, though they will burn, they will also melt and will probably release toxic fumes. Not sure about the latter but I’m not taking any chances, nor am I encouraging you to. 


Here’s some of the cotton twine I use. It’s not that dissimilar from the cotton I used in the creation of the jar-lamp that I wrote about a few months hence. 


Make sure you use enough wick that you have a few inches protruding from both ends of the mold. 


Once you have the wick pulled through the mold, there are a few more things you need to do before you can melt and pour the wax.


Step 3: Make a Wick Centering Tool and Center the Wick


One is to make a wick-centering tool. This is another thing you can buy but I see little reason to waste the money since you already definitely need a mold, wax, and a wick. 


I am not a gambling man but I’m quite certain you can make a wick-centering tool with whatever you have lying around the house. 


As for what I use, I get a bamboo skewer, break it in half, then bind both ends together tightly with tape. Electrical tape and duct tape both work well. It looks like this when finished. 


How to make taper candles.
Save yout hard-earned dollars. Don't buy a wick-centering tool when you can make one out of a single bamboo skewer and some tape, as I have. Here are two I made, it couldn't be easier to replicate my process (details in text).

Before you use it, though, tie a knot in the bottom of the wick where you’ve pulled it through the mold. 


Make sure the knot is a tight overhand knot. If you want, you can tie a bight in it, that will make it easier to release so you can pull the candle free when you’re done casting and cooling the wax. 

Now, with the knot tied in the bottom of the wick, use a knife to pry open the wick centering tool.

How to make taper candles.
Use the point of your knife to pry apart the two halves of the wick centering tool and pull the wick through. When you withdraw the knife, the centering tool will bite down on the wick and hold it in place.

Pull the wick through the wick-centering tool and slide the knife out. The centering tool will close on the wick.


Then, feed the wick through the centering tool until it’s taut, cinching the knot against the base of the mold. 


If you do this tightly enough, you won’t need to use any candle sealant around the base of the mold. This is a sticky compound that candle makers use to prevent wax from dripping through the wick at the bottom of the mold. 


If your knot is good and you pull it tight enough, you shouldn’t have a problem. A little wax will wick through at the bottom but if your wax is the right temperature it will harden and prevent any more wax from leaking through. 


Once you’ve cinched down on the wick, center it in the middle of the candle. It should look like this:

This is how the mold will look, wih the wick pulled through and secured before heating and pouring the wax. NOTE: The centering tool is, at this point, only used to apply pressure to the wick, but the wick itself is not centered yet. It has been moved to the side to facilitate the pouring of wax.

A good practice is to do this over a paper plate with a layer or two of paper towels beneath it, that way if the wax does seep through, you’ll have something absorbent underneath to catch it all. You can see this in the image above.


Now you’re ready to get started heating the wax. 


Step 4: Melt the Wax

How to make taper candles.
Here are some scraps and pucks of wax, most if not all paraffin, in my aluminum wax melting canister, and ready to go. Make sure you only heat the wax over a very low setting. Stay in the room and if the wax start to smoke at any point, immediately remove it from the burner.

You’ll need a metal pan to heat up the wax. There’s more than one way to do this but I do it over an open flame. 


It’s fast and effective but the drawback is you need to be very careful and attentive.


If you’re heating wax over an open flame, use the lowest setting possible. If you are aggressive with the stove, the wax will melt partially and the melted wax will quickly start to smoke. 


This is extremely dangerous, as once wax starts smoking, it’s getting close to its flash point and can ignite. You do not want to deal with a wax fire in your house (which is basically a grease fire). 


Make sure you are present the entire time you are heating the wax. As I said, only ever heat it on a very low setting and do not leave the room. 


If the wax starts smoking, even just a little, immediately remove it from the heat. You’re at risk of a flare at that point. 


Ideally, you want the wax to just melt and stay at the temperature, or very close to the temperature, at which it liquifies. This way it will harden quickly once you pour it in the mold. 


Either way, keep the wax on the low heat until it’s all melted, then remove it for a few moments. 


Step 5: Pour the Wax


Once the wax is entirely melted, make sure you have your wick centered, and you can start pouring. 

How to make taper candles.
A freshly poured mold with hot wax. Let it cool until it is semi-solid and you can chill it.

I would like to add a note of caveat here. Most guides on how to make taper candles (or any candles, for that matter) will require you to spray some sort of release agent or oil inside of the mold. 

I don’t require that, but only because I am recommending you chill the mold when you’re done. So be aware I am omitting this customary step only because I am building in another step – you need to chill the molds after you cast the wax – see details below. 

At any rate, once you actually start pouring, pour very conservatively at first, only just barely covering the base of the mold and the wick. If the wax does pour through the wick, you’ll want to stop pouring and let it harden before you have an entire mold of wax that will leak through the bottom and max a massive mess that will be a huge pain to clean up. 

Once you’re confident your mold isn’t leaking, fill it up nearly to the base – nearly as deep as you want your candles to be tall. 

Very carefully – you don’t want to spill the wax – ensure that the wicks are centered, then let the wax sit for a while until it starts to solidify.

Step 6: Chill the Molds

After a while – it will depend on how hot the wax was when you poured it as well as the temperature of your home and the volume of the mold, but it will probably take more than a half hour – the wax will have cooled to the point that it is opaque and semi-solid. 

How to make taper candles.
These molds are filled and semi-cooled, so they are ready to chill. They can be placed in the freezer or outside if it is cold enough, preferably below freezing.

Feel the molds, carefully. They should still be warm if not hot, but the wax should have at least cooled to the point that it wouldn’t spill if you tipped the mold over. 


Once you are confident that the wax has at least cooled to the point that it is solid, though soft, you can place your molds in the freezer (or outside, if it’s cold, sometimes I do that instead). 


Drop them in the freezer, upright, that way they don’t spill if there is any liquid wax remaining, and then let them chill for a while. 


It could take an hour or more. But check them periodically. Once they’re cold to the touch, they’re probably ready to go. 


You’ll also notice that as they chill, they start to pull away from the sides of the mold. 


Take them out – they’re ready to remove. 


Step 7: Remove the Candles

How to make taper candles.
This candle is chilled, to the point that it readily slid out of the mold. Yours will be too if you chill them.

Once the candles are chilled and the wax has started to separate from the mold – you can actively see this upon inspection – you can pull them out.


The first thing you need to do is pull them out of the freezer or, if you are chilling them outdoors, bring them in. 


Then, either pull the bight free that you have formed in the end of the wick. If you have tied a knot without a bight, cut this with a knife so that it is flush with the hole at the end of the mold which corresponds to the tip of the taper candle. 


With this done, pull gingerly on the tag end of the wick at the open end of the mold. The candle should slide free. 


If it doesn’t come out, find yourself a piece of wood, like a two-by-four. Tap the mold gently on the wood to dislodge it. It should come out readily but you can coax it out by pulling on the wick. 


With that done, trim the wick at the base of the candle. You’re ready to light them whenever needed. 


Repeat


How to make taper candles.
These tapers have cooled, been removed from their molds, and are ready to use.


That’s the basic process you need to follow for making your own taper candles at home.


I hope you found this useful. Now that you’re armed with this knowledge, you need never waste another scrap of soy, paraffin, or beeswax again. Don’t throw out those old candles. Just recycle them. 


If you liked this post, make sure you check out my other related posts on how to make an oil lamp from a jar (link above in this article), as well as my guide on how to make a candlestick from stuff you got at the hardware store


Stay bright. 

~The Eclectic Outfitter 

2 thoughts on “How to Make Taper Candles (by Casting)

  1. Marcel says:

    Ok so. First. Excellent intro. I love quotings of scripture. Second, incredible advice right off the bat: “never strike a match without lighting a candle”. It had never ocurred to me, and now i´m definitely applying it at home.

    Looking forward to the inverted pot-heater blog.

    Reply
    1. TheEclecticOutfitter says:

      Sorry I didn’t reply sooner, I didn’t notice this comment! Glad you appreciated the quoting of scripture and found the advice useful. Now you need to get some wax and make some candles.

      Reply

Leave a Reply

Your email address will not be published. Required fields are marked *

Eclectic Outfitter