The Recycling-Bin Candle (How to Convert an Old Jar into an Oil Lamp)

Oil lamp from a jar
Simple, effective, practical, gratifying...and strangely beautiful.

“May it be a light to you in dark places, when all other lights go out.” J.R.R. Tolkien.

The power goes out. You can’t use an electric lamp. You have no spare batteries and your flashlights are all dead, or worse, you don’t have a flashlight at all for some reason (a separate issue I suppose I will need to address in a subsequent post). You don’t even – wait for it – have any candles around.


What can you do?


Head out back and dig around in the recycling bin for an old glass jar with a metal lid. If you can find one of these, have some oil around, and some twine or cotton string, you can improvise a pretty legitimate oil lamp. Here’s how to do it. 


Step One: Find an Appropriate Jar


The first thing you need to do is go find a jar that will work for this. What jar will work, you ask? Basically any glass jar with a screw-on metal lid. Plastic jars are a no-go, as are plastic lids. They will melt or start fires, which is not the objective here. 


Pickle jars work well, but just about any glass jar will work for this. You can even convert a mason jar into a makeshift candle using this method. Just know that once you punch a hole in the top of the metal lid, you won’t be able to can with it. Making an oil lamp from a jar is a one-way process.


I’m going to use this old jar that once held vanilla bean paste, which I pulled out of my recycling pile.

Oil lamp from a jar.
This is an old jar that used to hold vanilla bean paste. I fished it out of the recycling, cleaned it up, and it's good to go. Plus, at this size, it's perfect for this tutorial.

Step Two: Find an Appropriate Wick and Prepare the Lid


Next, you need to find a suitable wick for this lamp. You can use a store-bought wick, which is actually a replacement for a bonafide oil lamp, but my guess is if you have one of these laying around, you don’t need to make a lamp out of an old pickle jar because you already have an oil lamp somewhere.

Oil lamp from a jar.
This is pure cotton rope that I had lying around. It'll work perfectly for this. (Synthetic fibers will melt and won't wick the oil effectively.)

The best advice I can offer you is that any natural fiber will work for this. Similar to my observation in my “How to Make Char Cloth” post, synthetic fibers will melt when you apply flame to them. They will wick the oil and will work, but I advise against it. 


Your best bet is jute twine, cotton twine, or even a strip of cotton canvas. If you have cotton cloth, rags, or old clothes lying about, you can tear off a strip of any of these to use as a wick, too. 


I’m going to use a bit of cotton rope, which I had on hand. I’m not using the whole thing, as you can see in the image below, I’m unwinding some of the fibers and will be using the ones I pulled off. At this thickness (about ¼”) it will soak up a good bit of oil and throw decent light.

Oil lamp from a jar.
The jar and wick segment almost ready to be assembled. I just need to punch the lid.

Once you select a wick, cut a length of it that is a few inches longer than the jar is tall. Next you will need to prepare the metal lid to secure the wick.


Remove the lid from the jar. You’ll next need to punch a hole through the lid from the bottom to the top. This will make it easier for you to slip the wick through in that direction, and also make it harder for the wick to slide through the opposite way; that is, it will be harder for the wick to slip down into the jar.


The tool you’ll want to use to punch the hole for the wick should be narrower than the wick is. For instance, if you’re using a thin cotton string or jute twine for the wick, choose a nail that’s just about as wide (but a little thinner) than the string or twine. 


Since the rope segment I’m using is a bit thicker, I’m going to use a slightly thicker general-purpose carpentry nail. Below is a picture in which I’m prepared to make the preliminary punch.

Oil lamp from a jar.
You can use pretty much any sharp metal object to pierce the lid. I'm going to use this general carpentry nail because it is not likely to badly tear the lid. Make sure you punch from the inner to the outer surface; the ragged, upward facing hole will help secure the wick.

Once I’ve done this, I can remove the nail and force a tool through the hole to widen it until it will receive my wick. For this, I’m going to use a set of pin punches.

Oil lamp from a jar.
Progressively widening the hole with pin punches until the hole is just slightly thinner than the diameter of the wick.

Once the lid is prepared, I can feed the wick through.

Oil lamp from a jar.
Once you punch the hole, you can feed the wick through the lid.

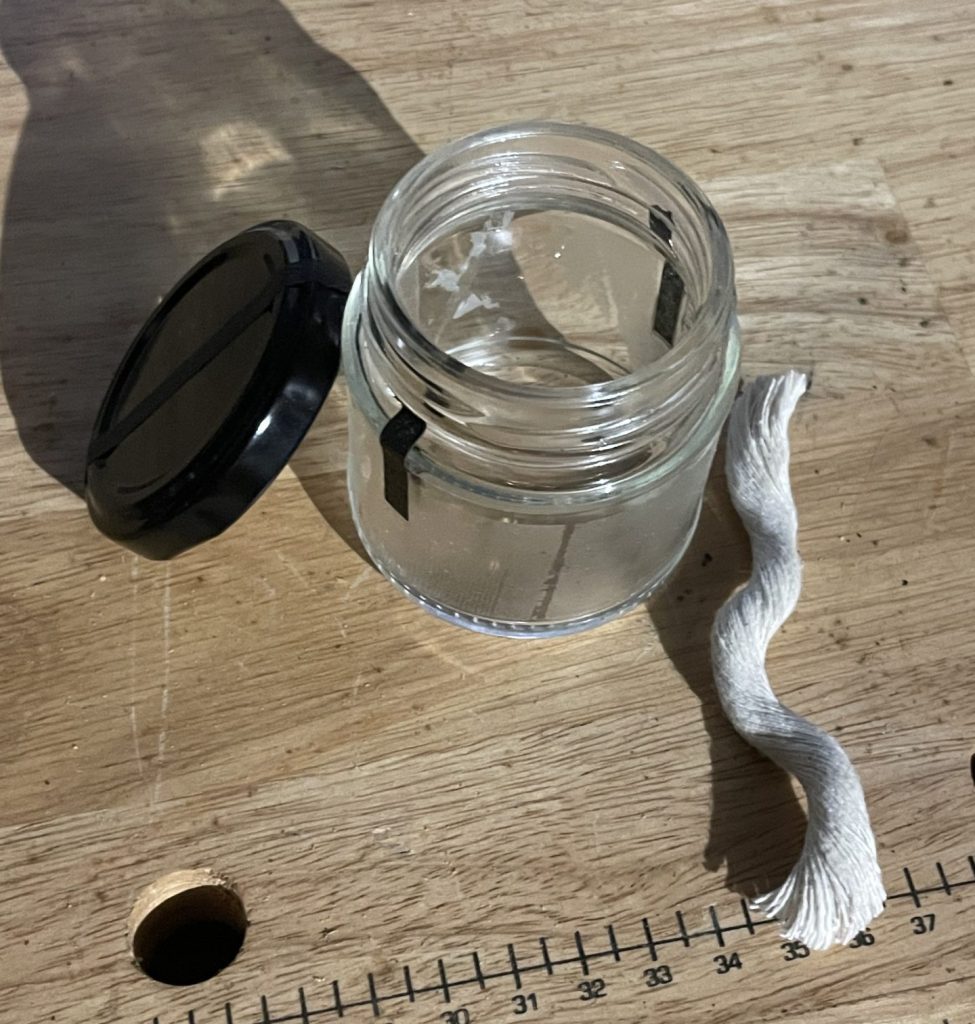
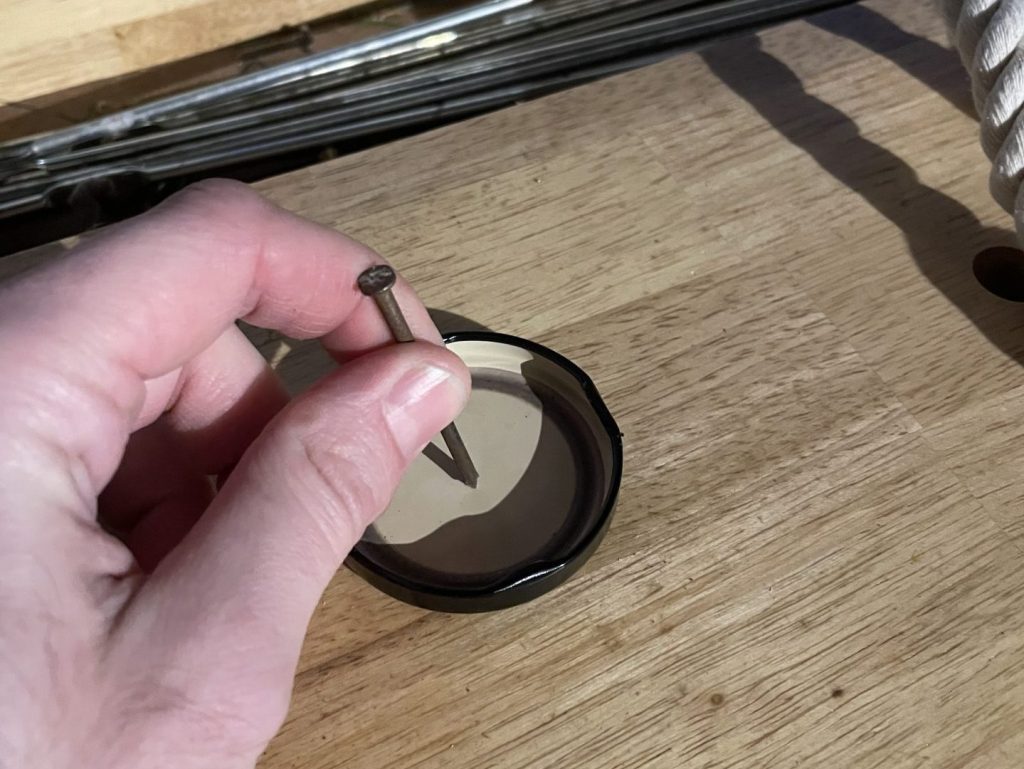
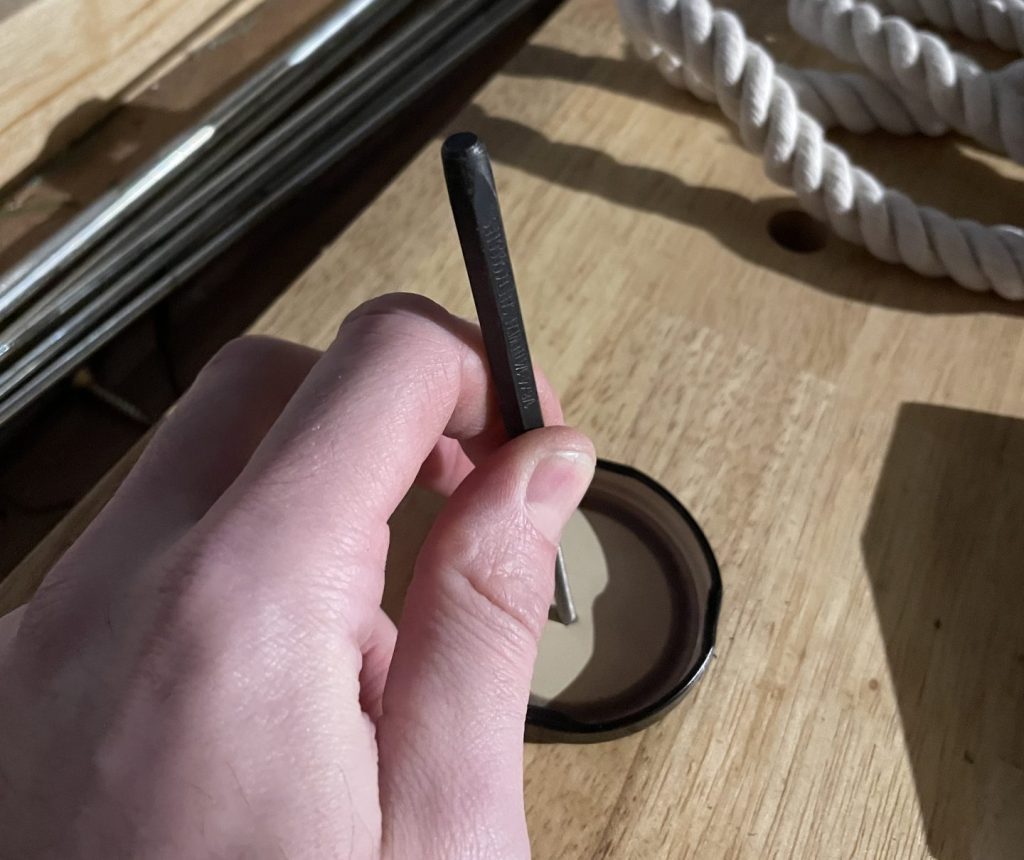
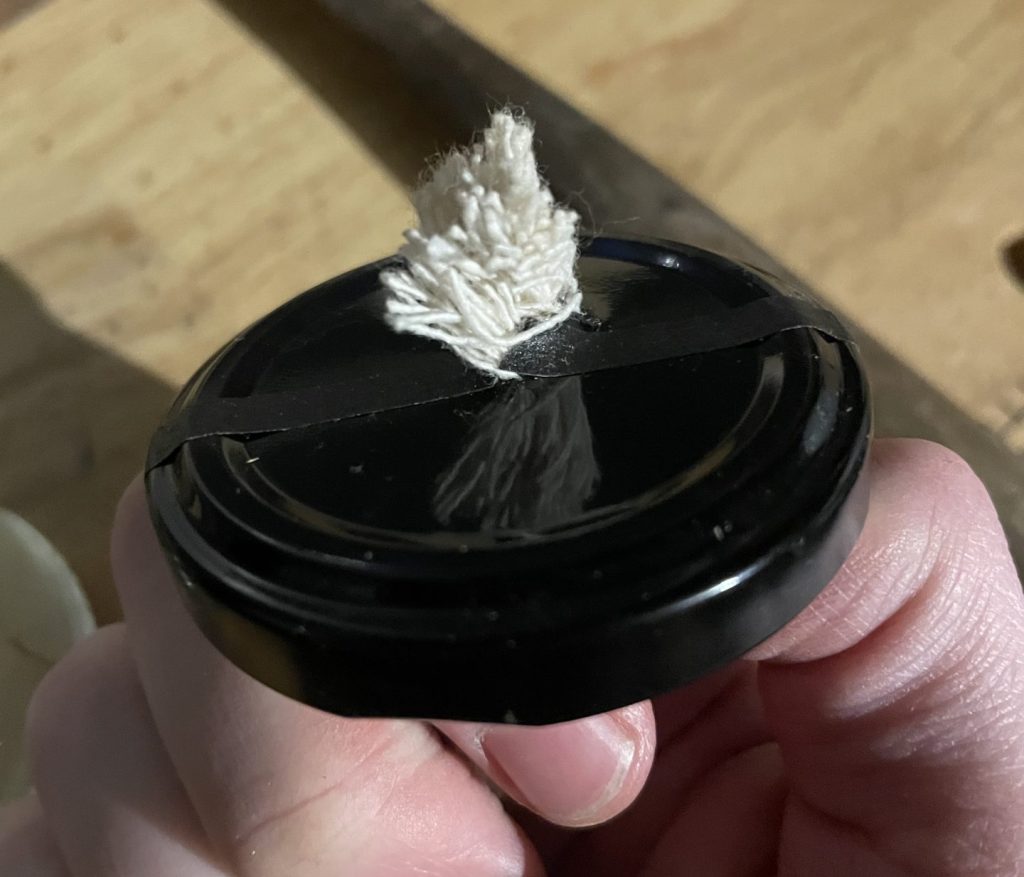
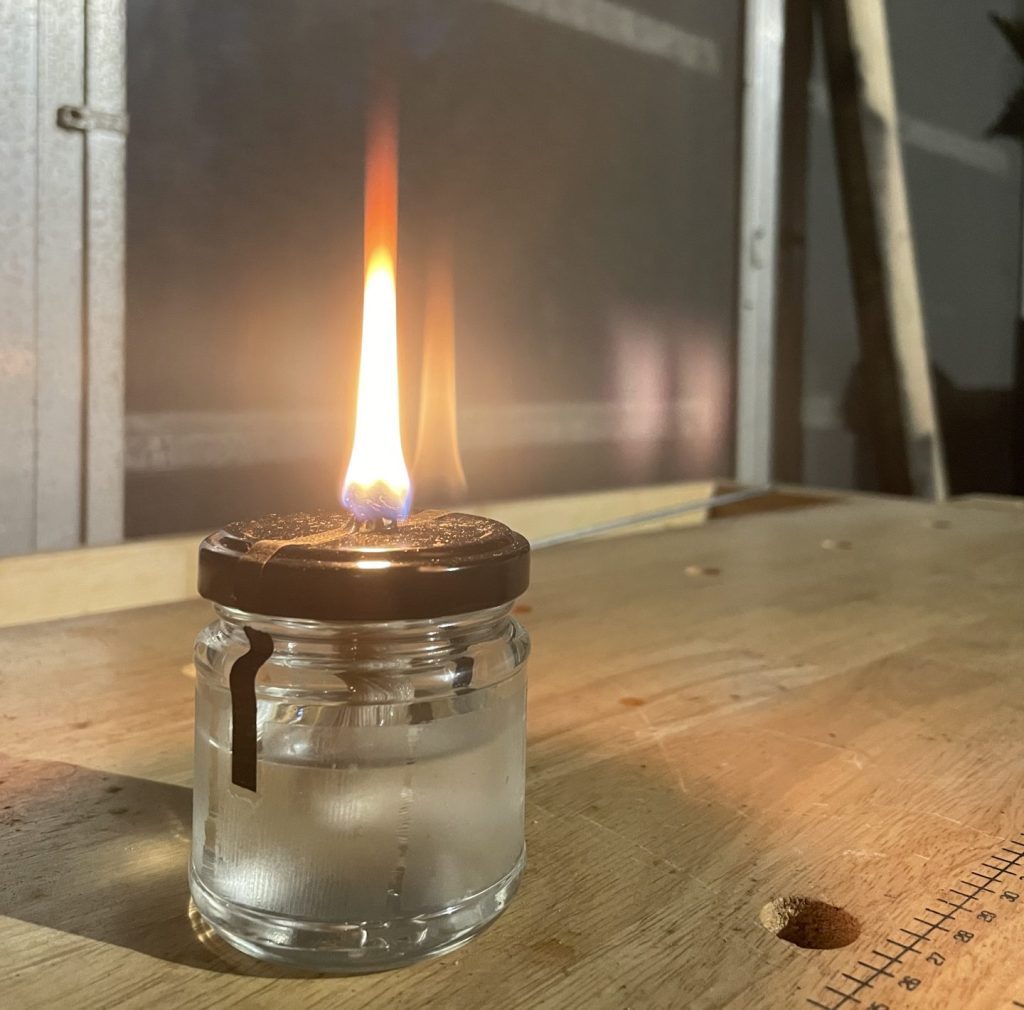
At this point, you should have about a ½” or so of the wick above the lid. If you like, you can tie a knot in the wick to prevent it from sliding back down into the jar. However, this isn’t necessary for my setup, given the thickness of the rope I’m using for a wick.


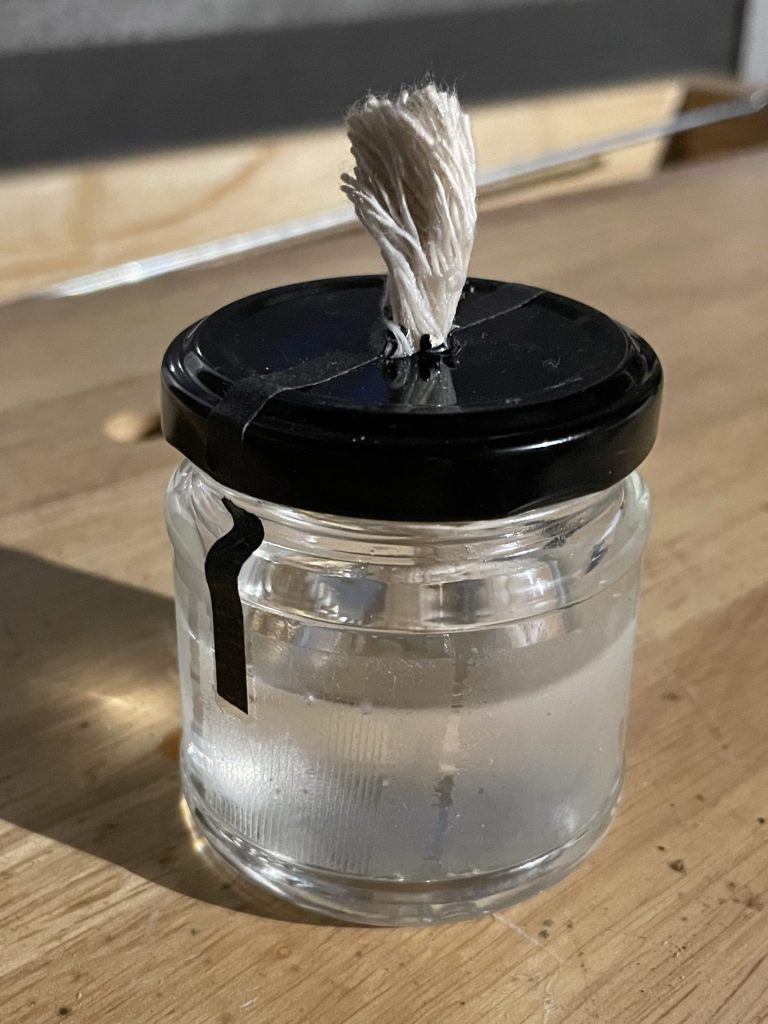
Step Three: Find a Suitable Oil and Fill the Jar


Here’s the second best part of this project (the best part is the gratification of making something on your own): you probably have a load of suitable fuel oil just sitting around your kitchen or house.


Again, my guess here is if you have liquid paraffin, you’re already prepared with an oil lamp and don’t need to improvise the process of making an oil lamp from a jar you found. Even if you don’t, lots of other oils will work well. Pretty much any cooking oil is great for making a candle; you can use canola oil, vegetable oil, peanut oil, corn oil, and yes, even olive oil. 


If you use a cooking oil, I suggest using one such as vegetable or canola oil, as the others can be pretty expensive and you’re literally going to be burning it. 


Pretty much everyone has some mineral oil around their house. This also works very well as a lamp oil. In fact, mineral oil is chemically very similar to the liquid paraffin oil that is sold commercially as lamp oil.


(No, unfortunately, vaseline will not work well for this project because it is too thick to be easily wicked. It is flammable though, and does have a billion other cool uses, especially in firecraft.)


Other oils will work too, such as essential oils, skincare oils (like castor or jojoba) or even automotive oils. However, I do not advise using any of these. They are either too expensive, too volatile, or too flammable to safely use. Will they burn? Yes. Is it worth the risk or expense to you? Unlikely.


So my vote is for some cooking oil or mineral oil (what I’m using). My bet is also that you already have these in your house.

Oil lamp from a jar.
Fill the jar with oil before screwing the lid back on. Leave an inch or two of space beneath the wick so the lamp doesn't overheat the oil. You'll need to let the wick start to absorb some oil before lighting, so wait a few minutes or tilt the lamp slightly on its side to speed up the process.

When you fill the jar with oil, make sure you leave an inch or two of space between the top of the oil fill and the lid of the jar. This will prevent the lid (which can get very hot while you’re burning the lamp) from heating up the oil beneath it and creating a risk of flares or fire. 


Step Four: Light


Once you’ve selected a jar, prepared a wick, punched the lid, set the wick, and filled the jar with your fuel oil, all that’s left to do now is light it. 


If your wick is too long and producing soot, simply trim it down until the smoking stops. It should burn basically like a candle flame.


With the wick properly trimmed, your lamp should look like this:

Oil lamp from a jar.
Once the wick absorbs some oil, go ahead and light it. If it smokes too much, blow it out and trim it down. If the flame is too small, blow it out and pull a little more wick out. It's that easy.

And that’s basically all there is to it. 

Disclaimer on Making an Oil Lamp from a Jar

I actually can’t believe I need to say this, but don’t light one of these things and leave it burning unless you are in the immediate area. If the jar breaks it’s going to make a righteous mess. You can make an oil lamp from a jar, but by Jove, be smart about it.


This is an improvised lamp; with a metal lid and a glass body. When burning, the lid will transfer heat to the glass and the jar can crack, so you want to be near this thing at all times. 


Remember, this is just a creative solution to a blackout situation and a lack of candles. It shouldn’t be your go-to solution to lighting your home. There are better ways!


And a few tips, before I cut you loose to experiment. When your wick burns down, just use a pair of pliers to pull some more out from the jar below. This is why you started with a section of wick that was about as long as the jar is tall. Keep the wick short, though, or it’ll smoke.


One more thing. If it appeals to you to burn scented oils, you can use the lamp oil itself (in this case, mineral oil) as a carrier for essential oils. If you put a few drops of essential oil in the lamp oil inside the jar, it will throw a nice scent as it’s burning.


Stay safe and shine bright.


~The Eclectic Outfitter

Leave a Reply

Your email address will not be published. Required fields are marked *

Eclectic Outfitter