How to Make a Simple Hummingbird Feeder

Hummingbird Feeder
Making a hummingbird feeder is easy (I actually surprised myself with how easy this project is) and you can make one from what is, basically, junk.


“No bird soars too high if he soars with his own wings.” ~William Blake

You can buy a hummingbird feeder at a hardware store and at most big box stores for a dollar or something thereabouts. So why would you make one when you can buy one so cheap?


How about because you probably go through all the materials you need multiple times per week and throw them away without even noticing it. With a little creativity you can easily make a hummingbird feeder and it’ll cost you nothing. It’s the perfect type of project to get you into upcycling and make your yard a more friendly place for hummingbirds – which, by the way, are a joy to watch. 


There’s more than one way to skin a cat, but all you’ll need for this are a glass bottle, some wire, some thin plastic tubing (not more than half a centimeter outside diameter (this is crucial), and a stopper for the bottle. You may also need some paraffin wax, though I did not. 


Humingbird feeder
Just the basics are required for this project: A bottle, a stopper, some thin tubing, some annealed wire, and some pliers.

You’ll also need some basic tools, either pliers or a wire-forming tool as well as a drill and a bit for getting through the stopper. 


So, let’s get into it. 


Choosing a Bottle


You can pretty much use any bottle for this, but a bottle with a thin neck that will accept a rubber stopper will be easiest to use. 


Also, smaller bottles are preferable because they will exert less pressure on the tubing, making it less likely that your hummingbird food will drip out. 


As you can see, I’m going to use a Corona bottle. For one, it’s the same size. The other reason is Corona bottles are clear so if you use red-colored hummingbird food it will attract them better. Glass is also very durable and UV-proof, whereas plastics are not. One more reason: glass is less likely to leach anything into the hummingbird food.


Preparing the Stopper


You don’t actually need to do this in any particular order, but the first real step I’m going to start with is making the stopper.


You’ll need to use a stopper that fits well into the neck of the bottle. I’m using a black rubber stopper that I bought at the hardware store for a few pennies. Here it is, demonstrating the fit it achieves in the neck of the bottle (after I prepared it).

Hummingbird Feeder
The rubber stopper you use must snugly fit in the neck of the bottle. Here is the one I used, after I already drilled it and inserted the tubing.

What you need to do next is check out the tubing you purchased for the task. Select a drill bit that is the same size or just a little bit smaller, and drill through the stopper. 


Here is the stopper, prepared. 

Hummingbird feeder
I had to drill the middle out of this rubber stopper with a drill bit. I started with a size smaller than I thought I'd need to ensure I didn't overdo it. The plastic tubing must fit snugly inside of the stopper or it will leak.

Cut off a section of the tubing that retains enough memory so that with the tubing inserted into the bottle it still creates not more than a 90° arc. Honestly, a narrower angle is better, such as 75° or even 60°. This will also help prevent the hummingbird food from leaking out. 


Optional: Waxing the End of the Tube


The next thing you may need to do to prevent the hummingbird liquid food from leaking out of the bottle is decrease the opening at the end of the tube. This magnifies the surface tension of the liquid and makes it almost impossible for it to drip out thanks the vacuum pressure that will be created at the top of the bottom when the feeder is filled and inverted. 


To do this, you’ll need to wax the open end of the tube using hot, melted wax. I’ve use paraffin because it is cheap and easily available. If you had red paraffin, even better, as hummingbirds are attracted to this color. 


Melt the wax and dip the end of the tube into the melted paraffin up to about a centimeter down. Do this until there are only about 2-3 mm of clearance at the orifice of the tubing. This, as stated, will help prevent leaks. 


Note: I didn’t have to do this because after I inserted the stopper and tube into the bottle and filled it with water, my bottle didn’t leak. This is just an added precaution for you to follow if you use my method and the feeder you make leaks.


Wiring the Bottle


The next step is creating a wire fixture that will be used to secure and hang the bottle. There is no single set way to do this and you can do whatever works best. 


My method is fairly simple but again it is not the only way. Start by cutting off a length of wire about 2 feet long. Make a sharp bend in the middle, then place it around the base of the neck of the bottle. 

Hummingbird feeder
To wrap the bottle in wire so you can hang it, start first by making a bend around the middle and twisting the wire around the neck of the bottle.


Create a single full wrap around the base of the neck of the bottle, as shown above.

Hummingbird feeder
After you wrap the neck of the bottle, run the wire up the sides of the bottle toward the base and double it back on itself.


Then, make a 90° bend in both ends of the wire, towards the base of the bottle. Then, when you get to the base of the bottle, make two additional 90° bends in opposite directions from each other.

The next step is to feed the ware around to itself and wrap the ends around each other to secure them. Then create one final right bend in the wire and make a “D” shaped loop at the top, twisting the loose ends of the wire together to secure them. 


If you follow the method I suggest, your hummingbird feeder will look like the image at the top of this blog.

Hummingbird feeder
I tested my hummingbird feeder with water after I sized and inserted the stopper with the tube. It didn't leak!


Making the Hummingbird Food


You can buy commercially mixed hummingbird food which is fairly affordable and contains red dye which naturally attracts hummingbirds, or you can make your own. 


I have some commercial food around so that’s what I’ll be using, but if you want to make your own, just follow a 4:1 ratio of water to sugar. That’s all you need; heating up the water a little first helps dissolve the sugar. 


If you want, you can add red food coloring, since that attracts birds. 


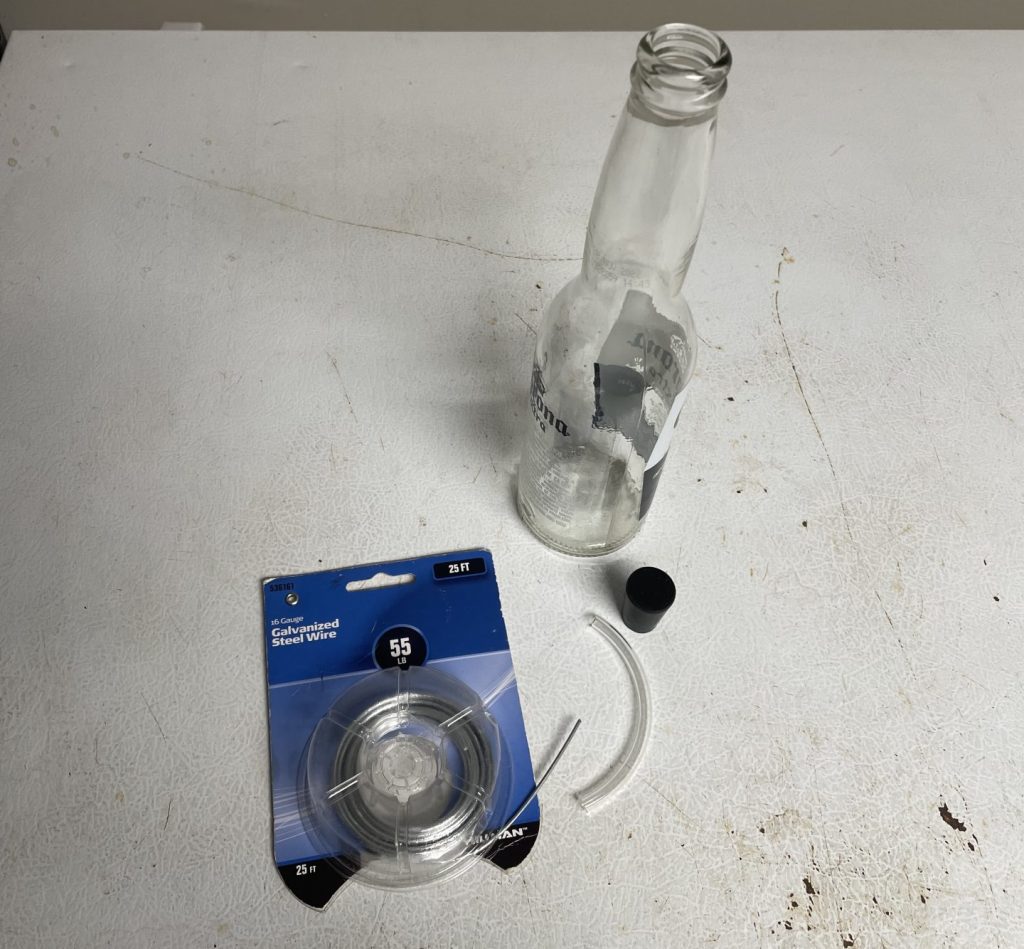
Filling; If the Feeder Leaks


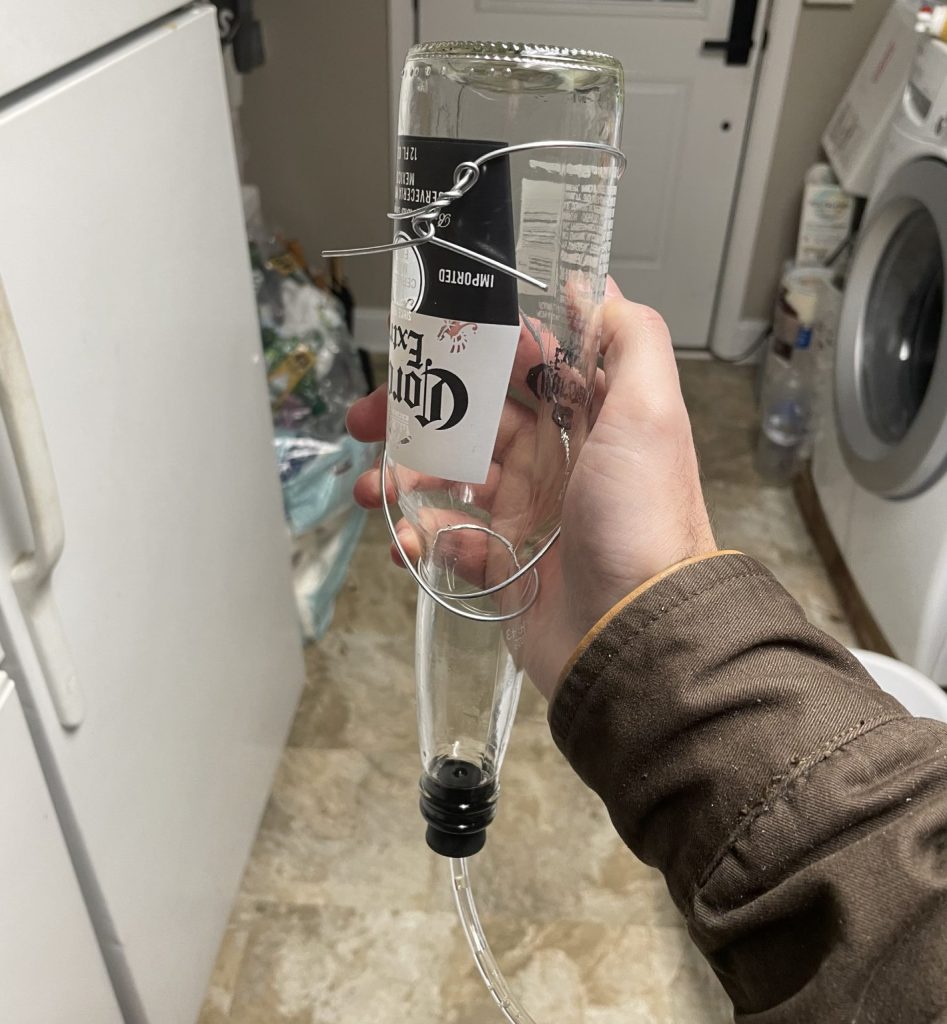
Since it’s winter right now, to demonstrate how to check for leaks, I didn’t use actual hummingbird food (picture above) – just water. 


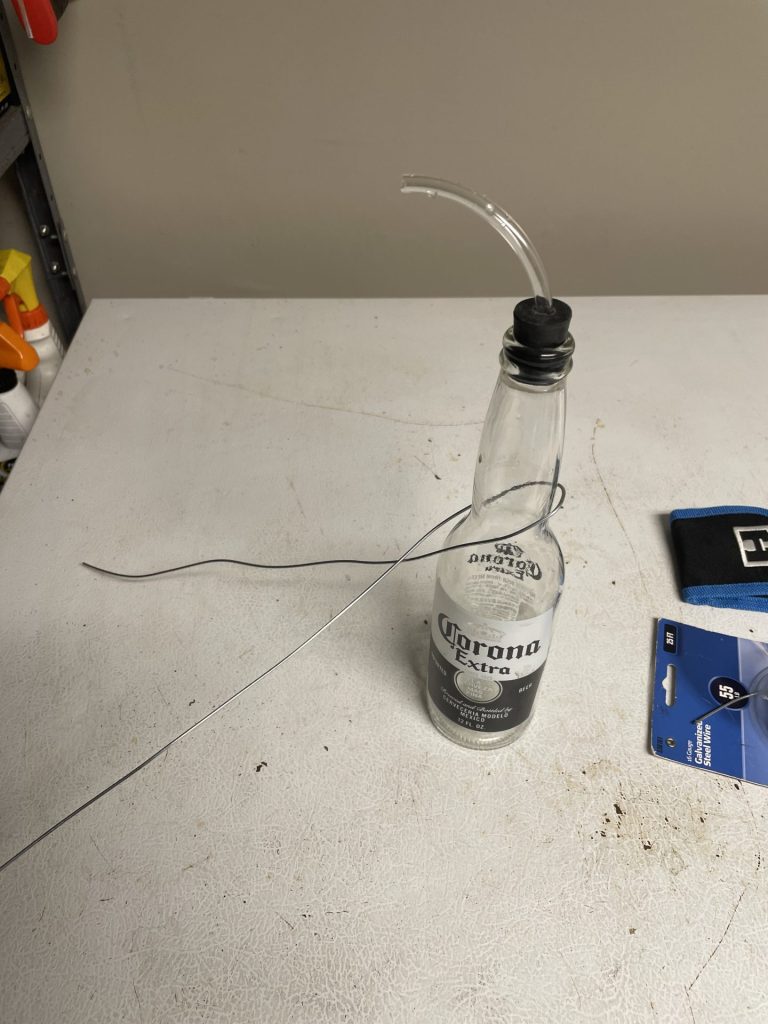
Fill your feeder nearly all the way, then plug it and invert it. 


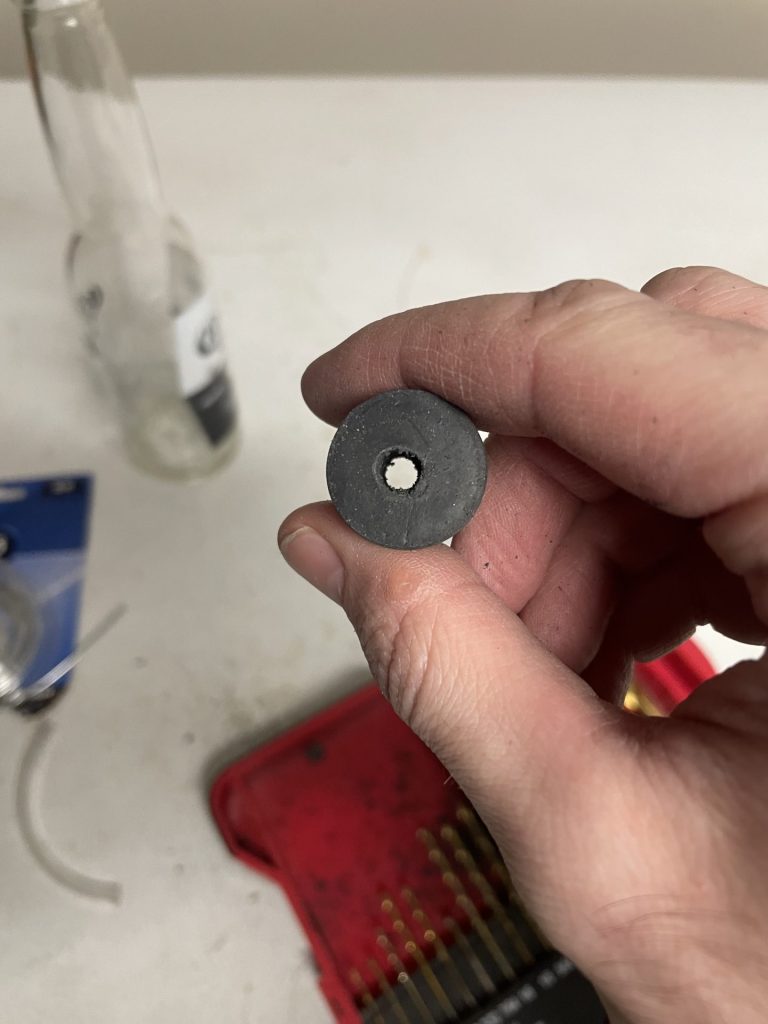
If you made the hole on the tube small enough, it shouldn’t leak. However, it’s also possible that it will leak when you’re completed. If it does, a little bit of wax on the inside of the rubber stopper where it receives the tube should solve that problem. Just drip a little melted wax in the area and it should clear the problem right up. 


I didn’t need to, so unfortunately I can’t illustrate this, but I’m confident by narrowing the inner diameter of the tubing with wax in the manner I have prescribed will solve the issue of any leaks.


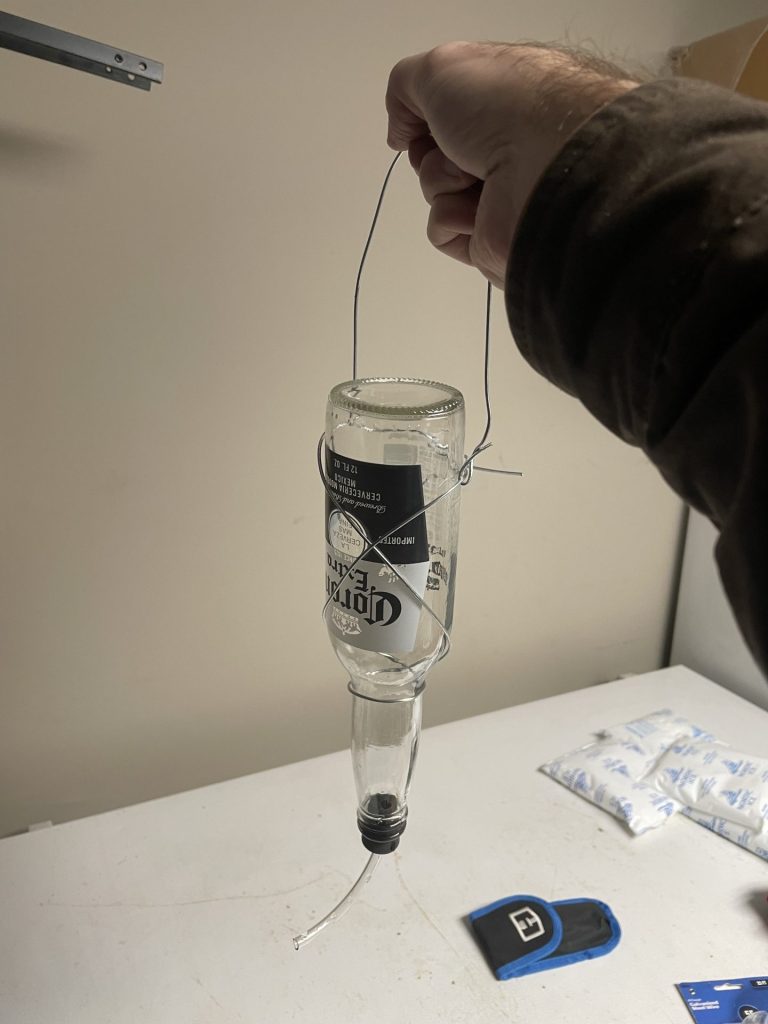
Where to Place the Feeder


Hummingbirds can be shy before they get used to people, but once they learn where they get accustomed to a feeding location, they’ll keep coming back time and time again. I’ve had birds come more or less right up to the house. 


My point is this: you don’t need to hang these feeders way out in the garden to coax the birds in. You can probably get away with hanging them right next to the window. 


Happy birding.


~The Eclectic Outfitter

4 thoughts on “How to Make a Simple Hummingbird Feeder

    1. TheEclecticOutfitter says:

      You can! Based on my (cursory) research, you have more hummingbirds by you than there are by me. In my area, we only have ruby-throated hummingbirds. Apparently, you have those in Alberta, as well as rufous hummings and calliope hummingbirds. If my hummingbirds are any indicator of yours, they’ll show up in your area around April or May (they show up here in March). Have the feeder ready by then and hang out some red ornaments or grow red flowers. Both will naturaly attract the hummingbirds.

      Reply

Leave a Reply

Your email address will not be published. Required fields are marked *

Eclectic Outfitter