Making a Basic Leather Slip Cover for Your Pocket Sharpening Stones

Leather Slip Cover
Making a leather slip cover like this for your sharpening stones only takes a few minutes of measuring, cutting and stitching, and will serve two functions: it will protect your delicate pocket stones and serve as an impromptu strop.

“A knife of the keenest steel requires the whetsone, and the wisest man needs advice.” ~Zoroaster

Recently, I was helping my brother in law rip up some of the carpeting in his home so he could refinish the hardwood floor lying under it. Understandably, this is a job that requires a knife. 


So, I broke out my CJRB Maileah and started cutting away. I’ve written at length about the steel quality and edge retention of the AR-RPM9 steel, but understandably, under more than an hour of cutting through carpet and the backing beneath it, my Maileah was as dull as a spoon. 


I didn’t have a stone with me, but there was more work to do, so I pressed through. 


I thought to myself for a moment, what’s the point of carrying a tool like that everyday so you can use it when you need it, if you don’t even have the means to sharpen it and maintain it properly. 


That’s like carrying a flashlight without batteries or a lighter without spare flints, and it makes no sense. 


So, later that weekend, I started scouring the web for some cheap Arkansas pocket stones that I could distribute through my packs, boxes and carry in my car so I’d always have one when the knife I was carrying went dull. 


I got lucky. That weekend, KnifeCenter.com ran a serious sale on Arkansas pocket stones and I got several of the small ones for less than $3 each and several of the larger ones for less than $6 each. 


Now, I have them in all the places I could possibly need them – but there’s just one catch here. I already had a few (just not enough) and the ones I had came either with plastic covers or nylon or leather slips. 


These did not, and storing a naked sharpening stone is not a good idea for two reasons. One, if you do, dust and what not will clog up the grit of the stone and decrease its efficiency. The other reason is that if you don’t keep it covered, the edges and surface are likely to get gouged or chipped. They may be hard, but they’re brittle. 


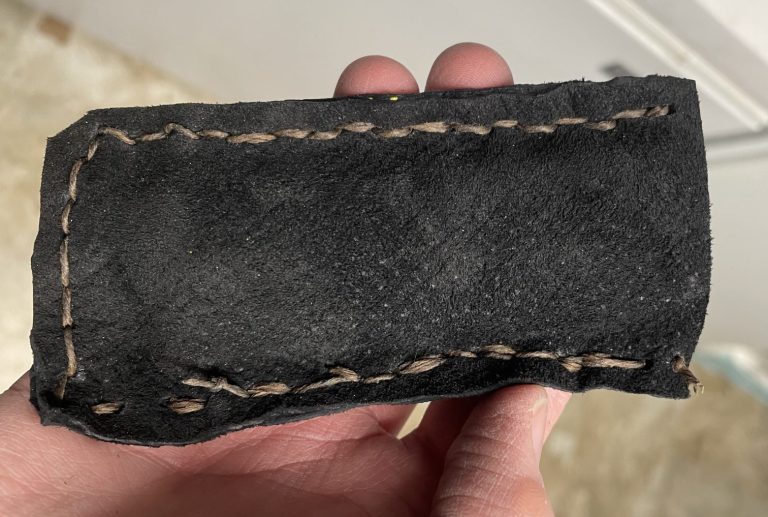
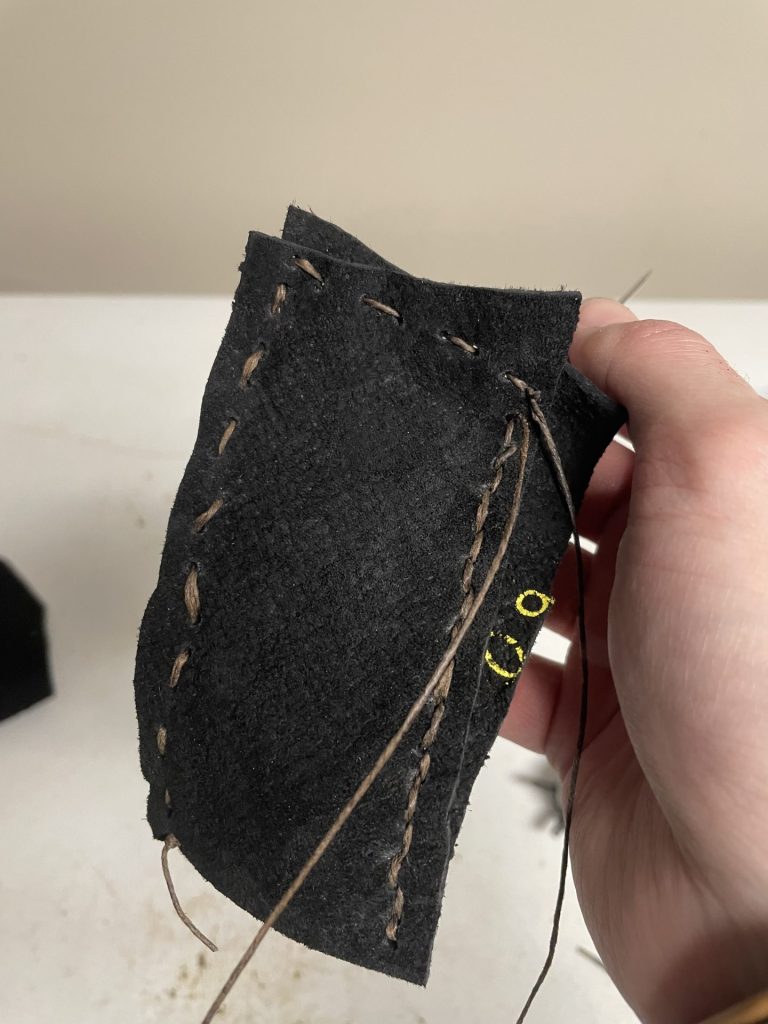
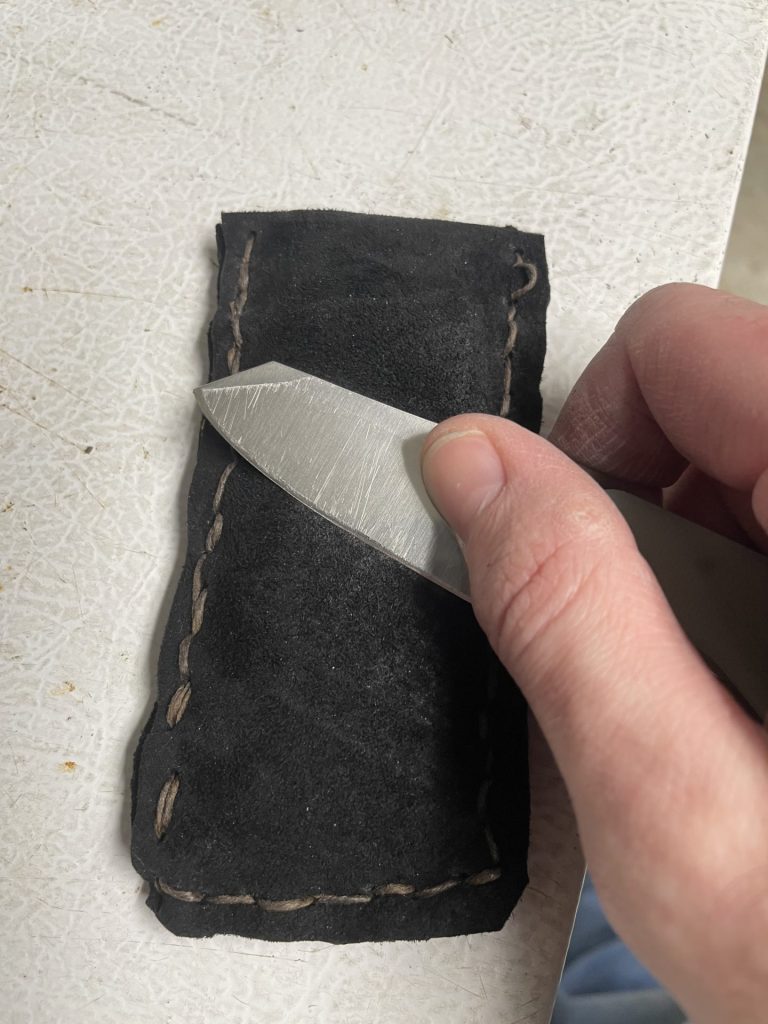
So, in the interest of maintaining and protecting the stones, I took it upon myself to make a few leather slip covers for the new ones I got. 
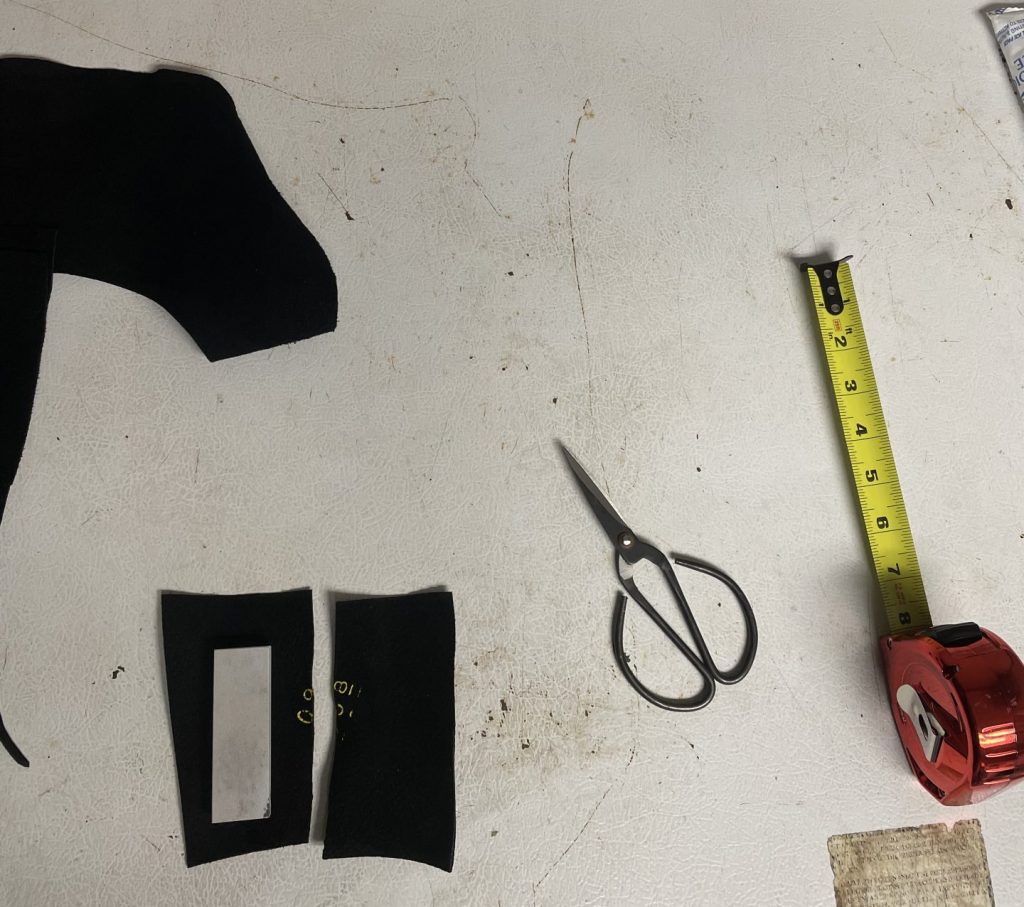
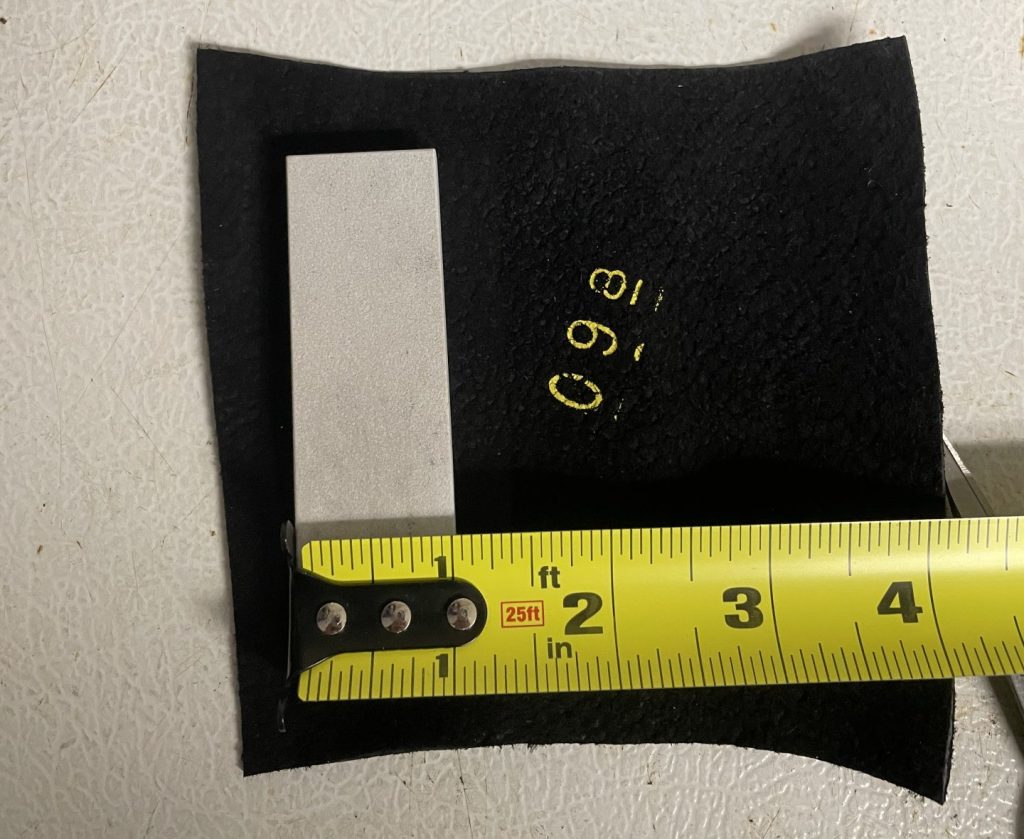
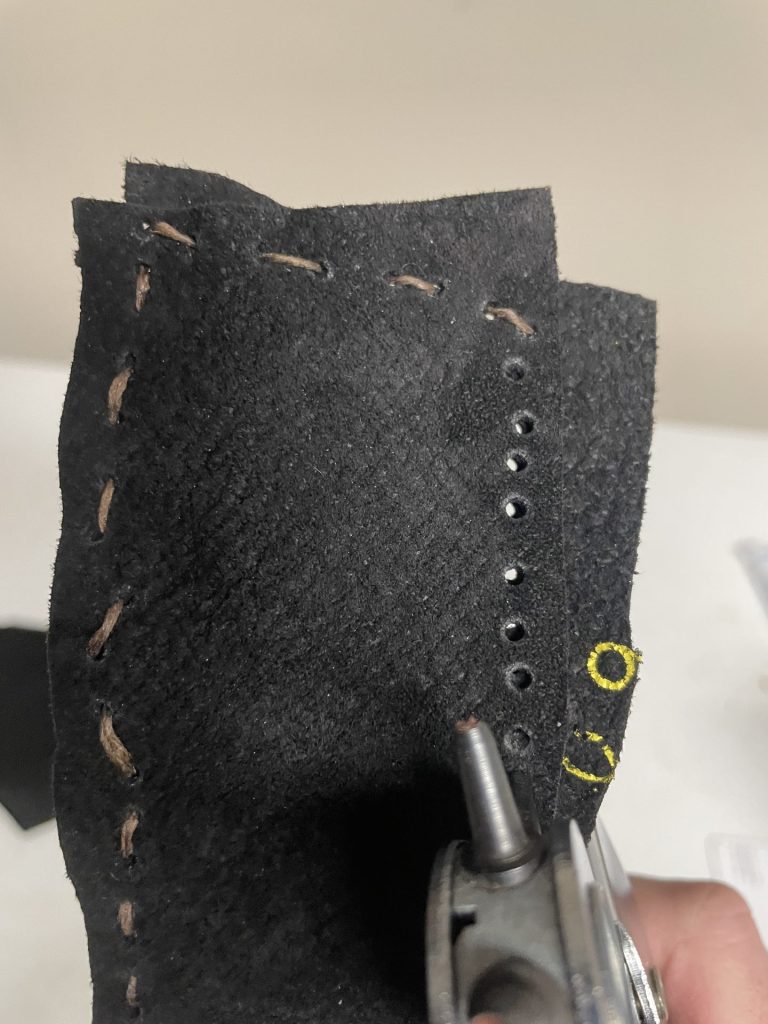
 

How to Make Them 


Leather slip cover
Scrap leather (already cut), a pocket stone, and some of the basic tools you will need.

I have a lot of scrap leather laying around, which I used to buy in scraps from craft stores because I used to be able to get large quantities of it for a song. Fortunately, I 


Back in the day when I crafted and cut things from leather, I wasn’t particularly judicious about measurements and patterns. The thing is, if these slip covers are too small for the stones, the stones won’t fit, and if they’re too large, they won’t secure the stones properly. 


So the first thing you need to keep in mind is that the pattern you cut from the leather needs to be just the right size for the stone. Leather is flexible, which is a good thing because it means you can make the slips just a little bit too tight and they will stretch to fit the contours of the stones over time. Still, you need to get close

Leather Slip Cover
As you can see in the image, the stone is almost exactly 1" wide. Therefore, I'm using a 4" (roughly) wide piece of scrap leather. This will give me two 2" wide pieces when halved, which gives me one half inch of clearance on either side of the stone for a snug fit. If your stones are the same dimension as mine, you can use the same method. Width matters here, depth does not. (I took this picture before I cut the leather in two pieces.)

To create a basic slip cover for your stones, you will need to cut two pieces of leather in the same size as each other and stitch them together. As you can see in the image above the leather sides of the slip are just a bit larger than the stone. 


These stones are 1″ wide, so I started with a piece of leather about 4″ wide, which would give me 2″ secitons once halved, for an overhang of about .5″ on each side – just enough to fit the stone snugly.


Once you have your patterns cut, you’re going to want to punch holes around the perimeter of the slip. Do not make the mistake of thinking you can push a needle through leather without first punching it. 


You can use either a leather punch or an awl.I started with an awl but then switched over to a leather punch because I was working much more quickly with the punch and I was losing track of the awl holes. also, it’s a lot easier to draw the needle through the punch-hole than through an awl-hole.

Leather slip cover
This image shows my progress with the leather punch after I've already started stiching one side (I punch one side and then stitch before punching the next side because it helps the pattern stay together). In this image, you can see the overhang that will need to be trimmed away.

Once you have punched a perimeter of holes around the leather pattern, you can start stitching. Measure the perimeter of the pattern and then cut off three times that length in whatever cord you will be using to stitch it. 


Feed these through the needle you’ll be using and tie an arbor knot in the other end this is two overhand knots in a row, cinched down on themselves so they hold.


Leather Slip Cover
I use waxed cotton thread here and a basic running stitch to stitch one side at a time before I punch and move to the next side. I will trim away the excess leather at the end.

I’m using a running stitch for this, not a spiral stitch, because it requires less cord and because it protects the cord from abrasion. Start at one side, pull the cord all the way through to the knot, then run in one side and out the other side until you get to the end of the pattern. If you have enough cord at the end, you can double back on the stitch, passing the thread through each hole twice before finishing it.


At this point, trim anyway any excess, overhanging leather if it becomes necessary to do so. You can see some oberhanging in my image above.


And that’s basically all there is to it. 

These leather slip covers not only protect your pocket stones. They also make excellent improvised stropping material.

Why Do They Need Slip Covers Anyway?

I touched on this at the beginning of this article, but there are a few good reasons that deserve to be hashed out. 


As stated, these slip covers protect the faces and extremities of the stones. This services two important functions. One is that it prevents the face of the stone from being clogged with dust and other fine particulate matter. This preserves the grit of the stone and will keep it an efficient sharpening tool.


The other reason is that both the face of the stone and the corners of the stone are prone to being scratched or chipped. Dropping or striking an Arkansas stone can also break it; being covered by leather, which is soft and provides a certain level of cushioning, can protect your stones from impact. 


There’s one more practical reason, that you can see illustrated in the image above. These leather slip stones can be used as improvised strops. When you’re sharpening your knives with these stones, you can put the finishing edge on them by stropping them on the outside of these little slip covers. They won’t be as effective as a full size leather strop; but then again, a pocket stone isn’t as effective as a bench stone, and these are itinerant solutions. 


Stay sharp.


~The Eclectic Outfitter

Leave a Reply

Your email address will not be published. Required fields are marked *

Eclectic Outfitter