With a few cents of materials from the hardware store, you can make an improvised candleholder.
“Some people without possessing genius have a remarkable power of stimulating it.” ~Sir Arthur Conan Doyle
One of the things I started doing was keeping old wax whenever I manage to get some. Whether it’s a candle that’s mostly burned out or a bunch of old scented wax cubes that have lost most of their mojo, I don’t toss the stuff anymore.
Loose bits of paraffin wax are too good for waxing clothes, bootlaces, and of course, for making new candles, which you can use for light if the power ever goes out. Plus, if you make them from bits of old candles or scented wax cubes, they make the house smell great in the process.
But you need a place to burn them. So let’s take a look at how you can make a candlestick from a few pieces of hardware store riff-raff.
What You Need: A Piece of Wood, a Copper Cap, a Bracket, and Some Fasteners.
This is one of the easiest “projects” I’m ever going to cover in this blog. If you have some tapers and need to make a candle holder in a matter of a few minutes, this is the way to do it.
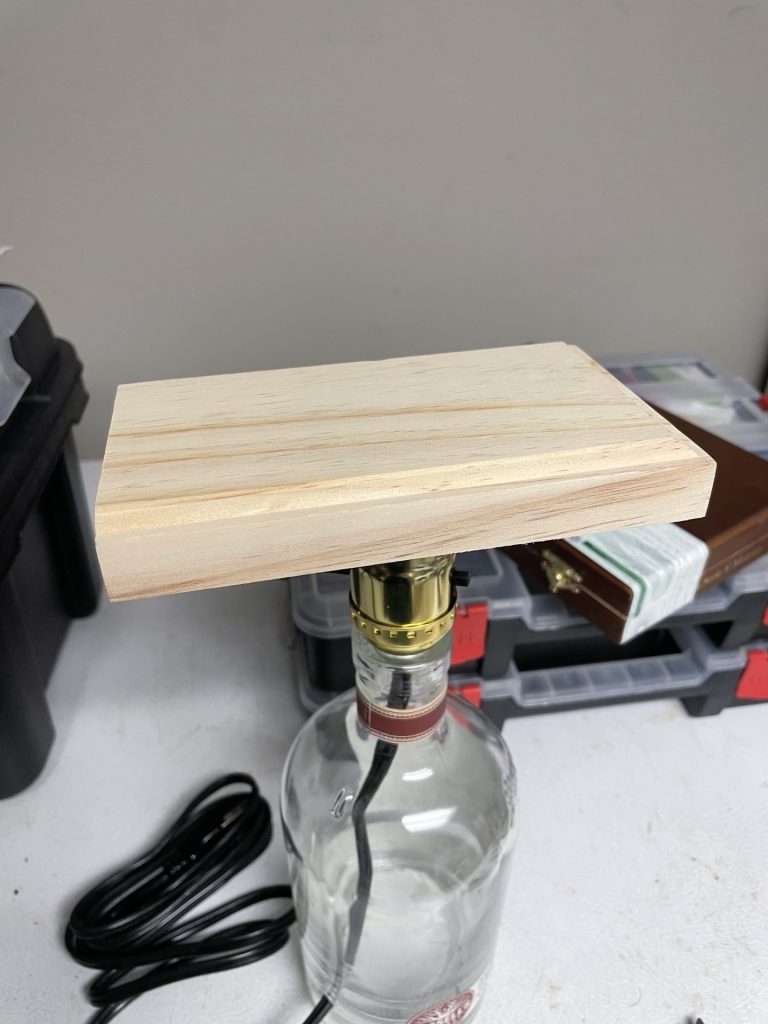
First, you need a piece of wood to serve as the base. You can use something else, too (there are no hard or fast rules here, this whole thing is improvised top to bottom) but if you want to do it my way wood works best.
I’m using a piece of wood trim I got at a hardware store for a few dollars since it’ll work great as a base.
Start with a block of wood. You can get one of these pieces of trim really cheap, but a better way to do is it cut a scrap off of a piece you already have. That way it's free and you're eliminating waste in the process.
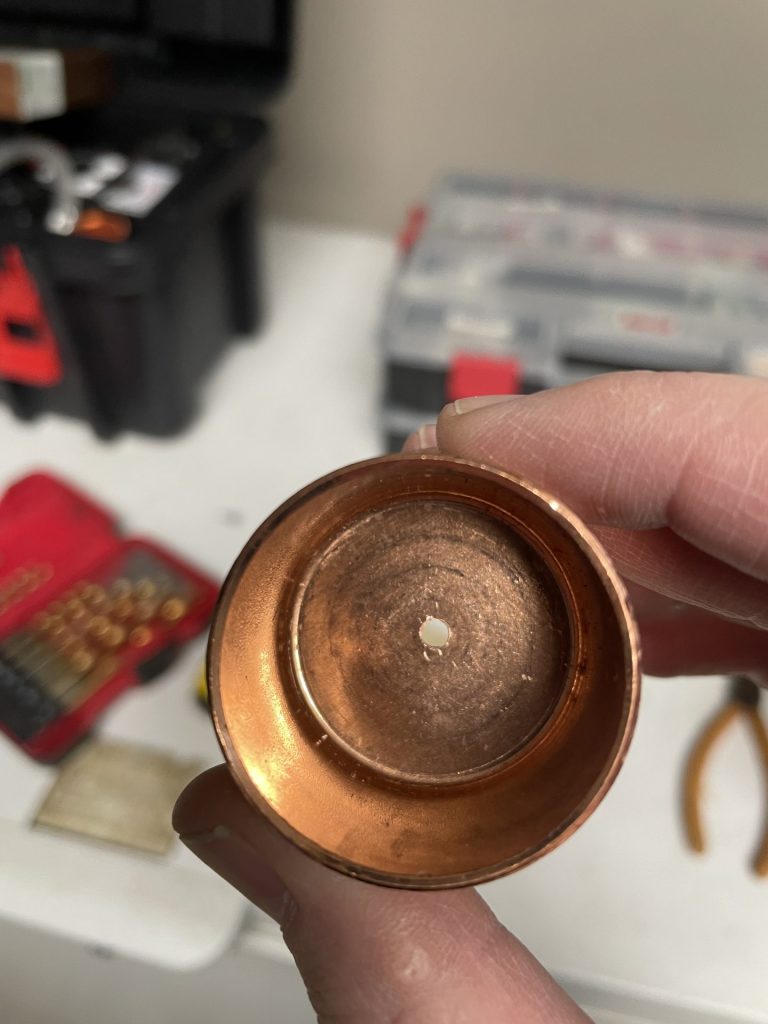
I also got a copper pipe cap and a piece of aluminum bracket. The size of cap you need will depend on the size of the candle you’re working with. For me, I’m working with tapers styled after carriage candles that are just a bit over an inch wide, so I’m going with 1.25” pipe caps.
Here you can see all the raw materials you need for this project, minus the hardware to fasten it. I didn't buy screws, I just plumbed some up from the depths of my tool box and recycled those.
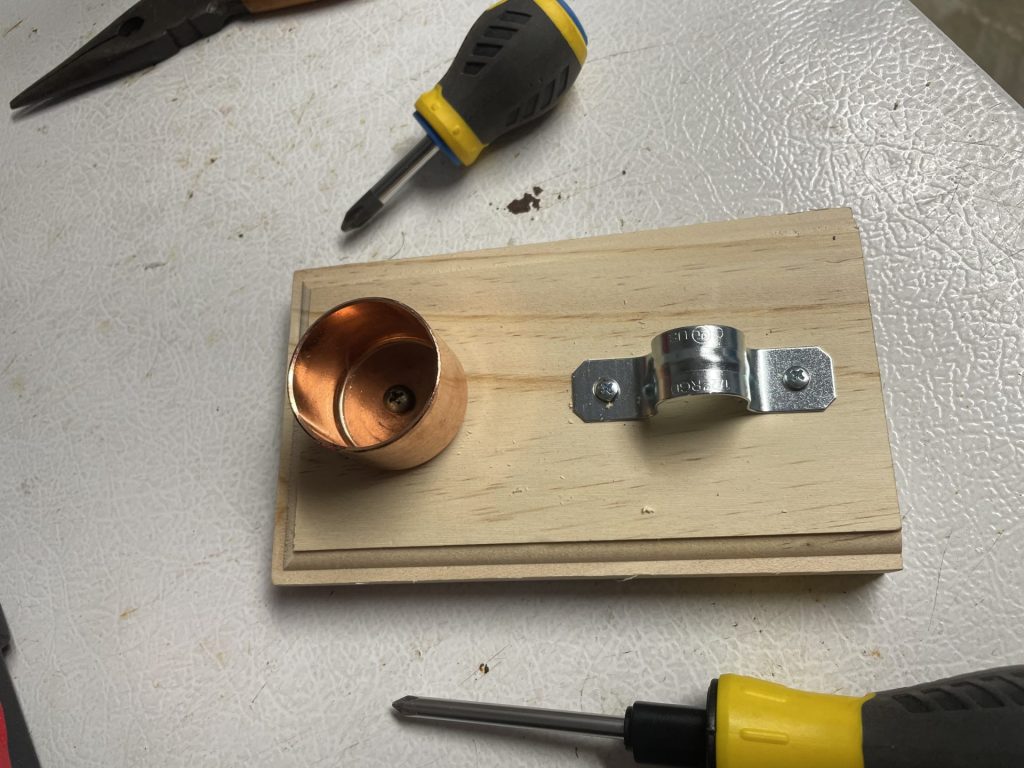
You can do this in any order you want, but first I’m going to mount the bracket to one side of the wood base. Drill two holes into the wood where you want to mount it, then screw it in.
Next you need to drill a hole through the base of the copper pipe cap. There may be better ways to do this than with a screw but I’m working with what I have.
Dril a hole through the bottom of your copper pipe cap. Alternatively, you can solder it or silicone it in place, but using a fastener is a much stronger and reliable way to do this.
Then drill a hole into the wood base where you intend to position the pipe cap. Just as you secured the bracket, screw the pipe cap into the wood base.
Next, drill holes into the block, and then fasten the pipe and bracket in place with some screws.
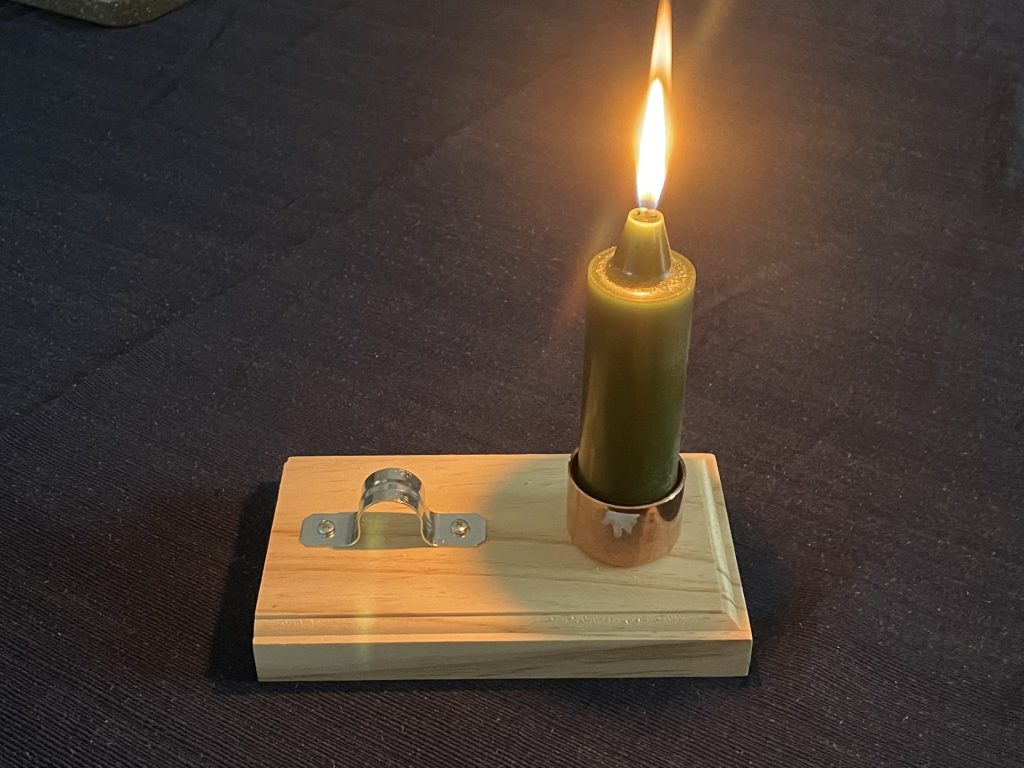
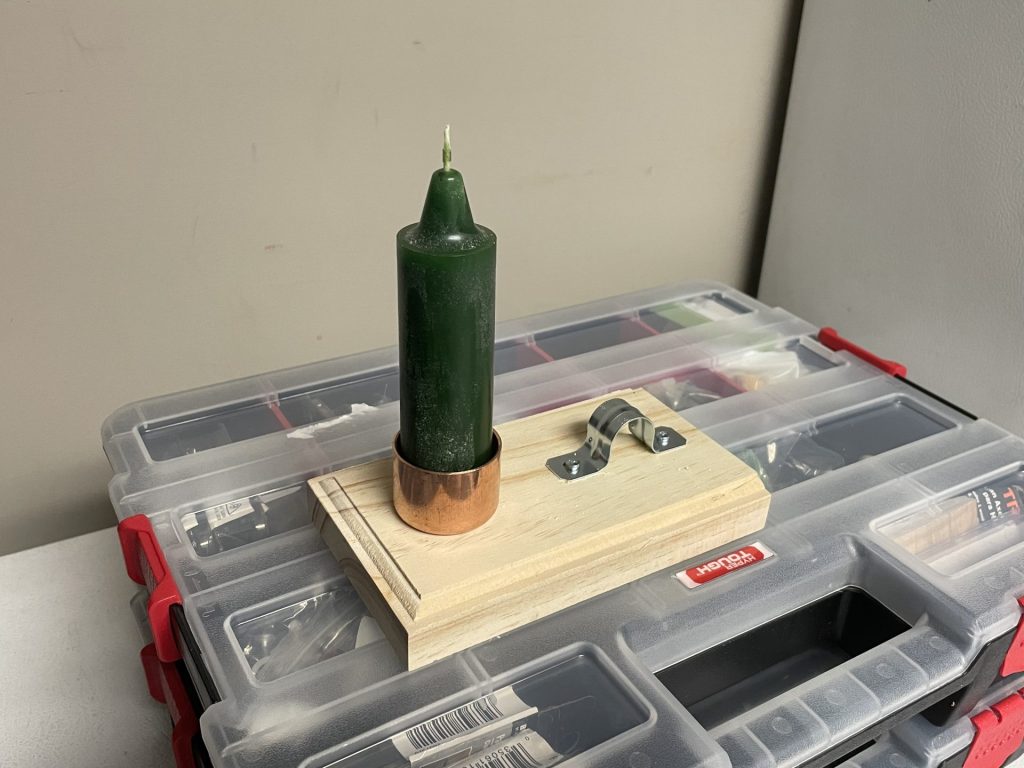
Then, get a candle and drop it in place.
The last step is to get a candle and place it in the cap holder. If the candle doesn't fit well in the holder, pull it out, light it, and drip some wax into the cap, then press the candle down into it and hold it in place until the wax cools and hardens.
If the pipe cap is a little bit too large for the candle, light the candle and drip some wax into the bottom of it, then press the candle down into the wet wax. Let it cool and this will secure the candle nicely.
And that’s all there is to it. A little rough, I admit, but it works like a charm and offers a secure, stable base for the candlestick, which is perfect if you ever want to use some candlelight instead of electricity.
Just be careful with this design. It has a habit of dripping wax if you’re not judicious.